232 Campbell Street, Seguin, TX 78155 (MLS #563715) - 563715
Take the new race and place it in the hub. Square it up, then gently tap it in with a rubber hammer, or a hammer and wood block, or hammer and a hockey puck, then stop and look at it carefully to determine whether it’s going in cocked, which it almost always is. If it is badly cocked, it can gouge the mating surface, so you want to correct it as quickly as possible. Gently tap on the high side until it is going in level, then continue tapping until it’s flush with the top of the hub.
When the race is flush with the top of the hub, switch from a block of wood to using a socket whose diameter is just slightly smaller than the race. You’ll have to figure this out by trial and error, as the exact outer diameter varies socket to socket, but on the 2002, I used a 1-13/16-inch socket on the larger inner race and a 1-3/8-inch socket on the smaller outer race.
CCI is at present having three operating units with a installed capacity of 14.46 lakh MT per annum. In line with the advancement in cement technology CCI had been adopting the latest one with one million tonne plants at Tandur. Bokajan unit at Assam is under expansion.
Threads. An official website of the Chester County Government. About Us ... In 2016, the Iron and Steel Heritage Partnership celebrated 300 years of ...
At this point, before I button things up, I like to test-fit the wheel, spin it, and check for play. If you do this, take care not to get any dirt into the open bearing (you can gently tap the bearing cap into place). The wheel should spin smoothly and quietly. Grab the wheel at 6 and 12 and push and pull it. There should be no play, or only a small hint of play.
CCI with a strong & skilled work-force has always encouraged balanced regional growth with most of its factories located in underdeveloped/backward areas. CCI has also been contributing to the development of areas around factories by adopting nearby villages and providing the basic facilities like school, health center, drinking water etc.
When installing the bearings, order is important. You must drop the inner bearing in first, then install the bearing seal to trap it in place, then slide the entire hub assembly onto the spindle, then slide the outer bearing into place, and then trap it with the spacer and nut.
CCI manufactures various types of cements like Portland Pozzolana Cement (PPC), Ordinary Portland Cement (OPC) of varying grades viz 33, 43,53 and 53S(special grade cement for manufacture of sleepers for Indian Railways) grades. Under strict quality control with the brand name of CCI Cement.

BSE
Jun 26, 2010 — The book says 175 ft-lb, which is when using a new crush collar. If you are re-using the old one, use a new nut and torque to 125 ft-lb.
If you are replacing the rotors, now is a good time to take the old ones off. On my 2002, they were held by four 8-mm Allen-head bolts, whereas on the Lotus, they were attached using traditional bolts. In either case, this is one of those times where owning an impact wrench makes it so easy that it’s almost not fair. If you don’t have one, you may need to clamp the old rotor in a vise to hold it still. Draw the bolts and their lock washers out, then separate the rotor from the hub. If it’s been on there for 40 years, you may need to persuade it with a few smacks from a hammer.

Either wash your hands or use a pair of rubber gloves. I’d advise wearing a Tyvek suit, as you’re likely going to get grease on whatever you’re wearing. Take a good-sized glob of grease and put it in the palm of your hand. Then take the bearing and press it in the wad of grease in your palm, almost like you’re scooping ice cream with a spoon, and work the grease into every crevice around the rim of the bearing. Replenish the grease in your palm as necessary. Do this for both the front and back of the bearing.
Zip Code 48046 EASY URL: 'ZipCode.org/48046' for Mount Clemens zip code.
Take the castellated nut, the spacer, and the dust cap, clean them, and put them somewhere where you won’t kick them across the garage floor.
Next, you need to find the gap in the castellated nut that best lines up with the hole in the end of the spindle. The Internet is full of stories of people who burned out wheel bearings in a hundred miles by over-tightening them. I was always trained to tighten the nut by hand, then back it off to line it up with the hole, but a friend pointed out to me that the 2002 factory manual calls for the nut to be tight enough that the spacer can be moved by prying it with a screwdriver. Check your manual for the correct procedure.
Slide the hub and rotor assembly onto the spindle, pressing it gently but firmly to get the inner bearing to seat on the spindle. Slide the outer bearing over the end of the spindle and into its race, then slide the spacer over the end of the spindle. Thread the castellated nut onto the end of the spindle. Be careful not to cross-thread it. Once the nut is on, spin it on as far as it will go by hand, then gently use a wrench on it, as both the inner and outer bearing rings sometimes need to seat on the spindle. It should be obvious when they’re seated. Do not apply any real torque on the nut. You’re not trying to tighten it.
And that’s it. Unless you own the car for 30 more years and drive the bejesus out of it, you’ll probably never have to change the front wheel bearings again.
Begin disassembling the hub by fishing the outer wheel bearing out. Don’t throw it away just yet, in case you need to compare it to the new bearing.
Straighten out the cotter pin with needle-nosed pliers, remove it, and then unscrew the nut from the spindle. It shouldn’t be on tight, but if it is, a wrench can get it started. Withdraw the thick spacer that’s behind the nut.
Over 50 million car parts & accessories delivered by CarParts.com, your trusted discount auto parts store. Lifetime Replacement Guarantee on every purchase.
Give the inside of the hub and the bearing races a quick cleaning with a paper towel so you can see what’s what. You should be able to see the smaller outer bearing race pressed into the front of the hub, and the larger inner race pressed into the back. If you look inside the hub from both sides, you should see two notches behind each race that allow you to bang them out. Using a hammer and the drift of your choice (e.g., an old screwdriver, a beat-up quarter-inch ratchet extension, or even an actual drift punch), and working on one race at a time, knock it out by banging alternately on the two notches. Then move on to the other race. It doesn’t matter which one you do first.
印度证券交易所官网
With the inner bearing trapped in place by the seal, turn the hub over and coat the outer bearing race with grease. Clean any grease off the rotors.
Wheel bearings generally live a long time on street cars, but front-wheel bearings suffer increased stress due to the steering, so they may need to be replaced at some point on a vintage car.
Rob Siegel has been writing the column The Hack Mechanic™ for BMW CCA Roundel magazine for 30 years. His most recent book, Just Needs a Recharge: The Hack Mechanic™ Guide to Vintage Air Conditioning, is available on Amazon (as are his previous books). You can also order personally inscribed copies here.
Spray everything down with the cleaner of your choice and scour it thoroughly. Then, as you did with the spindle, inspect the surfaces that the races sat in; I’ve never seen one ruined, but it’s not uncommon to see some gouging from the races being banged in and out. If gouging in one area is pronounced, you can take off the high spots with some Scotch-Brite, but don’t go nuts and risk not having the race fit snugly.
You begin by removing the caliper. If you’re also replacing the pads, it’s easiest if you first bang the pins out of the caliper before you unbolt it from the strut. Note that the original brake pads and shoes on a vintage car may contain asbestos, so wearing a dust mask is a wise precaution when dealing with brake components. Remove the bolts holding the caliper to the strut. There may also be a bolt holding the brake line bracket to the strut. Set the caliper on the control arm or hang it from the spring with a zip tie.
To remove the inner wheel bearing, you first need to pry the seal out of the back of the hub. You’re replacing it, so don’t worry about destroying it. A long screwdriver rocking on a fulcrum point like the handle of a hammer usually does the trick. With the seal out, withdraw the inner wheel bearing. Again, hold onto it for a bit in case you need to compare sizes.
2017821 — The old tapered roller bearing would last 100,000 miles (or more) when lubed and adjusted properly.Ball bearings in general don't take axial ...
Indiastock
Piezas de aspiradora de piscina Riptide. El kit incluye todo lo que se muestra. (4) Cojinetes del eje (4) Bujes (4) Arandelas.
On many vintage cars, replacing front wheel bearings is synergistic with replacing the front rotors. This is because the front rotors are often behind the front hubs, which means that to change the rotors you have to pull the hubs off the front spindles, at which point the bearings are practically in your hand. So, if you need to do a front brake job, check the wheel bearings.
While you don’t absolutely have to do the wheel bearings on both sides at the same time (it’s not like rotors and pads), it’s generally considered good practice to do so.
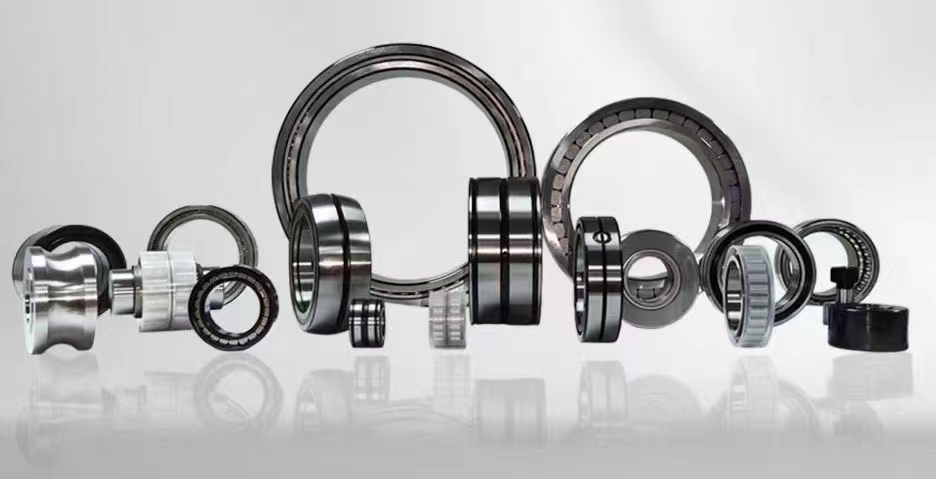
The front hub layout on many vintage cars is such that there are inner and outer bearings, each running in a race that’s pressed into the hub. The inner bearing is protected by a pressed-in seal, the outer bearing by a dust cap. The hub assembly—hub plus rotor plus bearings—slides onto a spindle that protrudes at a right angle from the strut, and it’s held in place by a castellated nut, so named because it has notches in it like the crenellations in the parapet of a castle or the top of a rook chess piece. One of the notches is lined up with a hole that’s drilled through the end of the spindle. A cotter pin is used to secure the nut.
For maintaining the ecological balance CCI is launching massive tree plantation drives from time to time at all units and in surrounding areas.
Indian stock market today
Buy Mityvac's MV5511 Vacuum/Pressure Gauge & Fuel Pump Tester designed for performing pressure and vacuum tests on mechanical and electrical pumps.
Sign up for the latest automotive news and videos—in short, everything for people who love cars
Use a glob of grease to coat the inner bearing race, then set the inner bearing down inside it. Take the inner wheel-bearing seal and install it as you did the bearing races, tapping it into place and taking care not to cock it, but only get it flush with the inner surface of the hub. Don’t pound it in any farther than that. The BMW 2002 had the rubber grease seal shown, but the Lotus had an old-school felt seal where the felt was on the outside, greased, and meant to be in light contact with the base of the spindle. Care needed to be taken to test-fit the hub assembly to be certain the clearance of the felt seal was adequate.
The next step is to slide the hub onto the spindle, but before that, there’s the question of whether the hub bore is supposed to be packed with grease. Consult a repair manual for the car. On the 2002, the grease packed into the bearings and dust cap were deemed enough, but on the Lotus, the manual said to pack the hub’s center bore approximately half full of grease.
Indiastock index chart
Once you’ve packed the crevices, cram the outer circumference of the bearing into your palm, working the grease into the individual rollers. Be sure that it’s well packed. Remember: You’re likely giving this bearing the only lubrication it’ll receive for decades. When the bearing is well-packed, put it down on a new clean paper towel. Do this with both the inner and outer bearings.
Cement Corporation of India Limited (CCI) was incorporated as a Company wholly owned by Government of India on 18th January 1965 with the principal objective of achieving self sufficiency in cement production. The authorised and paid-up capital of the company is Rs. 900 crores and Rs. 811.41 crores respectively.
Nseindia
Open the package with your nice new bearing. It should contain the bearing and the race. It doesn’t matter whether you select the inner or outer bearing first. Withdraw the race and set the bearing down on a clean paper towel or plastic sheet.
Indiastock index
To emerge as sustainable cement company committed to contribute to the economy and to enhance value for the stakeholders.
BMG plays a pivotal role in supporting the productivity and production targets of all Industrial, Manufacturing, Mining and Agricultural sectors ...
The classic test is to jack up the front of the car, support it on stands, grab each wheel at 6 o’clock and 12 o’clock, and gently rock it. If you feel play, the wheel bearing needs to be adjusted. If you can’t adjust out the play, or if when you spin it you hear and feel noise, it’s time to replace the bearings.
Indian stock market
To augment the wealth creation for the Company, inspiring employees in delivering an improved product and to aim for diversification in related fields.
Next, pull the hub and rotor assembly forward and off the spindle, but be aware that the outer wheel bearing may slide out, so be prepared to catch it. Lay everything on a clean piece of cardboard or a paper towel.
When the race is fully seated, you should hear the sound change from a ringing to more of a thud as you’re tapping it in, but you should also check by turning the hub over and carefully examining where the back of the race is visible through the slots. Be certain that there is no space behind the race. Then do the same thing with the other bearing race. You should now have both the inner and outer races seated.
Next comes the fun part: Packing the bearings. There are few things more automotively primal, elemental, and intimate than packing bearings. Use whatever grease you’re comfortable with. Like with motor oil, many people swear by certain greases. I haven’t found that it matters. Traditional brown 100-percent petroleum-based grease, black semi-synthetic, or red 100-percent synthetic are all fine, as long as the package lists “automotive bearings” among the applications.
Finally, put the cotter pin through the notch and the hole, and bend it far enough that it won’t hit the bearing cap. Put some grease in the cap and tap it back into place.
Wheel Bearings Replacement pricing for various cars ; 2010 Dodge Journey, $393, $247.27 ; 2008 Mercury Mariner, $264, $74.49 ; 2012 Lincoln MKZ, $253, $106.73 ...
I recently needed to do brake and bearing work on both my Lotus Europa and on one of my BMW 2002s. The two repairs were nearly identical. I’ll show it for the BMW simply because the photographs came out better, and I’ll point out the handful of minor differences.

Williams Sound – DL107 NET D. The Digi-Loop's amplifier design offers either single or dual 9.5 A rms loop outputs for perimeter loop(s), single array(s), dual ...
Next, take a paper towel and clean the spindle. Inspect the two flat surfaces. The bearings themselves do not actually run on these surfaces. Instead, they serve as the seating surfaces for the rings in the center of the bearing assemblies. However, if these surfaces are badly pockmarked or gouged, the inner bearing rings may not sit firmly on them, allowing the entire bearing to wobble. If that is the case, and if, after replacing the bearings and adjusting them, there is still substantial play in the wheel, the entire strut housing may need to be replaced. Fortunately, this is extremely rare, and usually comes only from catastrophic bearing failure—which is why, when you feel play that can’t be adjusted out, you replace the bearings.


 8613869596835