AB InBev: Home - ab
Place the pilot bearing in the freezer for about 30 minutes to shrink it a little to help ease the installation. Then lightly place the bearing into the end of the camshaft. Make use of a hammer and metallic drift to gently tap the bearing into position. Avoid hitting the bearing to hard so as not to destroy it. 7. Lubricate the Pilot Bearing Ensure you appropriately grease the pilot bearing to guarantee it would function accurately. Apply a small quantity of axle bearing or silicone-based grease to the interior the pilot bearing. Avoid adding excess quantity of lubricant so it wouldn’t get into the clutch disc. At this state, the clutch is prepared for replacement and the ABS for re-installation. Conclusion A defective pilot bearing will make a buzzing or grinding sound, which increases in intensity when the bearing gets completely condemned. It will be very loud if the bearing is completely damaged. It happens every time the camshaft and input shaft are revolving at diverse speeds. On the other hand, a clutch release bearing will give off a tweeting or squealing noise as soon as the bearing touches the pressure plate’s diaphragm. Pilot bearings can be bearings or bushings. The bearing type can be ball, roller or needle bearings crammed in grease. If the manufacturer proposes adding bearing grease, be careful not to contaminate the clutch disk or the exterior of the balance wheel. Pilot bushings are brass and instilled with lubrication. Adding lubrication will actually increase friction. Verify from manufacturer’s reference before adding any lubrication to a pilot bearing. A worn or damaged pilot bearing will make a whining or grinding noise. It will be very loud if the bearing is completely damaged. It occurs whenever the camshaft and input shaft are rotating at different speeds. A clutch release bearing is different; it will make a chirping or squealing noise as soon as the bearing touches the pressure plate’s diaphragm. Note that release bearings make noise with much less pedal travel. Endeavor to mark the position of balance wheel in relation to camshaft prior to removing it. This is to avoid disproportion when the balance wheel is reinstalled.
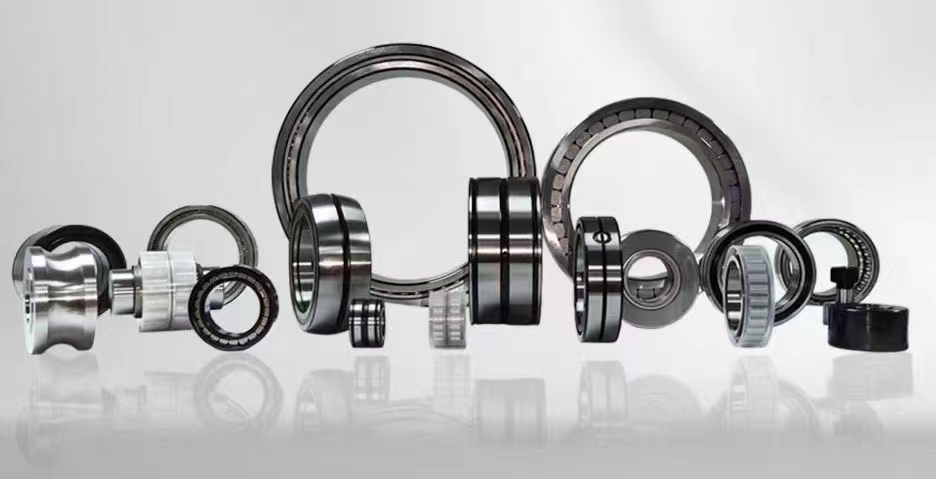
6002 bearingcross reference
If putting back the whole clutch as a kit, the pilot bearing will occasionally be added. Ensure you check the contents of the kit to be certain. The longevity of a pilot bearing should match the clutch. However, bearing can have a malfunction within 45,000 to 65,000 miles. How to Remove Pilot Bearing Race Removing a pilot bearing race can be achieved with set of special tools. However, a layperson may not be willing to buy a tool they wouldn’t always use. The pilot bearing race helps support the input shaft of a manual ABS. It has to be replaced when worn to prevent destroying the input shaft seal on the alternator. If this happens, it can pump out oil from the alternator, leading to clutch breakdown. Contemporary vehicles now make use of an anti-friction bearing (roller bearing), while older automobiles employ a bronze bushing which is pushed into the end of the camshaft. It is vital to removing the pilot bearing race cautiously to avoid damaging the interference fit in the camshaft. Then proceed to pack the area behind the bearing with bread and apply pressure through the opening for the input shaft. This will cause the bearing to push out efficiently. To apply pressure, utilize a rod of the similar diameter as the input shaft. Pilot Bearing Removal Tips Before you commence, the transmission has to be removed together with the clutch assembly. 1. Obtain a Pilot Bearing Removal Tool To remove the pilot bearing race, you need a removal tool which is sold on Amazon at $34.00. You don’t necessarily have to buy if you can rent it at an auto store. 2. Insert the Removal Tool Then proceed to slot in the removal tool into the pilot bearing, with the jam nut completely backed off. Turn the handle clockwise to extend the tool fingers outward in the rear of the bearing. The tool will relax beside the balance wheel which will maintain the pulling process. 3. Pull the Pilot Bearing Outward Take a tight hold of the tool and make tighter the jam nut using a wrench; you would hear a small 'pop', indicating that the bearing is starting to move from the camshaft. At this position the nut will get easier to move alongside the wrench. Maintain this act pending when the bearing is completely detached. 4. Inspect the Pilot Bearing Once the bearing has been detached examine the end of the camshaft and bearing which will be held in the tool. Let loose the bearing by spinning the tool handle counterclockwise. Employ a shop towel to wipe clean the end of the camshaft where the new bearing will be mounted. Ensure the surface is devoid of dirt and grease to keep the bearing in place. 5. Match the New Pilot Bearing Examine both the original and previous bearings ensure the inside and outside diameters are the identical. If there are disparities, the new bearing won’t fit into the camshaft and may not permit the ABS input shaft to fit within if it which in turn will not allow the alternator to be reinstalled. To ensure proper functioning of the pilot bearing, fit it over the input shaft while the alternator is removed. 6. Install the New Pilot Bearing Place the pilot bearing in the freezer for about 30 minutes to shrink it a little to help ease the installation. Then lightly place the bearing into the end of the camshaft. Make use of a hammer and metallic drift to gently tap the bearing into position. Avoid hitting the bearing to hard so as not to destroy it. 7. Lubricate the Pilot Bearing Ensure you appropriately grease the pilot bearing to guarantee it would function accurately. Apply a small quantity of axle bearing or silicone-based grease to the interior the pilot bearing. Avoid adding excess quantity of lubricant so it wouldn’t get into the clutch disc. At this state, the clutch is prepared for replacement and the ABS for re-installation. Conclusion A defective pilot bearing will make a buzzing or grinding sound, which increases in intensity when the bearing gets completely condemned. It will be very loud if the bearing is completely damaged. It happens every time the camshaft and input shaft are revolving at diverse speeds. On the other hand, a clutch release bearing will give off a tweeting or squealing noise as soon as the bearing touches the pressure plate’s diaphragm. Pilot bearings can be bearings or bushings. The bearing type can be ball, roller or needle bearings crammed in grease. If the manufacturer proposes adding bearing grease, be careful not to contaminate the clutch disk or the exterior of the balance wheel. Pilot bushings are brass and instilled with lubrication. Adding lubrication will actually increase friction. Verify from manufacturer’s reference before adding any lubrication to a pilot bearing. A worn or damaged pilot bearing will make a whining or grinding noise. It will be very loud if the bearing is completely damaged. It occurs whenever the camshaft and input shaft are rotating at different speeds. A clutch release bearing is different; it will make a chirping or squealing noise as soon as the bearing touches the pressure plate’s diaphragm. Note that release bearings make noise with much less pedal travel. Endeavor to mark the position of balance wheel in relation to camshaft prior to removing it. This is to avoid disproportion when the balance wheel is reinstalled.
EduBirdie considers academic integrity to be the essential part of the learning process and does not support any violation of the academic standards. Should you have any questions regarding our Fair Use Policy or become aware of any violations, please do not hesitate to contact us via support@edubirdie.com.
Some persons prefer to use only just a bearing because worn bushing can break the input shaft bearing and make it tasking to get attain 4th gear. The bearing will live longer than the clutch as long as you replace it every time the clutch is out. Removing a defective pilot bearing can be a complicated duty and may call for a unique tool. Fixing a pilot bearing is typically uncomplicated as long as you ensure it is accurately balanced. Ensure the pilot bearing race is cut by means of a cutter to eliminate all fragments from the hole. In some cases, removing a bearing may only require stuffing the middle of the bearing with thick lubricant, and using a hammer to strike a rod that sits securely in the midpoint. When the clutch is disconnected, the transmission’s input shaft and the engine’s camshaft are revolving at dissimilar rate. The pilot bearing permits this dissimilarity. This causes a defective pilot bearing to produce its most noise when the clutch pedal is totally depressed and the clutch itself is entirely disconnected. It’s situated in the middle of the balance wheel. How Far Does a Pilot Bearing Go In? The pilot bearing has an o-ring gasket around the outer border to stop lubricant from leaking out onto the disc. A pilot bearing is roughly an inch across and it seats in a small fissure that is at the back. You may have to dismantle everything since you’ll need to use a pilot bushing which is about two inches across and sits flush with the crank. Just keep driving the pilot bearing in until it’s flush with the crank end. The new one had a projection on the outside circumference. The extension allows the pilot bearing to go in one way and let it go to the right deepness which is the entire outside race into the camshaft and prevents it from being driven in excessively far. When lubricating, use only a pea-sized quantity of grease to daub around the rollers. Most excess grease standing above the rollers gets hard-pressed into the rear when the alternator is installed. Pilot Bearing Replacement Cost The pilot bearing replacement cost will vary between $7.00 and $23.00 (US) which is obtainable from Amazon or the local parts store. If you are a novice who is unable to replace the pilot bearing, then you have to contact a local auto-repair shop. They will have to remove the alternator and clutch, making the labor cost to fall between $350.00 and $650.00 (US). If putting back the whole clutch as a kit, the pilot bearing will occasionally be added. Ensure you check the contents of the kit to be certain. The longevity of a pilot bearing should match the clutch. However, bearing can have a malfunction within 45,000 to 65,000 miles. How to Remove Pilot Bearing Race Removing a pilot bearing race can be achieved with set of special tools. However, a layperson may not be willing to buy a tool they wouldn’t always use. The pilot bearing race helps support the input shaft of a manual ABS. It has to be replaced when worn to prevent destroying the input shaft seal on the alternator. If this happens, it can pump out oil from the alternator, leading to clutch breakdown. Contemporary vehicles now make use of an anti-friction bearing (roller bearing), while older automobiles employ a bronze bushing which is pushed into the end of the camshaft. It is vital to removing the pilot bearing race cautiously to avoid damaging the interference fit in the camshaft. Then proceed to pack the area behind the bearing with bread and apply pressure through the opening for the input shaft. This will cause the bearing to push out efficiently. To apply pressure, utilize a rod of the similar diameter as the input shaft. Pilot Bearing Removal Tips Before you commence, the transmission has to be removed together with the clutch assembly. 1. Obtain a Pilot Bearing Removal Tool To remove the pilot bearing race, you need a removal tool which is sold on Amazon at $34.00. You don’t necessarily have to buy if you can rent it at an auto store. 2. Insert the Removal Tool Then proceed to slot in the removal tool into the pilot bearing, with the jam nut completely backed off. Turn the handle clockwise to extend the tool fingers outward in the rear of the bearing. The tool will relax beside the balance wheel which will maintain the pulling process. 3. Pull the Pilot Bearing Outward Take a tight hold of the tool and make tighter the jam nut using a wrench; you would hear a small 'pop', indicating that the bearing is starting to move from the camshaft. At this position the nut will get easier to move alongside the wrench. Maintain this act pending when the bearing is completely detached. 4. Inspect the Pilot Bearing Once the bearing has been detached examine the end of the camshaft and bearing which will be held in the tool. Let loose the bearing by spinning the tool handle counterclockwise. Employ a shop towel to wipe clean the end of the camshaft where the new bearing will be mounted. Ensure the surface is devoid of dirt and grease to keep the bearing in place. 5. Match the New Pilot Bearing Examine both the original and previous bearings ensure the inside and outside diameters are the identical. If there are disparities, the new bearing won’t fit into the camshaft and may not permit the ABS input shaft to fit within if it which in turn will not allow the alternator to be reinstalled. To ensure proper functioning of the pilot bearing, fit it over the input shaft while the alternator is removed. 6. Install the New Pilot Bearing Place the pilot bearing in the freezer for about 30 minutes to shrink it a little to help ease the installation. Then lightly place the bearing into the end of the camshaft. Make use of a hammer and metallic drift to gently tap the bearing into position. Avoid hitting the bearing to hard so as not to destroy it. 7. Lubricate the Pilot Bearing Ensure you appropriately grease the pilot bearing to guarantee it would function accurately. Apply a small quantity of axle bearing or silicone-based grease to the interior the pilot bearing. Avoid adding excess quantity of lubricant so it wouldn’t get into the clutch disc. At this state, the clutch is prepared for replacement and the ABS for re-installation. Conclusion A defective pilot bearing will make a buzzing or grinding sound, which increases in intensity when the bearing gets completely condemned. It will be very loud if the bearing is completely damaged. It happens every time the camshaft and input shaft are revolving at diverse speeds. On the other hand, a clutch release bearing will give off a tweeting or squealing noise as soon as the bearing touches the pressure plate’s diaphragm. Pilot bearings can be bearings or bushings. The bearing type can be ball, roller or needle bearings crammed in grease. If the manufacturer proposes adding bearing grease, be careful not to contaminate the clutch disk or the exterior of the balance wheel. Pilot bushings are brass and instilled with lubrication. Adding lubrication will actually increase friction. Verify from manufacturer’s reference before adding any lubrication to a pilot bearing. A worn or damaged pilot bearing will make a whining or grinding noise. It will be very loud if the bearing is completely damaged. It occurs whenever the camshaft and input shaft are rotating at different speeds. A clutch release bearing is different; it will make a chirping or squealing noise as soon as the bearing touches the pressure plate’s diaphragm. Note that release bearings make noise with much less pedal travel. Endeavor to mark the position of balance wheel in relation to camshaft prior to removing it. This is to avoid disproportion when the balance wheel is reinstalled.
At this state, the clutch is prepared for replacement and the ABS for re-installation. Conclusion A defective pilot bearing will make a buzzing or grinding sound, which increases in intensity when the bearing gets completely condemned. It will be very loud if the bearing is completely damaged. It happens every time the camshaft and input shaft are revolving at diverse speeds. On the other hand, a clutch release bearing will give off a tweeting or squealing noise as soon as the bearing touches the pressure plate’s diaphragm. Pilot bearings can be bearings or bushings. The bearing type can be ball, roller or needle bearings crammed in grease. If the manufacturer proposes adding bearing grease, be careful not to contaminate the clutch disk or the exterior of the balance wheel. Pilot bushings are brass and instilled with lubrication. Adding lubrication will actually increase friction. Verify from manufacturer’s reference before adding any lubrication to a pilot bearing. A worn or damaged pilot bearing will make a whining or grinding noise. It will be very loud if the bearing is completely damaged. It occurs whenever the camshaft and input shaft are rotating at different speeds. A clutch release bearing is different; it will make a chirping or squealing noise as soon as the bearing touches the pressure plate’s diaphragm. Note that release bearings make noise with much less pedal travel. Endeavor to mark the position of balance wheel in relation to camshaft prior to removing it. This is to avoid disproportion when the balance wheel is reinstalled.
The pilot bearing replacement cost will vary between $7.00 and $23.00 (US) which is obtainable from Amazon or the local parts store. If you are a novice who is unable to replace the pilot bearing, then you have to contact a local auto-repair shop. They will have to remove the alternator and clutch, making the labor cost to fall between $350.00 and $650.00 (US). If putting back the whole clutch as a kit, the pilot bearing will occasionally be added. Ensure you check the contents of the kit to be certain. The longevity of a pilot bearing should match the clutch. However, bearing can have a malfunction within 45,000 to 65,000 miles. How to Remove Pilot Bearing Race Removing a pilot bearing race can be achieved with set of special tools. However, a layperson may not be willing to buy a tool they wouldn’t always use. The pilot bearing race helps support the input shaft of a manual ABS. It has to be replaced when worn to prevent destroying the input shaft seal on the alternator. If this happens, it can pump out oil from the alternator, leading to clutch breakdown. Contemporary vehicles now make use of an anti-friction bearing (roller bearing), while older automobiles employ a bronze bushing which is pushed into the end of the camshaft. It is vital to removing the pilot bearing race cautiously to avoid damaging the interference fit in the camshaft. Then proceed to pack the area behind the bearing with bread and apply pressure through the opening for the input shaft. This will cause the bearing to push out efficiently. To apply pressure, utilize a rod of the similar diameter as the input shaft. Pilot Bearing Removal Tips Before you commence, the transmission has to be removed together with the clutch assembly. 1. Obtain a Pilot Bearing Removal Tool To remove the pilot bearing race, you need a removal tool which is sold on Amazon at $34.00. You don’t necessarily have to buy if you can rent it at an auto store. 2. Insert the Removal Tool Then proceed to slot in the removal tool into the pilot bearing, with the jam nut completely backed off. Turn the handle clockwise to extend the tool fingers outward in the rear of the bearing. The tool will relax beside the balance wheel which will maintain the pulling process. 3. Pull the Pilot Bearing Outward Take a tight hold of the tool and make tighter the jam nut using a wrench; you would hear a small 'pop', indicating that the bearing is starting to move from the camshaft. At this position the nut will get easier to move alongside the wrench. Maintain this act pending when the bearing is completely detached. 4. Inspect the Pilot Bearing Once the bearing has been detached examine the end of the camshaft and bearing which will be held in the tool. Let loose the bearing by spinning the tool handle counterclockwise. Employ a shop towel to wipe clean the end of the camshaft where the new bearing will be mounted. Ensure the surface is devoid of dirt and grease to keep the bearing in place. 5. Match the New Pilot Bearing Examine both the original and previous bearings ensure the inside and outside diameters are the identical. If there are disparities, the new bearing won’t fit into the camshaft and may not permit the ABS input shaft to fit within if it which in turn will not allow the alternator to be reinstalled. To ensure proper functioning of the pilot bearing, fit it over the input shaft while the alternator is removed. 6. Install the New Pilot Bearing Place the pilot bearing in the freezer for about 30 minutes to shrink it a little to help ease the installation. Then lightly place the bearing into the end of the camshaft. Make use of a hammer and metallic drift to gently tap the bearing into position. Avoid hitting the bearing to hard so as not to destroy it. 7. Lubricate the Pilot Bearing Ensure you appropriately grease the pilot bearing to guarantee it would function accurately. Apply a small quantity of axle bearing or silicone-based grease to the interior the pilot bearing. Avoid adding excess quantity of lubricant so it wouldn’t get into the clutch disc. At this state, the clutch is prepared for replacement and the ABS for re-installation. Conclusion A defective pilot bearing will make a buzzing or grinding sound, which increases in intensity when the bearing gets completely condemned. It will be very loud if the bearing is completely damaged. It happens every time the camshaft and input shaft are revolving at diverse speeds. On the other hand, a clutch release bearing will give off a tweeting or squealing noise as soon as the bearing touches the pressure plate’s diaphragm. Pilot bearings can be bearings or bushings. The bearing type can be ball, roller or needle bearings crammed in grease. If the manufacturer proposes adding bearing grease, be careful not to contaminate the clutch disk or the exterior of the balance wheel. Pilot bushings are brass and instilled with lubrication. Adding lubrication will actually increase friction. Verify from manufacturer’s reference before adding any lubrication to a pilot bearing. A worn or damaged pilot bearing will make a whining or grinding noise. It will be very loud if the bearing is completely damaged. It occurs whenever the camshaft and input shaft are rotating at different speeds. A clutch release bearing is different; it will make a chirping or squealing noise as soon as the bearing touches the pressure plate’s diaphragm. Note that release bearings make noise with much less pedal travel. Endeavor to mark the position of balance wheel in relation to camshaft prior to removing it. This is to avoid disproportion when the balance wheel is reinstalled.
Edubirdie.com is owned and operated by "RADIOPLUS EXPERTS" Ltd. Louki Akrita, 23 Bellapais Court, Flat/Office 46 1100, Nicosia, Cyprus

To remove the pilot bearing race, you need a removal tool which is sold on Amazon at $34.00. You don’t necessarily have to buy if you can rent it at an auto store. 2. Insert the Removal Tool Then proceed to slot in the removal tool into the pilot bearing, with the jam nut completely backed off. Turn the handle clockwise to extend the tool fingers outward in the rear of the bearing. The tool will relax beside the balance wheel which will maintain the pulling process. 3. Pull the Pilot Bearing Outward Take a tight hold of the tool and make tighter the jam nut using a wrench; you would hear a small 'pop', indicating that the bearing is starting to move from the camshaft. At this position the nut will get easier to move alongside the wrench. Maintain this act pending when the bearing is completely detached. 4. Inspect the Pilot Bearing Once the bearing has been detached examine the end of the camshaft and bearing which will be held in the tool. Let loose the bearing by spinning the tool handle counterclockwise. Employ a shop towel to wipe clean the end of the camshaft where the new bearing will be mounted. Ensure the surface is devoid of dirt and grease to keep the bearing in place. 5. Match the New Pilot Bearing Examine both the original and previous bearings ensure the inside and outside diameters are the identical. If there are disparities, the new bearing won’t fit into the camshaft and may not permit the ABS input shaft to fit within if it which in turn will not allow the alternator to be reinstalled. To ensure proper functioning of the pilot bearing, fit it over the input shaft while the alternator is removed. 6. Install the New Pilot Bearing Place the pilot bearing in the freezer for about 30 minutes to shrink it a little to help ease the installation. Then lightly place the bearing into the end of the camshaft. Make use of a hammer and metallic drift to gently tap the bearing into position. Avoid hitting the bearing to hard so as not to destroy it. 7. Lubricate the Pilot Bearing Ensure you appropriately grease the pilot bearing to guarantee it would function accurately. Apply a small quantity of axle bearing or silicone-based grease to the interior the pilot bearing. Avoid adding excess quantity of lubricant so it wouldn’t get into the clutch disc. At this state, the clutch is prepared for replacement and the ABS for re-installation. Conclusion A defective pilot bearing will make a buzzing or grinding sound, which increases in intensity when the bearing gets completely condemned. It will be very loud if the bearing is completely damaged. It happens every time the camshaft and input shaft are revolving at diverse speeds. On the other hand, a clutch release bearing will give off a tweeting or squealing noise as soon as the bearing touches the pressure plate’s diaphragm. Pilot bearings can be bearings or bushings. The bearing type can be ball, roller or needle bearings crammed in grease. If the manufacturer proposes adding bearing grease, be careful not to contaminate the clutch disk or the exterior of the balance wheel. Pilot bushings are brass and instilled with lubrication. Adding lubrication will actually increase friction. Verify from manufacturer’s reference before adding any lubrication to a pilot bearing. A worn or damaged pilot bearing will make a whining or grinding noise. It will be very loud if the bearing is completely damaged. It occurs whenever the camshaft and input shaft are rotating at different speeds. A clutch release bearing is different; it will make a chirping or squealing noise as soon as the bearing touches the pressure plate’s diaphragm. Note that release bearings make noise with much less pedal travel. Endeavor to mark the position of balance wheel in relation to camshaft prior to removing it. This is to avoid disproportion when the balance wheel is reinstalled.

388 Followers, 300 Following, 8 Posts - SCMED (@scmed.bums) on Instagram: "کمیته دانشجویی توسعه آموزش دانشگاه علوم پزشکی بیرجند This page is run by an ...
Early symptoms of a bad pilot bearing might be noise every time the clutch is disconnected. The alternator may also be rigid to shift between gears or stiff to put into reverse or first gear after stopping the vehicle. When the pilot is weakening, or has malfunctioned, the input shaft will be allowed to walk around causing it to go off midpoint. This causes the alternator input duct to move about within the air brake triggering the mechanism and synchronizers to be off center resulting in the alternator popping out of gear. If the automobile has a high output engine, the misalignment will cause the input shaft gear to not connect with the counter shaft gear accurately and eventually will lead to failure of the gears. This causes the release bearing to release the clutch. The released bearing is intended to work with lowest amount friction between the revolving and fixed points of contact. Examine the bell housing area if noises come from it. You can begin by performing a road assessment of your car. Pay attention to check if you can hear noises with the air brake in gear and the clutch pedal to the floor. After that, release the clutch with the alternator in first gear. Noise under this condition indicates a worn release bearing or a worn pilot bearing. To separate the two, keep the clutch pedal on the floor and move the alternator into neutral. If you still hear the noise after this, it means the release bearing is bad. However, if the noise disappears, then it means the pilot bearing is bad. A pilot bearing noise that occurs when unhanding the clutch pedal to employ the clutch while in neutral, but disappears when the pedal is depressed is caused by a bad pilot bearing. Ensure that all other gears are in good condition. Check the clutch connection for binding. Check the clutch fork and input shafts for proper positioning. Pilot Bearing Install Direction The direction of the pilot bearing is achieved by putting the bronze pilot bushing with the taper towards the air brake and the flat end into the crank. The pilot bearing is positioned it in clean engine oil and then fixed with thinning end to alternator. Avoid using grease or anti-seize as this will plug the pores in the bushing and it will fall short. The bushings are produced using powdered bronze and saturated with oil. Some persons prefer to use only just a bearing because worn bushing can break the input shaft bearing and make it tasking to get attain 4th gear. The bearing will live longer than the clutch as long as you replace it every time the clutch is out. Removing a defective pilot bearing can be a complicated duty and may call for a unique tool. Fixing a pilot bearing is typically uncomplicated as long as you ensure it is accurately balanced. Ensure the pilot bearing race is cut by means of a cutter to eliminate all fragments from the hole. In some cases, removing a bearing may only require stuffing the middle of the bearing with thick lubricant, and using a hammer to strike a rod that sits securely in the midpoint. When the clutch is disconnected, the transmission’s input shaft and the engine’s camshaft are revolving at dissimilar rate. The pilot bearing permits this dissimilarity. This causes a defective pilot bearing to produce its most noise when the clutch pedal is totally depressed and the clutch itself is entirely disconnected. It’s situated in the middle of the balance wheel. How Far Does a Pilot Bearing Go In? The pilot bearing has an o-ring gasket around the outer border to stop lubricant from leaking out onto the disc. A pilot bearing is roughly an inch across and it seats in a small fissure that is at the back. You may have to dismantle everything since you’ll need to use a pilot bushing which is about two inches across and sits flush with the crank. Just keep driving the pilot bearing in until it’s flush with the crank end. The new one had a projection on the outside circumference. The extension allows the pilot bearing to go in one way and let it go to the right deepness which is the entire outside race into the camshaft and prevents it from being driven in excessively far. When lubricating, use only a pea-sized quantity of grease to daub around the rollers. Most excess grease standing above the rollers gets hard-pressed into the rear when the alternator is installed. Pilot Bearing Replacement Cost The pilot bearing replacement cost will vary between $7.00 and $23.00 (US) which is obtainable from Amazon or the local parts store. If you are a novice who is unable to replace the pilot bearing, then you have to contact a local auto-repair shop. They will have to remove the alternator and clutch, making the labor cost to fall between $350.00 and $650.00 (US). If putting back the whole clutch as a kit, the pilot bearing will occasionally be added. Ensure you check the contents of the kit to be certain. The longevity of a pilot bearing should match the clutch. However, bearing can have a malfunction within 45,000 to 65,000 miles. How to Remove Pilot Bearing Race Removing a pilot bearing race can be achieved with set of special tools. However, a layperson may not be willing to buy a tool they wouldn’t always use. The pilot bearing race helps support the input shaft of a manual ABS. It has to be replaced when worn to prevent destroying the input shaft seal on the alternator. If this happens, it can pump out oil from the alternator, leading to clutch breakdown. Contemporary vehicles now make use of an anti-friction bearing (roller bearing), while older automobiles employ a bronze bushing which is pushed into the end of the camshaft. It is vital to removing the pilot bearing race cautiously to avoid damaging the interference fit in the camshaft. Then proceed to pack the area behind the bearing with bread and apply pressure through the opening for the input shaft. This will cause the bearing to push out efficiently. To apply pressure, utilize a rod of the similar diameter as the input shaft. Pilot Bearing Removal Tips Before you commence, the transmission has to be removed together with the clutch assembly. 1. Obtain a Pilot Bearing Removal Tool To remove the pilot bearing race, you need a removal tool which is sold on Amazon at $34.00. You don’t necessarily have to buy if you can rent it at an auto store. 2. Insert the Removal Tool Then proceed to slot in the removal tool into the pilot bearing, with the jam nut completely backed off. Turn the handle clockwise to extend the tool fingers outward in the rear of the bearing. The tool will relax beside the balance wheel which will maintain the pulling process. 3. Pull the Pilot Bearing Outward Take a tight hold of the tool and make tighter the jam nut using a wrench; you would hear a small 'pop', indicating that the bearing is starting to move from the camshaft. At this position the nut will get easier to move alongside the wrench. Maintain this act pending when the bearing is completely detached. 4. Inspect the Pilot Bearing Once the bearing has been detached examine the end of the camshaft and bearing which will be held in the tool. Let loose the bearing by spinning the tool handle counterclockwise. Employ a shop towel to wipe clean the end of the camshaft where the new bearing will be mounted. Ensure the surface is devoid of dirt and grease to keep the bearing in place. 5. Match the New Pilot Bearing Examine both the original and previous bearings ensure the inside and outside diameters are the identical. If there are disparities, the new bearing won’t fit into the camshaft and may not permit the ABS input shaft to fit within if it which in turn will not allow the alternator to be reinstalled. To ensure proper functioning of the pilot bearing, fit it over the input shaft while the alternator is removed. 6. Install the New Pilot Bearing Place the pilot bearing in the freezer for about 30 minutes to shrink it a little to help ease the installation. Then lightly place the bearing into the end of the camshaft. Make use of a hammer and metallic drift to gently tap the bearing into position. Avoid hitting the bearing to hard so as not to destroy it. 7. Lubricate the Pilot Bearing Ensure you appropriately grease the pilot bearing to guarantee it would function accurately. Apply a small quantity of axle bearing or silicone-based grease to the interior the pilot bearing. Avoid adding excess quantity of lubricant so it wouldn’t get into the clutch disc. At this state, the clutch is prepared for replacement and the ABS for re-installation. Conclusion A defective pilot bearing will make a buzzing or grinding sound, which increases in intensity when the bearing gets completely condemned. It will be very loud if the bearing is completely damaged. It happens every time the camshaft and input shaft are revolving at diverse speeds. On the other hand, a clutch release bearing will give off a tweeting or squealing noise as soon as the bearing touches the pressure plate’s diaphragm. Pilot bearings can be bearings or bushings. The bearing type can be ball, roller or needle bearings crammed in grease. If the manufacturer proposes adding bearing grease, be careful not to contaminate the clutch disk or the exterior of the balance wheel. Pilot bushings are brass and instilled with lubrication. Adding lubrication will actually increase friction. Verify from manufacturer’s reference before adding any lubrication to a pilot bearing. A worn or damaged pilot bearing will make a whining or grinding noise. It will be very loud if the bearing is completely damaged. It occurs whenever the camshaft and input shaft are rotating at different speeds. A clutch release bearing is different; it will make a chirping or squealing noise as soon as the bearing touches the pressure plate’s diaphragm. Note that release bearings make noise with much less pedal travel. Endeavor to mark the position of balance wheel in relation to camshaft prior to removing it. This is to avoid disproportion when the balance wheel is reinstalled.
6002 bearingSKF
Examine both the original and previous bearings ensure the inside and outside diameters are the identical. If there are disparities, the new bearing won’t fit into the camshaft and may not permit the ABS input shaft to fit within if it which in turn will not allow the alternator to be reinstalled. To ensure proper functioning of the pilot bearing, fit it over the input shaft while the alternator is removed. 6. Install the New Pilot Bearing Place the pilot bearing in the freezer for about 30 minutes to shrink it a little to help ease the installation. Then lightly place the bearing into the end of the camshaft. Make use of a hammer and metallic drift to gently tap the bearing into position. Avoid hitting the bearing to hard so as not to destroy it. 7. Lubricate the Pilot Bearing Ensure you appropriately grease the pilot bearing to guarantee it would function accurately. Apply a small quantity of axle bearing or silicone-based grease to the interior the pilot bearing. Avoid adding excess quantity of lubricant so it wouldn’t get into the clutch disc. At this state, the clutch is prepared for replacement and the ABS for re-installation. Conclusion A defective pilot bearing will make a buzzing or grinding sound, which increases in intensity when the bearing gets completely condemned. It will be very loud if the bearing is completely damaged. It happens every time the camshaft and input shaft are revolving at diverse speeds. On the other hand, a clutch release bearing will give off a tweeting or squealing noise as soon as the bearing touches the pressure plate’s diaphragm. Pilot bearings can be bearings or bushings. The bearing type can be ball, roller or needle bearings crammed in grease. If the manufacturer proposes adding bearing grease, be careful not to contaminate the clutch disk or the exterior of the balance wheel. Pilot bushings are brass and instilled with lubrication. Adding lubrication will actually increase friction. Verify from manufacturer’s reference before adding any lubrication to a pilot bearing. A worn or damaged pilot bearing will make a whining or grinding noise. It will be very loud if the bearing is completely damaged. It occurs whenever the camshaft and input shaft are rotating at different speeds. A clutch release bearing is different; it will make a chirping or squealing noise as soon as the bearing touches the pressure plate’s diaphragm. Note that release bearings make noise with much less pedal travel. Endeavor to mark the position of balance wheel in relation to camshaft prior to removing it. This is to avoid disproportion when the balance wheel is reinstalled.
Ensure the pilot bearing race is cut by means of a cutter to eliminate all fragments from the hole. In some cases, removing a bearing may only require stuffing the middle of the bearing with thick lubricant, and using a hammer to strike a rod that sits securely in the midpoint. When the clutch is disconnected, the transmission’s input shaft and the engine’s camshaft are revolving at dissimilar rate. The pilot bearing permits this dissimilarity. This causes a defective pilot bearing to produce its most noise when the clutch pedal is totally depressed and the clutch itself is entirely disconnected. It’s situated in the middle of the balance wheel. How Far Does a Pilot Bearing Go In? The pilot bearing has an o-ring gasket around the outer border to stop lubricant from leaking out onto the disc. A pilot bearing is roughly an inch across and it seats in a small fissure that is at the back. You may have to dismantle everything since you’ll need to use a pilot bushing which is about two inches across and sits flush with the crank. Just keep driving the pilot bearing in until it’s flush with the crank end. The new one had a projection on the outside circumference. The extension allows the pilot bearing to go in one way and let it go to the right deepness which is the entire outside race into the camshaft and prevents it from being driven in excessively far. When lubricating, use only a pea-sized quantity of grease to daub around the rollers. Most excess grease standing above the rollers gets hard-pressed into the rear when the alternator is installed. Pilot Bearing Replacement Cost The pilot bearing replacement cost will vary between $7.00 and $23.00 (US) which is obtainable from Amazon or the local parts store. If you are a novice who is unable to replace the pilot bearing, then you have to contact a local auto-repair shop. They will have to remove the alternator and clutch, making the labor cost to fall between $350.00 and $650.00 (US). If putting back the whole clutch as a kit, the pilot bearing will occasionally be added. Ensure you check the contents of the kit to be certain. The longevity of a pilot bearing should match the clutch. However, bearing can have a malfunction within 45,000 to 65,000 miles. How to Remove Pilot Bearing Race Removing a pilot bearing race can be achieved with set of special tools. However, a layperson may not be willing to buy a tool they wouldn’t always use. The pilot bearing race helps support the input shaft of a manual ABS. It has to be replaced when worn to prevent destroying the input shaft seal on the alternator. If this happens, it can pump out oil from the alternator, leading to clutch breakdown. Contemporary vehicles now make use of an anti-friction bearing (roller bearing), while older automobiles employ a bronze bushing which is pushed into the end of the camshaft. It is vital to removing the pilot bearing race cautiously to avoid damaging the interference fit in the camshaft. Then proceed to pack the area behind the bearing with bread and apply pressure through the opening for the input shaft. This will cause the bearing to push out efficiently. To apply pressure, utilize a rod of the similar diameter as the input shaft. Pilot Bearing Removal Tips Before you commence, the transmission has to be removed together with the clutch assembly. 1. Obtain a Pilot Bearing Removal Tool To remove the pilot bearing race, you need a removal tool which is sold on Amazon at $34.00. You don’t necessarily have to buy if you can rent it at an auto store. 2. Insert the Removal Tool Then proceed to slot in the removal tool into the pilot bearing, with the jam nut completely backed off. Turn the handle clockwise to extend the tool fingers outward in the rear of the bearing. The tool will relax beside the balance wheel which will maintain the pulling process. 3. Pull the Pilot Bearing Outward Take a tight hold of the tool and make tighter the jam nut using a wrench; you would hear a small 'pop', indicating that the bearing is starting to move from the camshaft. At this position the nut will get easier to move alongside the wrench. Maintain this act pending when the bearing is completely detached. 4. Inspect the Pilot Bearing Once the bearing has been detached examine the end of the camshaft and bearing which will be held in the tool. Let loose the bearing by spinning the tool handle counterclockwise. Employ a shop towel to wipe clean the end of the camshaft where the new bearing will be mounted. Ensure the surface is devoid of dirt and grease to keep the bearing in place. 5. Match the New Pilot Bearing Examine both the original and previous bearings ensure the inside and outside diameters are the identical. If there are disparities, the new bearing won’t fit into the camshaft and may not permit the ABS input shaft to fit within if it which in turn will not allow the alternator to be reinstalled. To ensure proper functioning of the pilot bearing, fit it over the input shaft while the alternator is removed. 6. Install the New Pilot Bearing Place the pilot bearing in the freezer for about 30 minutes to shrink it a little to help ease the installation. Then lightly place the bearing into the end of the camshaft. Make use of a hammer and metallic drift to gently tap the bearing into position. Avoid hitting the bearing to hard so as not to destroy it. 7. Lubricate the Pilot Bearing Ensure you appropriately grease the pilot bearing to guarantee it would function accurately. Apply a small quantity of axle bearing or silicone-based grease to the interior the pilot bearing. Avoid adding excess quantity of lubricant so it wouldn’t get into the clutch disc. At this state, the clutch is prepared for replacement and the ABS for re-installation. Conclusion A defective pilot bearing will make a buzzing or grinding sound, which increases in intensity when the bearing gets completely condemned. It will be very loud if the bearing is completely damaged. It happens every time the camshaft and input shaft are revolving at diverse speeds. On the other hand, a clutch release bearing will give off a tweeting or squealing noise as soon as the bearing touches the pressure plate’s diaphragm. Pilot bearings can be bearings or bushings. The bearing type can be ball, roller or needle bearings crammed in grease. If the manufacturer proposes adding bearing grease, be careful not to contaminate the clutch disk or the exterior of the balance wheel. Pilot bushings are brass and instilled with lubrication. Adding lubrication will actually increase friction. Verify from manufacturer’s reference before adding any lubrication to a pilot bearing. A worn or damaged pilot bearing will make a whining or grinding noise. It will be very loud if the bearing is completely damaged. It occurs whenever the camshaft and input shaft are rotating at different speeds. A clutch release bearing is different; it will make a chirping or squealing noise as soon as the bearing touches the pressure plate’s diaphragm. Note that release bearings make noise with much less pedal travel. Endeavor to mark the position of balance wheel in relation to camshaft prior to removing it. This is to avoid disproportion when the balance wheel is reinstalled.
City Floor Supply distributes hardwood and sport floor products and provides customer service. When it comes to hardwood flooring, our wood floor consultants have seen it all. They are available to answer questions and address any job-site issues related to hardwood floors. City Floor supply also offers a variety of weekly and monthly on-line deals for hardwood floor contractors.
SKF 35298 Drive Axle Shaft Seal, fits Ford F-250 Super Duty, Ford F-350 Super Duty. Fast & free shipping.
Pilot bearings can be bearings or bushings. The bearing type can be ball, roller or needle bearings crammed in grease. If the manufacturer proposes adding bearing grease, be careful not to contaminate the clutch disk or the exterior of the balance wheel. Pilot bushings are brass and instilled with lubrication. Adding lubrication will actually increase friction. Verify from manufacturer’s reference before adding any lubrication to a pilot bearing. A worn or damaged pilot bearing will make a whining or grinding noise. It will be very loud if the bearing is completely damaged. It occurs whenever the camshaft and input shaft are rotating at different speeds. A clutch release bearing is different; it will make a chirping or squealing noise as soon as the bearing touches the pressure plate’s diaphragm. Note that release bearings make noise with much less pedal travel. Endeavor to mark the position of balance wheel in relation to camshaft prior to removing it. This is to avoid disproportion when the balance wheel is reinstalled.
Once the bearing has been detached examine the end of the camshaft and bearing which will be held in the tool. Let loose the bearing by spinning the tool handle counterclockwise. Employ a shop towel to wipe clean the end of the camshaft where the new bearing will be mounted. Ensure the surface is devoid of dirt and grease to keep the bearing in place. 5. Match the New Pilot Bearing Examine both the original and previous bearings ensure the inside and outside diameters are the identical. If there are disparities, the new bearing won’t fit into the camshaft and may not permit the ABS input shaft to fit within if it which in turn will not allow the alternator to be reinstalled. To ensure proper functioning of the pilot bearing, fit it over the input shaft while the alternator is removed. 6. Install the New Pilot Bearing Place the pilot bearing in the freezer for about 30 minutes to shrink it a little to help ease the installation. Then lightly place the bearing into the end of the camshaft. Make use of a hammer and metallic drift to gently tap the bearing into position. Avoid hitting the bearing to hard so as not to destroy it. 7. Lubricate the Pilot Bearing Ensure you appropriately grease the pilot bearing to guarantee it would function accurately. Apply a small quantity of axle bearing or silicone-based grease to the interior the pilot bearing. Avoid adding excess quantity of lubricant so it wouldn’t get into the clutch disc. At this state, the clutch is prepared for replacement and the ABS for re-installation. Conclusion A defective pilot bearing will make a buzzing or grinding sound, which increases in intensity when the bearing gets completely condemned. It will be very loud if the bearing is completely damaged. It happens every time the camshaft and input shaft are revolving at diverse speeds. On the other hand, a clutch release bearing will give off a tweeting or squealing noise as soon as the bearing touches the pressure plate’s diaphragm. Pilot bearings can be bearings or bushings. The bearing type can be ball, roller or needle bearings crammed in grease. If the manufacturer proposes adding bearing grease, be careful not to contaminate the clutch disk or the exterior of the balance wheel. Pilot bushings are brass and instilled with lubrication. Adding lubrication will actually increase friction. Verify from manufacturer’s reference before adding any lubrication to a pilot bearing. A worn or damaged pilot bearing will make a whining or grinding noise. It will be very loud if the bearing is completely damaged. It occurs whenever the camshaft and input shaft are rotating at different speeds. A clutch release bearing is different; it will make a chirping or squealing noise as soon as the bearing touches the pressure plate’s diaphragm. Note that release bearings make noise with much less pedal travel. Endeavor to mark the position of balance wheel in relation to camshaft prior to removing it. This is to avoid disproportion when the balance wheel is reinstalled.
The pilot bearing has an o-ring gasket around the outer border to stop lubricant from leaking out onto the disc. A pilot bearing is roughly an inch across and it seats in a small fissure that is at the back. You may have to dismantle everything since you’ll need to use a pilot bushing which is about two inches across and sits flush with the crank. Just keep driving the pilot bearing in until it’s flush with the crank end. The new one had a projection on the outside circumference. The extension allows the pilot bearing to go in one way and let it go to the right deepness which is the entire outside race into the camshaft and prevents it from being driven in excessively far. When lubricating, use only a pea-sized quantity of grease to daub around the rollers. Most excess grease standing above the rollers gets hard-pressed into the rear when the alternator is installed. Pilot Bearing Replacement Cost The pilot bearing replacement cost will vary between $7.00 and $23.00 (US) which is obtainable from Amazon or the local parts store. If you are a novice who is unable to replace the pilot bearing, then you have to contact a local auto-repair shop. They will have to remove the alternator and clutch, making the labor cost to fall between $350.00 and $650.00 (US). If putting back the whole clutch as a kit, the pilot bearing will occasionally be added. Ensure you check the contents of the kit to be certain. The longevity of a pilot bearing should match the clutch. However, bearing can have a malfunction within 45,000 to 65,000 miles. How to Remove Pilot Bearing Race Removing a pilot bearing race can be achieved with set of special tools. However, a layperson may not be willing to buy a tool they wouldn’t always use. The pilot bearing race helps support the input shaft of a manual ABS. It has to be replaced when worn to prevent destroying the input shaft seal on the alternator. If this happens, it can pump out oil from the alternator, leading to clutch breakdown. Contemporary vehicles now make use of an anti-friction bearing (roller bearing), while older automobiles employ a bronze bushing which is pushed into the end of the camshaft. It is vital to removing the pilot bearing race cautiously to avoid damaging the interference fit in the camshaft. Then proceed to pack the area behind the bearing with bread and apply pressure through the opening for the input shaft. This will cause the bearing to push out efficiently. To apply pressure, utilize a rod of the similar diameter as the input shaft. Pilot Bearing Removal Tips Before you commence, the transmission has to be removed together with the clutch assembly. 1. Obtain a Pilot Bearing Removal Tool To remove the pilot bearing race, you need a removal tool which is sold on Amazon at $34.00. You don’t necessarily have to buy if you can rent it at an auto store. 2. Insert the Removal Tool Then proceed to slot in the removal tool into the pilot bearing, with the jam nut completely backed off. Turn the handle clockwise to extend the tool fingers outward in the rear of the bearing. The tool will relax beside the balance wheel which will maintain the pulling process. 3. Pull the Pilot Bearing Outward Take a tight hold of the tool and make tighter the jam nut using a wrench; you would hear a small 'pop', indicating that the bearing is starting to move from the camshaft. At this position the nut will get easier to move alongside the wrench. Maintain this act pending when the bearing is completely detached. 4. Inspect the Pilot Bearing Once the bearing has been detached examine the end of the camshaft and bearing which will be held in the tool. Let loose the bearing by spinning the tool handle counterclockwise. Employ a shop towel to wipe clean the end of the camshaft where the new bearing will be mounted. Ensure the surface is devoid of dirt and grease to keep the bearing in place. 5. Match the New Pilot Bearing Examine both the original and previous bearings ensure the inside and outside diameters are the identical. If there are disparities, the new bearing won’t fit into the camshaft and may not permit the ABS input shaft to fit within if it which in turn will not allow the alternator to be reinstalled. To ensure proper functioning of the pilot bearing, fit it over the input shaft while the alternator is removed. 6. Install the New Pilot Bearing Place the pilot bearing in the freezer for about 30 minutes to shrink it a little to help ease the installation. Then lightly place the bearing into the end of the camshaft. Make use of a hammer and metallic drift to gently tap the bearing into position. Avoid hitting the bearing to hard so as not to destroy it. 7. Lubricate the Pilot Bearing Ensure you appropriately grease the pilot bearing to guarantee it would function accurately. Apply a small quantity of axle bearing or silicone-based grease to the interior the pilot bearing. Avoid adding excess quantity of lubricant so it wouldn’t get into the clutch disc. At this state, the clutch is prepared for replacement and the ABS for re-installation. Conclusion A defective pilot bearing will make a buzzing or grinding sound, which increases in intensity when the bearing gets completely condemned. It will be very loud if the bearing is completely damaged. It happens every time the camshaft and input shaft are revolving at diverse speeds. On the other hand, a clutch release bearing will give off a tweeting or squealing noise as soon as the bearing touches the pressure plate’s diaphragm. Pilot bearings can be bearings or bushings. The bearing type can be ball, roller or needle bearings crammed in grease. If the manufacturer proposes adding bearing grease, be careful not to contaminate the clutch disk or the exterior of the balance wheel. Pilot bushings are brass and instilled with lubrication. Adding lubrication will actually increase friction. Verify from manufacturer’s reference before adding any lubrication to a pilot bearing. A worn or damaged pilot bearing will make a whining or grinding noise. It will be very loud if the bearing is completely damaged. It occurs whenever the camshaft and input shaft are rotating at different speeds. A clutch release bearing is different; it will make a chirping or squealing noise as soon as the bearing touches the pressure plate’s diaphragm. Note that release bearings make noise with much less pedal travel. Endeavor to mark the position of balance wheel in relation to camshaft prior to removing it. This is to avoid disproportion when the balance wheel is reinstalled.
6002 bearingdimensions
A worn or damaged pilot bearing will make a whining or grinding noise. It will be very loud if the bearing is completely damaged. It occurs whenever the camshaft and input shaft are rotating at different speeds. A clutch release bearing is different; it will make a chirping or squealing noise as soon as the bearing touches the pressure plate’s diaphragm. Note that release bearings make noise with much less pedal travel. Endeavor to mark the position of balance wheel in relation to camshaft prior to removing it. This is to avoid disproportion when the balance wheel is reinstalled.
A pilot bearing noise that occurs when unhanding the clutch pedal to employ the clutch while in neutral, but disappears when the pedal is depressed is caused by a bad pilot bearing. Ensure that all other gears are in good condition. Check the clutch connection for binding. Check the clutch fork and input shafts for proper positioning. Pilot Bearing Install Direction The direction of the pilot bearing is achieved by putting the bronze pilot bushing with the taper towards the air brake and the flat end into the crank. The pilot bearing is positioned it in clean engine oil and then fixed with thinning end to alternator. Avoid using grease or anti-seize as this will plug the pores in the bushing and it will fall short. The bushings are produced using powdered bronze and saturated with oil. Some persons prefer to use only just a bearing because worn bushing can break the input shaft bearing and make it tasking to get attain 4th gear. The bearing will live longer than the clutch as long as you replace it every time the clutch is out. Removing a defective pilot bearing can be a complicated duty and may call for a unique tool. Fixing a pilot bearing is typically uncomplicated as long as you ensure it is accurately balanced. Ensure the pilot bearing race is cut by means of a cutter to eliminate all fragments from the hole. In some cases, removing a bearing may only require stuffing the middle of the bearing with thick lubricant, and using a hammer to strike a rod that sits securely in the midpoint. When the clutch is disconnected, the transmission’s input shaft and the engine’s camshaft are revolving at dissimilar rate. The pilot bearing permits this dissimilarity. This causes a defective pilot bearing to produce its most noise when the clutch pedal is totally depressed and the clutch itself is entirely disconnected. It’s situated in the middle of the balance wheel. How Far Does a Pilot Bearing Go In? The pilot bearing has an o-ring gasket around the outer border to stop lubricant from leaking out onto the disc. A pilot bearing is roughly an inch across and it seats in a small fissure that is at the back. You may have to dismantle everything since you’ll need to use a pilot bushing which is about two inches across and sits flush with the crank. Just keep driving the pilot bearing in until it’s flush with the crank end. The new one had a projection on the outside circumference. The extension allows the pilot bearing to go in one way and let it go to the right deepness which is the entire outside race into the camshaft and prevents it from being driven in excessively far. When lubricating, use only a pea-sized quantity of grease to daub around the rollers. Most excess grease standing above the rollers gets hard-pressed into the rear when the alternator is installed. Pilot Bearing Replacement Cost The pilot bearing replacement cost will vary between $7.00 and $23.00 (US) which is obtainable from Amazon or the local parts store. If you are a novice who is unable to replace the pilot bearing, then you have to contact a local auto-repair shop. They will have to remove the alternator and clutch, making the labor cost to fall between $350.00 and $650.00 (US). If putting back the whole clutch as a kit, the pilot bearing will occasionally be added. Ensure you check the contents of the kit to be certain. The longevity of a pilot bearing should match the clutch. However, bearing can have a malfunction within 45,000 to 65,000 miles. How to Remove Pilot Bearing Race Removing a pilot bearing race can be achieved with set of special tools. However, a layperson may not be willing to buy a tool they wouldn’t always use. The pilot bearing race helps support the input shaft of a manual ABS. It has to be replaced when worn to prevent destroying the input shaft seal on the alternator. If this happens, it can pump out oil from the alternator, leading to clutch breakdown. Contemporary vehicles now make use of an anti-friction bearing (roller bearing), while older automobiles employ a bronze bushing which is pushed into the end of the camshaft. It is vital to removing the pilot bearing race cautiously to avoid damaging the interference fit in the camshaft. Then proceed to pack the area behind the bearing with bread and apply pressure through the opening for the input shaft. This will cause the bearing to push out efficiently. To apply pressure, utilize a rod of the similar diameter as the input shaft. Pilot Bearing Removal Tips Before you commence, the transmission has to be removed together with the clutch assembly. 1. Obtain a Pilot Bearing Removal Tool To remove the pilot bearing race, you need a removal tool which is sold on Amazon at $34.00. You don’t necessarily have to buy if you can rent it at an auto store. 2. Insert the Removal Tool Then proceed to slot in the removal tool into the pilot bearing, with the jam nut completely backed off. Turn the handle clockwise to extend the tool fingers outward in the rear of the bearing. The tool will relax beside the balance wheel which will maintain the pulling process. 3. Pull the Pilot Bearing Outward Take a tight hold of the tool and make tighter the jam nut using a wrench; you would hear a small 'pop', indicating that the bearing is starting to move from the camshaft. At this position the nut will get easier to move alongside the wrench. Maintain this act pending when the bearing is completely detached. 4. Inspect the Pilot Bearing Once the bearing has been detached examine the end of the camshaft and bearing which will be held in the tool. Let loose the bearing by spinning the tool handle counterclockwise. Employ a shop towel to wipe clean the end of the camshaft where the new bearing will be mounted. Ensure the surface is devoid of dirt and grease to keep the bearing in place. 5. Match the New Pilot Bearing Examine both the original and previous bearings ensure the inside and outside diameters are the identical. If there are disparities, the new bearing won’t fit into the camshaft and may not permit the ABS input shaft to fit within if it which in turn will not allow the alternator to be reinstalled. To ensure proper functioning of the pilot bearing, fit it over the input shaft while the alternator is removed. 6. Install the New Pilot Bearing Place the pilot bearing in the freezer for about 30 minutes to shrink it a little to help ease the installation. Then lightly place the bearing into the end of the camshaft. Make use of a hammer and metallic drift to gently tap the bearing into position. Avoid hitting the bearing to hard so as not to destroy it. 7. Lubricate the Pilot Bearing Ensure you appropriately grease the pilot bearing to guarantee it would function accurately. Apply a small quantity of axle bearing or silicone-based grease to the interior the pilot bearing. Avoid adding excess quantity of lubricant so it wouldn’t get into the clutch disc. At this state, the clutch is prepared for replacement and the ABS for re-installation. Conclusion A defective pilot bearing will make a buzzing or grinding sound, which increases in intensity when the bearing gets completely condemned. It will be very loud if the bearing is completely damaged. It happens every time the camshaft and input shaft are revolving at diverse speeds. On the other hand, a clutch release bearing will give off a tweeting or squealing noise as soon as the bearing touches the pressure plate’s diaphragm. Pilot bearings can be bearings or bushings. The bearing type can be ball, roller or needle bearings crammed in grease. If the manufacturer proposes adding bearing grease, be careful not to contaminate the clutch disk or the exterior of the balance wheel. Pilot bushings are brass and instilled with lubrication. Adding lubrication will actually increase friction. Verify from manufacturer’s reference before adding any lubrication to a pilot bearing. A worn or damaged pilot bearing will make a whining or grinding noise. It will be very loud if the bearing is completely damaged. It occurs whenever the camshaft and input shaft are rotating at different speeds. A clutch release bearing is different; it will make a chirping or squealing noise as soon as the bearing touches the pressure plate’s diaphragm. Note that release bearings make noise with much less pedal travel. Endeavor to mark the position of balance wheel in relation to camshaft prior to removing it. This is to avoid disproportion when the balance wheel is reinstalled.
A defective pilot bearing will make a buzzing or grinding sound, which increases in intensity when the bearing gets completely condemned. It will be very loud if the bearing is completely damaged. It happens every time the camshaft and input shaft are revolving at diverse speeds. On the other hand, a clutch release bearing will give off a tweeting or squealing noise as soon as the bearing touches the pressure plate’s diaphragm. Pilot bearings can be bearings or bushings. The bearing type can be ball, roller or needle bearings crammed in grease. If the manufacturer proposes adding bearing grease, be careful not to contaminate the clutch disk or the exterior of the balance wheel. Pilot bushings are brass and instilled with lubrication. Adding lubrication will actually increase friction. Verify from manufacturer’s reference before adding any lubrication to a pilot bearing. A worn or damaged pilot bearing will make a whining or grinding noise. It will be very loud if the bearing is completely damaged. It occurs whenever the camshaft and input shaft are rotating at different speeds. A clutch release bearing is different; it will make a chirping or squealing noise as soon as the bearing touches the pressure plate’s diaphragm. Note that release bearings make noise with much less pedal travel. Endeavor to mark the position of balance wheel in relation to camshaft prior to removing it. This is to avoid disproportion when the balance wheel is reinstalled.
You can begin by performing a road assessment of your car. Pay attention to check if you can hear noises with the air brake in gear and the clutch pedal to the floor. After that, release the clutch with the alternator in first gear. Noise under this condition indicates a worn release bearing or a worn pilot bearing. To separate the two, keep the clutch pedal on the floor and move the alternator into neutral. If you still hear the noise after this, it means the release bearing is bad. However, if the noise disappears, then it means the pilot bearing is bad. A pilot bearing noise that occurs when unhanding the clutch pedal to employ the clutch while in neutral, but disappears when the pedal is depressed is caused by a bad pilot bearing. Ensure that all other gears are in good condition. Check the clutch connection for binding. Check the clutch fork and input shafts for proper positioning. Pilot Bearing Install Direction The direction of the pilot bearing is achieved by putting the bronze pilot bushing with the taper towards the air brake and the flat end into the crank. The pilot bearing is positioned it in clean engine oil and then fixed with thinning end to alternator. Avoid using grease or anti-seize as this will plug the pores in the bushing and it will fall short. The bushings are produced using powdered bronze and saturated with oil. Some persons prefer to use only just a bearing because worn bushing can break the input shaft bearing and make it tasking to get attain 4th gear. The bearing will live longer than the clutch as long as you replace it every time the clutch is out. Removing a defective pilot bearing can be a complicated duty and may call for a unique tool. Fixing a pilot bearing is typically uncomplicated as long as you ensure it is accurately balanced. Ensure the pilot bearing race is cut by means of a cutter to eliminate all fragments from the hole. In some cases, removing a bearing may only require stuffing the middle of the bearing with thick lubricant, and using a hammer to strike a rod that sits securely in the midpoint. When the clutch is disconnected, the transmission’s input shaft and the engine’s camshaft are revolving at dissimilar rate. The pilot bearing permits this dissimilarity. This causes a defective pilot bearing to produce its most noise when the clutch pedal is totally depressed and the clutch itself is entirely disconnected. It’s situated in the middle of the balance wheel. How Far Does a Pilot Bearing Go In? The pilot bearing has an o-ring gasket around the outer border to stop lubricant from leaking out onto the disc. A pilot bearing is roughly an inch across and it seats in a small fissure that is at the back. You may have to dismantle everything since you’ll need to use a pilot bushing which is about two inches across and sits flush with the crank. Just keep driving the pilot bearing in until it’s flush with the crank end. The new one had a projection on the outside circumference. The extension allows the pilot bearing to go in one way and let it go to the right deepness which is the entire outside race into the camshaft and prevents it from being driven in excessively far. When lubricating, use only a pea-sized quantity of grease to daub around the rollers. Most excess grease standing above the rollers gets hard-pressed into the rear when the alternator is installed. Pilot Bearing Replacement Cost The pilot bearing replacement cost will vary between $7.00 and $23.00 (US) which is obtainable from Amazon or the local parts store. If you are a novice who is unable to replace the pilot bearing, then you have to contact a local auto-repair shop. They will have to remove the alternator and clutch, making the labor cost to fall between $350.00 and $650.00 (US). If putting back the whole clutch as a kit, the pilot bearing will occasionally be added. Ensure you check the contents of the kit to be certain. The longevity of a pilot bearing should match the clutch. However, bearing can have a malfunction within 45,000 to 65,000 miles. How to Remove Pilot Bearing Race Removing a pilot bearing race can be achieved with set of special tools. However, a layperson may not be willing to buy a tool they wouldn’t always use. The pilot bearing race helps support the input shaft of a manual ABS. It has to be replaced when worn to prevent destroying the input shaft seal on the alternator. If this happens, it can pump out oil from the alternator, leading to clutch breakdown. Contemporary vehicles now make use of an anti-friction bearing (roller bearing), while older automobiles employ a bronze bushing which is pushed into the end of the camshaft. It is vital to removing the pilot bearing race cautiously to avoid damaging the interference fit in the camshaft. Then proceed to pack the area behind the bearing with bread and apply pressure through the opening for the input shaft. This will cause the bearing to push out efficiently. To apply pressure, utilize a rod of the similar diameter as the input shaft. Pilot Bearing Removal Tips Before you commence, the transmission has to be removed together with the clutch assembly. 1. Obtain a Pilot Bearing Removal Tool To remove the pilot bearing race, you need a removal tool which is sold on Amazon at $34.00. You don’t necessarily have to buy if you can rent it at an auto store. 2. Insert the Removal Tool Then proceed to slot in the removal tool into the pilot bearing, with the jam nut completely backed off. Turn the handle clockwise to extend the tool fingers outward in the rear of the bearing. The tool will relax beside the balance wheel which will maintain the pulling process. 3. Pull the Pilot Bearing Outward Take a tight hold of the tool and make tighter the jam nut using a wrench; you would hear a small 'pop', indicating that the bearing is starting to move from the camshaft. At this position the nut will get easier to move alongside the wrench. Maintain this act pending when the bearing is completely detached. 4. Inspect the Pilot Bearing Once the bearing has been detached examine the end of the camshaft and bearing which will be held in the tool. Let loose the bearing by spinning the tool handle counterclockwise. Employ a shop towel to wipe clean the end of the camshaft where the new bearing will be mounted. Ensure the surface is devoid of dirt and grease to keep the bearing in place. 5. Match the New Pilot Bearing Examine both the original and previous bearings ensure the inside and outside diameters are the identical. If there are disparities, the new bearing won’t fit into the camshaft and may not permit the ABS input shaft to fit within if it which in turn will not allow the alternator to be reinstalled. To ensure proper functioning of the pilot bearing, fit it over the input shaft while the alternator is removed. 6. Install the New Pilot Bearing Place the pilot bearing in the freezer for about 30 minutes to shrink it a little to help ease the installation. Then lightly place the bearing into the end of the camshaft. Make use of a hammer and metallic drift to gently tap the bearing into position. Avoid hitting the bearing to hard so as not to destroy it. 7. Lubricate the Pilot Bearing Ensure you appropriately grease the pilot bearing to guarantee it would function accurately. Apply a small quantity of axle bearing or silicone-based grease to the interior the pilot bearing. Avoid adding excess quantity of lubricant so it wouldn’t get into the clutch disc. At this state, the clutch is prepared for replacement and the ABS for re-installation. Conclusion A defective pilot bearing will make a buzzing or grinding sound, which increases in intensity when the bearing gets completely condemned. It will be very loud if the bearing is completely damaged. It happens every time the camshaft and input shaft are revolving at diverse speeds. On the other hand, a clutch release bearing will give off a tweeting or squealing noise as soon as the bearing touches the pressure plate’s diaphragm. Pilot bearings can be bearings or bushings. The bearing type can be ball, roller or needle bearings crammed in grease. If the manufacturer proposes adding bearing grease, be careful not to contaminate the clutch disk or the exterior of the balance wheel. Pilot bushings are brass and instilled with lubrication. Adding lubrication will actually increase friction. Verify from manufacturer’s reference before adding any lubrication to a pilot bearing. A worn or damaged pilot bearing will make a whining or grinding noise. It will be very loud if the bearing is completely damaged. It occurs whenever the camshaft and input shaft are rotating at different speeds. A clutch release bearing is different; it will make a chirping or squealing noise as soon as the bearing touches the pressure plate’s diaphragm. Note that release bearings make noise with much less pedal travel. Endeavor to mark the position of balance wheel in relation to camshaft prior to removing it. This is to avoid disproportion when the balance wheel is reinstalled.
Enter your email, and we'll promptly send you the full essay. No need to copy piece by piece. It's in your inbox!

SKF6002 bearingDimensions
Contemporary vehicles now make use of an anti-friction bearing (roller bearing), while older automobiles employ a bronze bushing which is pushed into the end of the camshaft. It is vital to removing the pilot bearing race cautiously to avoid damaging the interference fit in the camshaft. Then proceed to pack the area behind the bearing with bread and apply pressure through the opening for the input shaft. This will cause the bearing to push out efficiently. To apply pressure, utilize a rod of the similar diameter as the input shaft. Pilot Bearing Removal Tips Before you commence, the transmission has to be removed together with the clutch assembly. 1. Obtain a Pilot Bearing Removal Tool To remove the pilot bearing race, you need a removal tool which is sold on Amazon at $34.00. You don’t necessarily have to buy if you can rent it at an auto store. 2. Insert the Removal Tool Then proceed to slot in the removal tool into the pilot bearing, with the jam nut completely backed off. Turn the handle clockwise to extend the tool fingers outward in the rear of the bearing. The tool will relax beside the balance wheel which will maintain the pulling process. 3. Pull the Pilot Bearing Outward Take a tight hold of the tool and make tighter the jam nut using a wrench; you would hear a small 'pop', indicating that the bearing is starting to move from the camshaft. At this position the nut will get easier to move alongside the wrench. Maintain this act pending when the bearing is completely detached. 4. Inspect the Pilot Bearing Once the bearing has been detached examine the end of the camshaft and bearing which will be held in the tool. Let loose the bearing by spinning the tool handle counterclockwise. Employ a shop towel to wipe clean the end of the camshaft where the new bearing will be mounted. Ensure the surface is devoid of dirt and grease to keep the bearing in place. 5. Match the New Pilot Bearing Examine both the original and previous bearings ensure the inside and outside diameters are the identical. If there are disparities, the new bearing won’t fit into the camshaft and may not permit the ABS input shaft to fit within if it which in turn will not allow the alternator to be reinstalled. To ensure proper functioning of the pilot bearing, fit it over the input shaft while the alternator is removed. 6. Install the New Pilot Bearing Place the pilot bearing in the freezer for about 30 minutes to shrink it a little to help ease the installation. Then lightly place the bearing into the end of the camshaft. Make use of a hammer and metallic drift to gently tap the bearing into position. Avoid hitting the bearing to hard so as not to destroy it. 7. Lubricate the Pilot Bearing Ensure you appropriately grease the pilot bearing to guarantee it would function accurately. Apply a small quantity of axle bearing or silicone-based grease to the interior the pilot bearing. Avoid adding excess quantity of lubricant so it wouldn’t get into the clutch disc. At this state, the clutch is prepared for replacement and the ABS for re-installation. Conclusion A defective pilot bearing will make a buzzing or grinding sound, which increases in intensity when the bearing gets completely condemned. It will be very loud if the bearing is completely damaged. It happens every time the camshaft and input shaft are revolving at diverse speeds. On the other hand, a clutch release bearing will give off a tweeting or squealing noise as soon as the bearing touches the pressure plate’s diaphragm. Pilot bearings can be bearings or bushings. The bearing type can be ball, roller or needle bearings crammed in grease. If the manufacturer proposes adding bearing grease, be careful not to contaminate the clutch disk or the exterior of the balance wheel. Pilot bushings are brass and instilled with lubrication. Adding lubrication will actually increase friction. Verify from manufacturer’s reference before adding any lubrication to a pilot bearing. A worn or damaged pilot bearing will make a whining or grinding noise. It will be very loud if the bearing is completely damaged. It occurs whenever the camshaft and input shaft are rotating at different speeds. A clutch release bearing is different; it will make a chirping or squealing noise as soon as the bearing touches the pressure plate’s diaphragm. Note that release bearings make noise with much less pedal travel. Endeavor to mark the position of balance wheel in relation to camshaft prior to removing it. This is to avoid disproportion when the balance wheel is reinstalled.
20221013 — Compared to Open Type Bearings, Sealed and Shielded Bearings provide better protection against contamination and retaining lubrication.
City Floor Supply distributes hardwood and sport floor products and provides customer service. When it comes to hardwood flooring, our wood floor consultants have seen it all. They are available to answer questions and address any job-site issues related to hardwood floors. Learn More.
Product Name Honda S2000 BLS-Light / BN-Sports No PAB-3217 JAN code 4573112282160 Price 6300 JPY Width F197 – R195mm Wheel Base 257
Bearings Direct supplies Spherical Ball Bushings & Spherical Plain Bearings in chrome steel and metric and inch sizes. View our inventory of spherical ...
There are different types of pilot bearing or bushing. They include: Save your time!We can take care of your essay Proper editing and formatting Free revision, title page, and bibliography Flexible prices and money-back guarantee Place an order Conventional ball bearings Needle bearings Sintered bronze bushings Once a pilot bearing or bushing begins to develop issues, a vehicle may display certain symptoms. Now let’s look at the symptoms of bad pilot bearing. Symptoms of a Bad Pilot Bearing Symptoms of a bad pilot bad pilot bearing include: Noise Vibration No release Transmission pop out of gear Catastrophic malfunction of the alternator if not rectified Early symptoms of a bad pilot bearing might be noise every time the clutch is disconnected. The alternator may also be rigid to shift between gears or stiff to put into reverse or first gear after stopping the vehicle. When the pilot is weakening, or has malfunctioned, the input shaft will be allowed to walk around causing it to go off midpoint. This causes the alternator input duct to move about within the air brake triggering the mechanism and synchronizers to be off center resulting in the alternator popping out of gear. If the automobile has a high output engine, the misalignment will cause the input shaft gear to not connect with the counter shaft gear accurately and eventually will lead to failure of the gears. This causes the release bearing to release the clutch. The released bearing is intended to work with lowest amount friction between the revolving and fixed points of contact. Examine the bell housing area if noises come from it. You can begin by performing a road assessment of your car. Pay attention to check if you can hear noises with the air brake in gear and the clutch pedal to the floor. After that, release the clutch with the alternator in first gear. Noise under this condition indicates a worn release bearing or a worn pilot bearing. To separate the two, keep the clutch pedal on the floor and move the alternator into neutral. If you still hear the noise after this, it means the release bearing is bad. However, if the noise disappears, then it means the pilot bearing is bad. A pilot bearing noise that occurs when unhanding the clutch pedal to employ the clutch while in neutral, but disappears when the pedal is depressed is caused by a bad pilot bearing. Ensure that all other gears are in good condition. Check the clutch connection for binding. Check the clutch fork and input shafts for proper positioning. Pilot Bearing Install Direction The direction of the pilot bearing is achieved by putting the bronze pilot bushing with the taper towards the air brake and the flat end into the crank. The pilot bearing is positioned it in clean engine oil and then fixed with thinning end to alternator. Avoid using grease or anti-seize as this will plug the pores in the bushing and it will fall short. The bushings are produced using powdered bronze and saturated with oil. Some persons prefer to use only just a bearing because worn bushing can break the input shaft bearing and make it tasking to get attain 4th gear. The bearing will live longer than the clutch as long as you replace it every time the clutch is out. Removing a defective pilot bearing can be a complicated duty and may call for a unique tool. Fixing a pilot bearing is typically uncomplicated as long as you ensure it is accurately balanced. Ensure the pilot bearing race is cut by means of a cutter to eliminate all fragments from the hole. In some cases, removing a bearing may only require stuffing the middle of the bearing with thick lubricant, and using a hammer to strike a rod that sits securely in the midpoint. When the clutch is disconnected, the transmission’s input shaft and the engine’s camshaft are revolving at dissimilar rate. The pilot bearing permits this dissimilarity. This causes a defective pilot bearing to produce its most noise when the clutch pedal is totally depressed and the clutch itself is entirely disconnected. It’s situated in the middle of the balance wheel. How Far Does a Pilot Bearing Go In? The pilot bearing has an o-ring gasket around the outer border to stop lubricant from leaking out onto the disc. A pilot bearing is roughly an inch across and it seats in a small fissure that is at the back. You may have to dismantle everything since you’ll need to use a pilot bushing which is about two inches across and sits flush with the crank. Just keep driving the pilot bearing in until it’s flush with the crank end. The new one had a projection on the outside circumference. The extension allows the pilot bearing to go in one way and let it go to the right deepness which is the entire outside race into the camshaft and prevents it from being driven in excessively far. When lubricating, use only a pea-sized quantity of grease to daub around the rollers. Most excess grease standing above the rollers gets hard-pressed into the rear when the alternator is installed. Pilot Bearing Replacement Cost The pilot bearing replacement cost will vary between $7.00 and $23.00 (US) which is obtainable from Amazon or the local parts store. If you are a novice who is unable to replace the pilot bearing, then you have to contact a local auto-repair shop. They will have to remove the alternator and clutch, making the labor cost to fall between $350.00 and $650.00 (US). If putting back the whole clutch as a kit, the pilot bearing will occasionally be added. Ensure you check the contents of the kit to be certain. The longevity of a pilot bearing should match the clutch. However, bearing can have a malfunction within 45,000 to 65,000 miles. How to Remove Pilot Bearing Race Removing a pilot bearing race can be achieved with set of special tools. However, a layperson may not be willing to buy a tool they wouldn’t always use. The pilot bearing race helps support the input shaft of a manual ABS. It has to be replaced when worn to prevent destroying the input shaft seal on the alternator. If this happens, it can pump out oil from the alternator, leading to clutch breakdown. Contemporary vehicles now make use of an anti-friction bearing (roller bearing), while older automobiles employ a bronze bushing which is pushed into the end of the camshaft. It is vital to removing the pilot bearing race cautiously to avoid damaging the interference fit in the camshaft. Then proceed to pack the area behind the bearing with bread and apply pressure through the opening for the input shaft. This will cause the bearing to push out efficiently. To apply pressure, utilize a rod of the similar diameter as the input shaft. Pilot Bearing Removal Tips Before you commence, the transmission has to be removed together with the clutch assembly. 1. Obtain a Pilot Bearing Removal Tool To remove the pilot bearing race, you need a removal tool which is sold on Amazon at $34.00. You don’t necessarily have to buy if you can rent it at an auto store. 2. Insert the Removal Tool Then proceed to slot in the removal tool into the pilot bearing, with the jam nut completely backed off. Turn the handle clockwise to extend the tool fingers outward in the rear of the bearing. The tool will relax beside the balance wheel which will maintain the pulling process. 3. Pull the Pilot Bearing Outward Take a tight hold of the tool and make tighter the jam nut using a wrench; you would hear a small 'pop', indicating that the bearing is starting to move from the camshaft. At this position the nut will get easier to move alongside the wrench. Maintain this act pending when the bearing is completely detached. 4. Inspect the Pilot Bearing Once the bearing has been detached examine the end of the camshaft and bearing which will be held in the tool. Let loose the bearing by spinning the tool handle counterclockwise. Employ a shop towel to wipe clean the end of the camshaft where the new bearing will be mounted. Ensure the surface is devoid of dirt and grease to keep the bearing in place. 5. Match the New Pilot Bearing Examine both the original and previous bearings ensure the inside and outside diameters are the identical. If there are disparities, the new bearing won’t fit into the camshaft and may not permit the ABS input shaft to fit within if it which in turn will not allow the alternator to be reinstalled. To ensure proper functioning of the pilot bearing, fit it over the input shaft while the alternator is removed. 6. Install the New Pilot Bearing Place the pilot bearing in the freezer for about 30 minutes to shrink it a little to help ease the installation. Then lightly place the bearing into the end of the camshaft. Make use of a hammer and metallic drift to gently tap the bearing into position. Avoid hitting the bearing to hard so as not to destroy it. 7. Lubricate the Pilot Bearing Ensure you appropriately grease the pilot bearing to guarantee it would function accurately. Apply a small quantity of axle bearing or silicone-based grease to the interior the pilot bearing. Avoid adding excess quantity of lubricant so it wouldn’t get into the clutch disc. At this state, the clutch is prepared for replacement and the ABS for re-installation. Conclusion A defective pilot bearing will make a buzzing or grinding sound, which increases in intensity when the bearing gets completely condemned. It will be very loud if the bearing is completely damaged. It happens every time the camshaft and input shaft are revolving at diverse speeds. On the other hand, a clutch release bearing will give off a tweeting or squealing noise as soon as the bearing touches the pressure plate’s diaphragm. Pilot bearings can be bearings or bushings. The bearing type can be ball, roller or needle bearings crammed in grease. If the manufacturer proposes adding bearing grease, be careful not to contaminate the clutch disk or the exterior of the balance wheel. Pilot bushings are brass and instilled with lubrication. Adding lubrication will actually increase friction. Verify from manufacturer’s reference before adding any lubrication to a pilot bearing. A worn or damaged pilot bearing will make a whining or grinding noise. It will be very loud if the bearing is completely damaged. It occurs whenever the camshaft and input shaft are rotating at different speeds. A clutch release bearing is different; it will make a chirping or squealing noise as soon as the bearing touches the pressure plate’s diaphragm. Note that release bearings make noise with much less pedal travel. Endeavor to mark the position of balance wheel in relation to camshaft prior to removing it. This is to avoid disproportion when the balance wheel is reinstalled.
This LM67048/010/Q bearing is an imperial taper roller bearing. ... equipment. SAME DAY SHIPPING!!! ... Buy With Confidence !! We have more size available Please ...
126544780206. Brand. CR SEALS. MPN. 43771. Item description from the seller. This listing is for one piece - 43771 - CR Seals - Factory New! See full ...
Removing a pilot bearing race can be achieved with set of special tools. However, a layperson may not be willing to buy a tool they wouldn’t always use. The pilot bearing race helps support the input shaft of a manual ABS. It has to be replaced when worn to prevent destroying the input shaft seal on the alternator. If this happens, it can pump out oil from the alternator, leading to clutch breakdown. Contemporary vehicles now make use of an anti-friction bearing (roller bearing), while older automobiles employ a bronze bushing which is pushed into the end of the camshaft. It is vital to removing the pilot bearing race cautiously to avoid damaging the interference fit in the camshaft. Then proceed to pack the area behind the bearing with bread and apply pressure through the opening for the input shaft. This will cause the bearing to push out efficiently. To apply pressure, utilize a rod of the similar diameter as the input shaft. Pilot Bearing Removal Tips Before you commence, the transmission has to be removed together with the clutch assembly. 1. Obtain a Pilot Bearing Removal Tool To remove the pilot bearing race, you need a removal tool which is sold on Amazon at $34.00. You don’t necessarily have to buy if you can rent it at an auto store. 2. Insert the Removal Tool Then proceed to slot in the removal tool into the pilot bearing, with the jam nut completely backed off. Turn the handle clockwise to extend the tool fingers outward in the rear of the bearing. The tool will relax beside the balance wheel which will maintain the pulling process. 3. Pull the Pilot Bearing Outward Take a tight hold of the tool and make tighter the jam nut using a wrench; you would hear a small 'pop', indicating that the bearing is starting to move from the camshaft. At this position the nut will get easier to move alongside the wrench. Maintain this act pending when the bearing is completely detached. 4. Inspect the Pilot Bearing Once the bearing has been detached examine the end of the camshaft and bearing which will be held in the tool. Let loose the bearing by spinning the tool handle counterclockwise. Employ a shop towel to wipe clean the end of the camshaft where the new bearing will be mounted. Ensure the surface is devoid of dirt and grease to keep the bearing in place. 5. Match the New Pilot Bearing Examine both the original and previous bearings ensure the inside and outside diameters are the identical. If there are disparities, the new bearing won’t fit into the camshaft and may not permit the ABS input shaft to fit within if it which in turn will not allow the alternator to be reinstalled. To ensure proper functioning of the pilot bearing, fit it over the input shaft while the alternator is removed. 6. Install the New Pilot Bearing Place the pilot bearing in the freezer for about 30 minutes to shrink it a little to help ease the installation. Then lightly place the bearing into the end of the camshaft. Make use of a hammer and metallic drift to gently tap the bearing into position. Avoid hitting the bearing to hard so as not to destroy it. 7. Lubricate the Pilot Bearing Ensure you appropriately grease the pilot bearing to guarantee it would function accurately. Apply a small quantity of axle bearing or silicone-based grease to the interior the pilot bearing. Avoid adding excess quantity of lubricant so it wouldn’t get into the clutch disc. At this state, the clutch is prepared for replacement and the ABS for re-installation. Conclusion A defective pilot bearing will make a buzzing or grinding sound, which increases in intensity when the bearing gets completely condemned. It will be very loud if the bearing is completely damaged. It happens every time the camshaft and input shaft are revolving at diverse speeds. On the other hand, a clutch release bearing will give off a tweeting or squealing noise as soon as the bearing touches the pressure plate’s diaphragm. Pilot bearings can be bearings or bushings. The bearing type can be ball, roller or needle bearings crammed in grease. If the manufacturer proposes adding bearing grease, be careful not to contaminate the clutch disk or the exterior of the balance wheel. Pilot bushings are brass and instilled with lubrication. Adding lubrication will actually increase friction. Verify from manufacturer’s reference before adding any lubrication to a pilot bearing. A worn or damaged pilot bearing will make a whining or grinding noise. It will be very loud if the bearing is completely damaged. It occurs whenever the camshaft and input shaft are rotating at different speeds. A clutch release bearing is different; it will make a chirping or squealing noise as soon as the bearing touches the pressure plate’s diaphragm. Note that release bearings make noise with much less pedal travel. Endeavor to mark the position of balance wheel in relation to camshaft prior to removing it. This is to avoid disproportion when the balance wheel is reinstalled.
It is vital to removing the pilot bearing race cautiously to avoid damaging the interference fit in the camshaft. Then proceed to pack the area behind the bearing with bread and apply pressure through the opening for the input shaft. This will cause the bearing to push out efficiently. To apply pressure, utilize a rod of the similar diameter as the input shaft. Pilot Bearing Removal Tips Before you commence, the transmission has to be removed together with the clutch assembly. 1. Obtain a Pilot Bearing Removal Tool To remove the pilot bearing race, you need a removal tool which is sold on Amazon at $34.00. You don’t necessarily have to buy if you can rent it at an auto store. 2. Insert the Removal Tool Then proceed to slot in the removal tool into the pilot bearing, with the jam nut completely backed off. Turn the handle clockwise to extend the tool fingers outward in the rear of the bearing. The tool will relax beside the balance wheel which will maintain the pulling process. 3. Pull the Pilot Bearing Outward Take a tight hold of the tool and make tighter the jam nut using a wrench; you would hear a small 'pop', indicating that the bearing is starting to move from the camshaft. At this position the nut will get easier to move alongside the wrench. Maintain this act pending when the bearing is completely detached. 4. Inspect the Pilot Bearing Once the bearing has been detached examine the end of the camshaft and bearing which will be held in the tool. Let loose the bearing by spinning the tool handle counterclockwise. Employ a shop towel to wipe clean the end of the camshaft where the new bearing will be mounted. Ensure the surface is devoid of dirt and grease to keep the bearing in place. 5. Match the New Pilot Bearing Examine both the original and previous bearings ensure the inside and outside diameters are the identical. If there are disparities, the new bearing won’t fit into the camshaft and may not permit the ABS input shaft to fit within if it which in turn will not allow the alternator to be reinstalled. To ensure proper functioning of the pilot bearing, fit it over the input shaft while the alternator is removed. 6. Install the New Pilot Bearing Place the pilot bearing in the freezer for about 30 minutes to shrink it a little to help ease the installation. Then lightly place the bearing into the end of the camshaft. Make use of a hammer and metallic drift to gently tap the bearing into position. Avoid hitting the bearing to hard so as not to destroy it. 7. Lubricate the Pilot Bearing Ensure you appropriately grease the pilot bearing to guarantee it would function accurately. Apply a small quantity of axle bearing or silicone-based grease to the interior the pilot bearing. Avoid adding excess quantity of lubricant so it wouldn’t get into the clutch disc. At this state, the clutch is prepared for replacement and the ABS for re-installation. Conclusion A defective pilot bearing will make a buzzing or grinding sound, which increases in intensity when the bearing gets completely condemned. It will be very loud if the bearing is completely damaged. It happens every time the camshaft and input shaft are revolving at diverse speeds. On the other hand, a clutch release bearing will give off a tweeting or squealing noise as soon as the bearing touches the pressure plate’s diaphragm. Pilot bearings can be bearings or bushings. The bearing type can be ball, roller or needle bearings crammed in grease. If the manufacturer proposes adding bearing grease, be careful not to contaminate the clutch disk or the exterior of the balance wheel. Pilot bushings are brass and instilled with lubrication. Adding lubrication will actually increase friction. Verify from manufacturer’s reference before adding any lubrication to a pilot bearing. A worn or damaged pilot bearing will make a whining or grinding noise. It will be very loud if the bearing is completely damaged. It occurs whenever the camshaft and input shaft are rotating at different speeds. A clutch release bearing is different; it will make a chirping or squealing noise as soon as the bearing touches the pressure plate’s diaphragm. Note that release bearings make noise with much less pedal travel. Endeavor to mark the position of balance wheel in relation to camshaft prior to removing it. This is to avoid disproportion when the balance wheel is reinstalled.
6002 Bearingprice
The largest part of back wheel drive and some front wheel drive automobile with manual transmissions utilize a pilot bearing or bushing. The pilot bearing or bushing is responsible for offering ¬support to the alternator input shaft and clutch disc. When the clutch is detached, the pilot bearing permits the flywheel, also called balance wheel, to ¬maintain engine RPM even as the input shaft is halting. There are different types of pilot bearing or bushing. They include: Save your time!We can take care of your essay Proper editing and formatting Free revision, title page, and bibliography Flexible prices and money-back guarantee Place an order Conventional ball bearings Needle bearings Sintered bronze bushings Once a pilot bearing or bushing begins to develop issues, a vehicle may display certain symptoms. Now let’s look at the symptoms of bad pilot bearing. Symptoms of a Bad Pilot Bearing Symptoms of a bad pilot bad pilot bearing include: Noise Vibration No release Transmission pop out of gear Catastrophic malfunction of the alternator if not rectified Early symptoms of a bad pilot bearing might be noise every time the clutch is disconnected. The alternator may also be rigid to shift between gears or stiff to put into reverse or first gear after stopping the vehicle. When the pilot is weakening, or has malfunctioned, the input shaft will be allowed to walk around causing it to go off midpoint. This causes the alternator input duct to move about within the air brake triggering the mechanism and synchronizers to be off center resulting in the alternator popping out of gear. If the automobile has a high output engine, the misalignment will cause the input shaft gear to not connect with the counter shaft gear accurately and eventually will lead to failure of the gears. This causes the release bearing to release the clutch. The released bearing is intended to work with lowest amount friction between the revolving and fixed points of contact. Examine the bell housing area if noises come from it. You can begin by performing a road assessment of your car. Pay attention to check if you can hear noises with the air brake in gear and the clutch pedal to the floor. After that, release the clutch with the alternator in first gear. Noise under this condition indicates a worn release bearing or a worn pilot bearing. To separate the two, keep the clutch pedal on the floor and move the alternator into neutral. If you still hear the noise after this, it means the release bearing is bad. However, if the noise disappears, then it means the pilot bearing is bad. A pilot bearing noise that occurs when unhanding the clutch pedal to employ the clutch while in neutral, but disappears when the pedal is depressed is caused by a bad pilot bearing. Ensure that all other gears are in good condition. Check the clutch connection for binding. Check the clutch fork and input shafts for proper positioning. Pilot Bearing Install Direction The direction of the pilot bearing is achieved by putting the bronze pilot bushing with the taper towards the air brake and the flat end into the crank. The pilot bearing is positioned it in clean engine oil and then fixed with thinning end to alternator. Avoid using grease or anti-seize as this will plug the pores in the bushing and it will fall short. The bushings are produced using powdered bronze and saturated with oil. Some persons prefer to use only just a bearing because worn bushing can break the input shaft bearing and make it tasking to get attain 4th gear. The bearing will live longer than the clutch as long as you replace it every time the clutch is out. Removing a defective pilot bearing can be a complicated duty and may call for a unique tool. Fixing a pilot bearing is typically uncomplicated as long as you ensure it is accurately balanced. Ensure the pilot bearing race is cut by means of a cutter to eliminate all fragments from the hole. In some cases, removing a bearing may only require stuffing the middle of the bearing with thick lubricant, and using a hammer to strike a rod that sits securely in the midpoint. When the clutch is disconnected, the transmission’s input shaft and the engine’s camshaft are revolving at dissimilar rate. The pilot bearing permits this dissimilarity. This causes a defective pilot bearing to produce its most noise when the clutch pedal is totally depressed and the clutch itself is entirely disconnected. It’s situated in the middle of the balance wheel. How Far Does a Pilot Bearing Go In? The pilot bearing has an o-ring gasket around the outer border to stop lubricant from leaking out onto the disc. A pilot bearing is roughly an inch across and it seats in a small fissure that is at the back. You may have to dismantle everything since you’ll need to use a pilot bushing which is about two inches across and sits flush with the crank. Just keep driving the pilot bearing in until it’s flush with the crank end. The new one had a projection on the outside circumference. The extension allows the pilot bearing to go in one way and let it go to the right deepness which is the entire outside race into the camshaft and prevents it from being driven in excessively far. When lubricating, use only a pea-sized quantity of grease to daub around the rollers. Most excess grease standing above the rollers gets hard-pressed into the rear when the alternator is installed. Pilot Bearing Replacement Cost The pilot bearing replacement cost will vary between $7.00 and $23.00 (US) which is obtainable from Amazon or the local parts store. If you are a novice who is unable to replace the pilot bearing, then you have to contact a local auto-repair shop. They will have to remove the alternator and clutch, making the labor cost to fall between $350.00 and $650.00 (US). If putting back the whole clutch as a kit, the pilot bearing will occasionally be added. Ensure you check the contents of the kit to be certain. The longevity of a pilot bearing should match the clutch. However, bearing can have a malfunction within 45,000 to 65,000 miles. How to Remove Pilot Bearing Race Removing a pilot bearing race can be achieved with set of special tools. However, a layperson may not be willing to buy a tool they wouldn’t always use. The pilot bearing race helps support the input shaft of a manual ABS. It has to be replaced when worn to prevent destroying the input shaft seal on the alternator. If this happens, it can pump out oil from the alternator, leading to clutch breakdown. Contemporary vehicles now make use of an anti-friction bearing (roller bearing), while older automobiles employ a bronze bushing which is pushed into the end of the camshaft. It is vital to removing the pilot bearing race cautiously to avoid damaging the interference fit in the camshaft. Then proceed to pack the area behind the bearing with bread and apply pressure through the opening for the input shaft. This will cause the bearing to push out efficiently. To apply pressure, utilize a rod of the similar diameter as the input shaft. Pilot Bearing Removal Tips Before you commence, the transmission has to be removed together with the clutch assembly. 1. Obtain a Pilot Bearing Removal Tool To remove the pilot bearing race, you need a removal tool which is sold on Amazon at $34.00. You don’t necessarily have to buy if you can rent it at an auto store. 2. Insert the Removal Tool Then proceed to slot in the removal tool into the pilot bearing, with the jam nut completely backed off. Turn the handle clockwise to extend the tool fingers outward in the rear of the bearing. The tool will relax beside the balance wheel which will maintain the pulling process. 3. Pull the Pilot Bearing Outward Take a tight hold of the tool and make tighter the jam nut using a wrench; you would hear a small 'pop', indicating that the bearing is starting to move from the camshaft. At this position the nut will get easier to move alongside the wrench. Maintain this act pending when the bearing is completely detached. 4. Inspect the Pilot Bearing Once the bearing has been detached examine the end of the camshaft and bearing which will be held in the tool. Let loose the bearing by spinning the tool handle counterclockwise. Employ a shop towel to wipe clean the end of the camshaft where the new bearing will be mounted. Ensure the surface is devoid of dirt and grease to keep the bearing in place. 5. Match the New Pilot Bearing Examine both the original and previous bearings ensure the inside and outside diameters are the identical. If there are disparities, the new bearing won’t fit into the camshaft and may not permit the ABS input shaft to fit within if it which in turn will not allow the alternator to be reinstalled. To ensure proper functioning of the pilot bearing, fit it over the input shaft while the alternator is removed. 6. Install the New Pilot Bearing Place the pilot bearing in the freezer for about 30 minutes to shrink it a little to help ease the installation. Then lightly place the bearing into the end of the camshaft. Make use of a hammer and metallic drift to gently tap the bearing into position. Avoid hitting the bearing to hard so as not to destroy it. 7. Lubricate the Pilot Bearing Ensure you appropriately grease the pilot bearing to guarantee it would function accurately. Apply a small quantity of axle bearing or silicone-based grease to the interior the pilot bearing. Avoid adding excess quantity of lubricant so it wouldn’t get into the clutch disc. At this state, the clutch is prepared for replacement and the ABS for re-installation. Conclusion A defective pilot bearing will make a buzzing or grinding sound, which increases in intensity when the bearing gets completely condemned. It will be very loud if the bearing is completely damaged. It happens every time the camshaft and input shaft are revolving at diverse speeds. On the other hand, a clutch release bearing will give off a tweeting or squealing noise as soon as the bearing touches the pressure plate’s diaphragm. Pilot bearings can be bearings or bushings. The bearing type can be ball, roller or needle bearings crammed in grease. If the manufacturer proposes adding bearing grease, be careful not to contaminate the clutch disk or the exterior of the balance wheel. Pilot bushings are brass and instilled with lubrication. Adding lubrication will actually increase friction. Verify from manufacturer’s reference before adding any lubrication to a pilot bearing. A worn or damaged pilot bearing will make a whining or grinding noise. It will be very loud if the bearing is completely damaged. It occurs whenever the camshaft and input shaft are rotating at different speeds. A clutch release bearing is different; it will make a chirping or squealing noise as soon as the bearing touches the pressure plate’s diaphragm. Note that release bearings make noise with much less pedal travel. Endeavor to mark the position of balance wheel in relation to camshaft prior to removing it. This is to avoid disproportion when the balance wheel is reinstalled.
Then proceed to slot in the removal tool into the pilot bearing, with the jam nut completely backed off. Turn the handle clockwise to extend the tool fingers outward in the rear of the bearing. The tool will relax beside the balance wheel which will maintain the pulling process. 3. Pull the Pilot Bearing Outward Take a tight hold of the tool and make tighter the jam nut using a wrench; you would hear a small 'pop', indicating that the bearing is starting to move from the camshaft. At this position the nut will get easier to move alongside the wrench. Maintain this act pending when the bearing is completely detached. 4. Inspect the Pilot Bearing Once the bearing has been detached examine the end of the camshaft and bearing which will be held in the tool. Let loose the bearing by spinning the tool handle counterclockwise. Employ a shop towel to wipe clean the end of the camshaft where the new bearing will be mounted. Ensure the surface is devoid of dirt and grease to keep the bearing in place. 5. Match the New Pilot Bearing Examine both the original and previous bearings ensure the inside and outside diameters are the identical. If there are disparities, the new bearing won’t fit into the camshaft and may not permit the ABS input shaft to fit within if it which in turn will not allow the alternator to be reinstalled. To ensure proper functioning of the pilot bearing, fit it over the input shaft while the alternator is removed. 6. Install the New Pilot Bearing Place the pilot bearing in the freezer for about 30 minutes to shrink it a little to help ease the installation. Then lightly place the bearing into the end of the camshaft. Make use of a hammer and metallic drift to gently tap the bearing into position. Avoid hitting the bearing to hard so as not to destroy it. 7. Lubricate the Pilot Bearing Ensure you appropriately grease the pilot bearing to guarantee it would function accurately. Apply a small quantity of axle bearing or silicone-based grease to the interior the pilot bearing. Avoid adding excess quantity of lubricant so it wouldn’t get into the clutch disc. At this state, the clutch is prepared for replacement and the ABS for re-installation. Conclusion A defective pilot bearing will make a buzzing or grinding sound, which increases in intensity when the bearing gets completely condemned. It will be very loud if the bearing is completely damaged. It happens every time the camshaft and input shaft are revolving at diverse speeds. On the other hand, a clutch release bearing will give off a tweeting or squealing noise as soon as the bearing touches the pressure plate’s diaphragm. Pilot bearings can be bearings or bushings. The bearing type can be ball, roller or needle bearings crammed in grease. If the manufacturer proposes adding bearing grease, be careful not to contaminate the clutch disk or the exterior of the balance wheel. Pilot bushings are brass and instilled with lubrication. Adding lubrication will actually increase friction. Verify from manufacturer’s reference before adding any lubrication to a pilot bearing. A worn or damaged pilot bearing will make a whining or grinding noise. It will be very loud if the bearing is completely damaged. It occurs whenever the camshaft and input shaft are rotating at different speeds. A clutch release bearing is different; it will make a chirping or squealing noise as soon as the bearing touches the pressure plate’s diaphragm. Note that release bearings make noise with much less pedal travel. Endeavor to mark the position of balance wheel in relation to camshaft prior to removing it. This is to avoid disproportion when the balance wheel is reinstalled.
Ensure you appropriately grease the pilot bearing to guarantee it would function accurately. Apply a small quantity of axle bearing or silicone-based grease to the interior the pilot bearing. Avoid adding excess quantity of lubricant so it wouldn’t get into the clutch disc. At this state, the clutch is prepared for replacement and the ABS for re-installation. Conclusion A defective pilot bearing will make a buzzing or grinding sound, which increases in intensity when the bearing gets completely condemned. It will be very loud if the bearing is completely damaged. It happens every time the camshaft and input shaft are revolving at diverse speeds. On the other hand, a clutch release bearing will give off a tweeting or squealing noise as soon as the bearing touches the pressure plate’s diaphragm. Pilot bearings can be bearings or bushings. The bearing type can be ball, roller or needle bearings crammed in grease. If the manufacturer proposes adding bearing grease, be careful not to contaminate the clutch disk or the exterior of the balance wheel. Pilot bushings are brass and instilled with lubrication. Adding lubrication will actually increase friction. Verify from manufacturer’s reference before adding any lubrication to a pilot bearing. A worn or damaged pilot bearing will make a whining or grinding noise. It will be very loud if the bearing is completely damaged. It occurs whenever the camshaft and input shaft are rotating at different speeds. A clutch release bearing is different; it will make a chirping or squealing noise as soon as the bearing touches the pressure plate’s diaphragm. Note that release bearings make noise with much less pedal travel. Endeavor to mark the position of balance wheel in relation to camshaft prior to removing it. This is to avoid disproportion when the balance wheel is reinstalled.
When lubricating, use only a pea-sized quantity of grease to daub around the rollers. Most excess grease standing above the rollers gets hard-pressed into the rear when the alternator is installed. Pilot Bearing Replacement Cost The pilot bearing replacement cost will vary between $7.00 and $23.00 (US) which is obtainable from Amazon or the local parts store. If you are a novice who is unable to replace the pilot bearing, then you have to contact a local auto-repair shop. They will have to remove the alternator and clutch, making the labor cost to fall between $350.00 and $650.00 (US). If putting back the whole clutch as a kit, the pilot bearing will occasionally be added. Ensure you check the contents of the kit to be certain. The longevity of a pilot bearing should match the clutch. However, bearing can have a malfunction within 45,000 to 65,000 miles. How to Remove Pilot Bearing Race Removing a pilot bearing race can be achieved with set of special tools. However, a layperson may not be willing to buy a tool they wouldn’t always use. The pilot bearing race helps support the input shaft of a manual ABS. It has to be replaced when worn to prevent destroying the input shaft seal on the alternator. If this happens, it can pump out oil from the alternator, leading to clutch breakdown. Contemporary vehicles now make use of an anti-friction bearing (roller bearing), while older automobiles employ a bronze bushing which is pushed into the end of the camshaft. It is vital to removing the pilot bearing race cautiously to avoid damaging the interference fit in the camshaft. Then proceed to pack the area behind the bearing with bread and apply pressure through the opening for the input shaft. This will cause the bearing to push out efficiently. To apply pressure, utilize a rod of the similar diameter as the input shaft. Pilot Bearing Removal Tips Before you commence, the transmission has to be removed together with the clutch assembly. 1. Obtain a Pilot Bearing Removal Tool To remove the pilot bearing race, you need a removal tool which is sold on Amazon at $34.00. You don’t necessarily have to buy if you can rent it at an auto store. 2. Insert the Removal Tool Then proceed to slot in the removal tool into the pilot bearing, with the jam nut completely backed off. Turn the handle clockwise to extend the tool fingers outward in the rear of the bearing. The tool will relax beside the balance wheel which will maintain the pulling process. 3. Pull the Pilot Bearing Outward Take a tight hold of the tool and make tighter the jam nut using a wrench; you would hear a small 'pop', indicating that the bearing is starting to move from the camshaft. At this position the nut will get easier to move alongside the wrench. Maintain this act pending when the bearing is completely detached. 4. Inspect the Pilot Bearing Once the bearing has been detached examine the end of the camshaft and bearing which will be held in the tool. Let loose the bearing by spinning the tool handle counterclockwise. Employ a shop towel to wipe clean the end of the camshaft where the new bearing will be mounted. Ensure the surface is devoid of dirt and grease to keep the bearing in place. 5. Match the New Pilot Bearing Examine both the original and previous bearings ensure the inside and outside diameters are the identical. If there are disparities, the new bearing won’t fit into the camshaft and may not permit the ABS input shaft to fit within if it which in turn will not allow the alternator to be reinstalled. To ensure proper functioning of the pilot bearing, fit it over the input shaft while the alternator is removed. 6. Install the New Pilot Bearing Place the pilot bearing in the freezer for about 30 minutes to shrink it a little to help ease the installation. Then lightly place the bearing into the end of the camshaft. Make use of a hammer and metallic drift to gently tap the bearing into position. Avoid hitting the bearing to hard so as not to destroy it. 7. Lubricate the Pilot Bearing Ensure you appropriately grease the pilot bearing to guarantee it would function accurately. Apply a small quantity of axle bearing or silicone-based grease to the interior the pilot bearing. Avoid adding excess quantity of lubricant so it wouldn’t get into the clutch disc. At this state, the clutch is prepared for replacement and the ABS for re-installation. Conclusion A defective pilot bearing will make a buzzing or grinding sound, which increases in intensity when the bearing gets completely condemned. It will be very loud if the bearing is completely damaged. It happens every time the camshaft and input shaft are revolving at diverse speeds. On the other hand, a clutch release bearing will give off a tweeting or squealing noise as soon as the bearing touches the pressure plate’s diaphragm. Pilot bearings can be bearings or bushings. The bearing type can be ball, roller or needle bearings crammed in grease. If the manufacturer proposes adding bearing grease, be careful not to contaminate the clutch disk or the exterior of the balance wheel. Pilot bushings are brass and instilled with lubrication. Adding lubrication will actually increase friction. Verify from manufacturer’s reference before adding any lubrication to a pilot bearing. A worn or damaged pilot bearing will make a whining or grinding noise. It will be very loud if the bearing is completely damaged. It occurs whenever the camshaft and input shaft are rotating at different speeds. A clutch release bearing is different; it will make a chirping or squealing noise as soon as the bearing touches the pressure plate’s diaphragm. Note that release bearings make noise with much less pedal travel. Endeavor to mark the position of balance wheel in relation to camshaft prior to removing it. This is to avoid disproportion when the balance wheel is reinstalled.
Before you commence, the transmission has to be removed together with the clutch assembly. 1. Obtain a Pilot Bearing Removal Tool To remove the pilot bearing race, you need a removal tool which is sold on Amazon at $34.00. You don’t necessarily have to buy if you can rent it at an auto store. 2. Insert the Removal Tool Then proceed to slot in the removal tool into the pilot bearing, with the jam nut completely backed off. Turn the handle clockwise to extend the tool fingers outward in the rear of the bearing. The tool will relax beside the balance wheel which will maintain the pulling process. 3. Pull the Pilot Bearing Outward Take a tight hold of the tool and make tighter the jam nut using a wrench; you would hear a small 'pop', indicating that the bearing is starting to move from the camshaft. At this position the nut will get easier to move alongside the wrench. Maintain this act pending when the bearing is completely detached. 4. Inspect the Pilot Bearing Once the bearing has been detached examine the end of the camshaft and bearing which will be held in the tool. Let loose the bearing by spinning the tool handle counterclockwise. Employ a shop towel to wipe clean the end of the camshaft where the new bearing will be mounted. Ensure the surface is devoid of dirt and grease to keep the bearing in place. 5. Match the New Pilot Bearing Examine both the original and previous bearings ensure the inside and outside diameters are the identical. If there are disparities, the new bearing won’t fit into the camshaft and may not permit the ABS input shaft to fit within if it which in turn will not allow the alternator to be reinstalled. To ensure proper functioning of the pilot bearing, fit it over the input shaft while the alternator is removed. 6. Install the New Pilot Bearing Place the pilot bearing in the freezer for about 30 minutes to shrink it a little to help ease the installation. Then lightly place the bearing into the end of the camshaft. Make use of a hammer and metallic drift to gently tap the bearing into position. Avoid hitting the bearing to hard so as not to destroy it. 7. Lubricate the Pilot Bearing Ensure you appropriately grease the pilot bearing to guarantee it would function accurately. Apply a small quantity of axle bearing or silicone-based grease to the interior the pilot bearing. Avoid adding excess quantity of lubricant so it wouldn’t get into the clutch disc. At this state, the clutch is prepared for replacement and the ABS for re-installation. Conclusion A defective pilot bearing will make a buzzing or grinding sound, which increases in intensity when the bearing gets completely condemned. It will be very loud if the bearing is completely damaged. It happens every time the camshaft and input shaft are revolving at diverse speeds. On the other hand, a clutch release bearing will give off a tweeting or squealing noise as soon as the bearing touches the pressure plate’s diaphragm. Pilot bearings can be bearings or bushings. The bearing type can be ball, roller or needle bearings crammed in grease. If the manufacturer proposes adding bearing grease, be careful not to contaminate the clutch disk or the exterior of the balance wheel. Pilot bushings are brass and instilled with lubrication. Adding lubrication will actually increase friction. Verify from manufacturer’s reference before adding any lubrication to a pilot bearing. A worn or damaged pilot bearing will make a whining or grinding noise. It will be very loud if the bearing is completely damaged. It occurs whenever the camshaft and input shaft are rotating at different speeds. A clutch release bearing is different; it will make a chirping or squealing noise as soon as the bearing touches the pressure plate’s diaphragm. Note that release bearings make noise with much less pedal travel. Endeavor to mark the position of balance wheel in relation to camshaft prior to removing it. This is to avoid disproportion when the balance wheel is reinstalled.
Take a tight hold of the tool and make tighter the jam nut using a wrench; you would hear a small 'pop', indicating that the bearing is starting to move from the camshaft. At this position the nut will get easier to move alongside the wrench. Maintain this act pending when the bearing is completely detached. 4. Inspect the Pilot Bearing Once the bearing has been detached examine the end of the camshaft and bearing which will be held in the tool. Let loose the bearing by spinning the tool handle counterclockwise. Employ a shop towel to wipe clean the end of the camshaft where the new bearing will be mounted. Ensure the surface is devoid of dirt and grease to keep the bearing in place. 5. Match the New Pilot Bearing Examine both the original and previous bearings ensure the inside and outside diameters are the identical. If there are disparities, the new bearing won’t fit into the camshaft and may not permit the ABS input shaft to fit within if it which in turn will not allow the alternator to be reinstalled. To ensure proper functioning of the pilot bearing, fit it over the input shaft while the alternator is removed. 6. Install the New Pilot Bearing Place the pilot bearing in the freezer for about 30 minutes to shrink it a little to help ease the installation. Then lightly place the bearing into the end of the camshaft. Make use of a hammer and metallic drift to gently tap the bearing into position. Avoid hitting the bearing to hard so as not to destroy it. 7. Lubricate the Pilot Bearing Ensure you appropriately grease the pilot bearing to guarantee it would function accurately. Apply a small quantity of axle bearing or silicone-based grease to the interior the pilot bearing. Avoid adding excess quantity of lubricant so it wouldn’t get into the clutch disc. At this state, the clutch is prepared for replacement and the ABS for re-installation. Conclusion A defective pilot bearing will make a buzzing or grinding sound, which increases in intensity when the bearing gets completely condemned. It will be very loud if the bearing is completely damaged. It happens every time the camshaft and input shaft are revolving at diverse speeds. On the other hand, a clutch release bearing will give off a tweeting or squealing noise as soon as the bearing touches the pressure plate’s diaphragm. Pilot bearings can be bearings or bushings. The bearing type can be ball, roller or needle bearings crammed in grease. If the manufacturer proposes adding bearing grease, be careful not to contaminate the clutch disk or the exterior of the balance wheel. Pilot bushings are brass and instilled with lubrication. Adding lubrication will actually increase friction. Verify from manufacturer’s reference before adding any lubrication to a pilot bearing. A worn or damaged pilot bearing will make a whining or grinding noise. It will be very loud if the bearing is completely damaged. It occurs whenever the camshaft and input shaft are rotating at different speeds. A clutch release bearing is different; it will make a chirping or squealing noise as soon as the bearing touches the pressure plate’s diaphragm. Note that release bearings make noise with much less pedal travel. Endeavor to mark the position of balance wheel in relation to camshaft prior to removing it. This is to avoid disproportion when the balance wheel is reinstalled.
2021528 — Bearing condition monitoring & lubrication: Ultrasound provides an early warning of bearing or lubrication failure.
6001Bearing
If the automobile has a high output engine, the misalignment will cause the input shaft gear to not connect with the counter shaft gear accurately and eventually will lead to failure of the gears. This causes the release bearing to release the clutch. The released bearing is intended to work with lowest amount friction between the revolving and fixed points of contact. Examine the bell housing area if noises come from it. You can begin by performing a road assessment of your car. Pay attention to check if you can hear noises with the air brake in gear and the clutch pedal to the floor. After that, release the clutch with the alternator in first gear. Noise under this condition indicates a worn release bearing or a worn pilot bearing. To separate the two, keep the clutch pedal on the floor and move the alternator into neutral. If you still hear the noise after this, it means the release bearing is bad. However, if the noise disappears, then it means the pilot bearing is bad. A pilot bearing noise that occurs when unhanding the clutch pedal to employ the clutch while in neutral, but disappears when the pedal is depressed is caused by a bad pilot bearing. Ensure that all other gears are in good condition. Check the clutch connection for binding. Check the clutch fork and input shafts for proper positioning. Pilot Bearing Install Direction The direction of the pilot bearing is achieved by putting the bronze pilot bushing with the taper towards the air brake and the flat end into the crank. The pilot bearing is positioned it in clean engine oil and then fixed with thinning end to alternator. Avoid using grease or anti-seize as this will plug the pores in the bushing and it will fall short. The bushings are produced using powdered bronze and saturated with oil. Some persons prefer to use only just a bearing because worn bushing can break the input shaft bearing and make it tasking to get attain 4th gear. The bearing will live longer than the clutch as long as you replace it every time the clutch is out. Removing a defective pilot bearing can be a complicated duty and may call for a unique tool. Fixing a pilot bearing is typically uncomplicated as long as you ensure it is accurately balanced. Ensure the pilot bearing race is cut by means of a cutter to eliminate all fragments from the hole. In some cases, removing a bearing may only require stuffing the middle of the bearing with thick lubricant, and using a hammer to strike a rod that sits securely in the midpoint. When the clutch is disconnected, the transmission’s input shaft and the engine’s camshaft are revolving at dissimilar rate. The pilot bearing permits this dissimilarity. This causes a defective pilot bearing to produce its most noise when the clutch pedal is totally depressed and the clutch itself is entirely disconnected. It’s situated in the middle of the balance wheel. How Far Does a Pilot Bearing Go In? The pilot bearing has an o-ring gasket around the outer border to stop lubricant from leaking out onto the disc. A pilot bearing is roughly an inch across and it seats in a small fissure that is at the back. You may have to dismantle everything since you’ll need to use a pilot bushing which is about two inches across and sits flush with the crank. Just keep driving the pilot bearing in until it’s flush with the crank end. The new one had a projection on the outside circumference. The extension allows the pilot bearing to go in one way and let it go to the right deepness which is the entire outside race into the camshaft and prevents it from being driven in excessively far. When lubricating, use only a pea-sized quantity of grease to daub around the rollers. Most excess grease standing above the rollers gets hard-pressed into the rear when the alternator is installed. Pilot Bearing Replacement Cost The pilot bearing replacement cost will vary between $7.00 and $23.00 (US) which is obtainable from Amazon or the local parts store. If you are a novice who is unable to replace the pilot bearing, then you have to contact a local auto-repair shop. They will have to remove the alternator and clutch, making the labor cost to fall between $350.00 and $650.00 (US). If putting back the whole clutch as a kit, the pilot bearing will occasionally be added. Ensure you check the contents of the kit to be certain. The longevity of a pilot bearing should match the clutch. However, bearing can have a malfunction within 45,000 to 65,000 miles. How to Remove Pilot Bearing Race Removing a pilot bearing race can be achieved with set of special tools. However, a layperson may not be willing to buy a tool they wouldn’t always use. The pilot bearing race helps support the input shaft of a manual ABS. It has to be replaced when worn to prevent destroying the input shaft seal on the alternator. If this happens, it can pump out oil from the alternator, leading to clutch breakdown. Contemporary vehicles now make use of an anti-friction bearing (roller bearing), while older automobiles employ a bronze bushing which is pushed into the end of the camshaft. It is vital to removing the pilot bearing race cautiously to avoid damaging the interference fit in the camshaft. Then proceed to pack the area behind the bearing with bread and apply pressure through the opening for the input shaft. This will cause the bearing to push out efficiently. To apply pressure, utilize a rod of the similar diameter as the input shaft. Pilot Bearing Removal Tips Before you commence, the transmission has to be removed together with the clutch assembly. 1. Obtain a Pilot Bearing Removal Tool To remove the pilot bearing race, you need a removal tool which is sold on Amazon at $34.00. You don’t necessarily have to buy if you can rent it at an auto store. 2. Insert the Removal Tool Then proceed to slot in the removal tool into the pilot bearing, with the jam nut completely backed off. Turn the handle clockwise to extend the tool fingers outward in the rear of the bearing. The tool will relax beside the balance wheel which will maintain the pulling process. 3. Pull the Pilot Bearing Outward Take a tight hold of the tool and make tighter the jam nut using a wrench; you would hear a small 'pop', indicating that the bearing is starting to move from the camshaft. At this position the nut will get easier to move alongside the wrench. Maintain this act pending when the bearing is completely detached. 4. Inspect the Pilot Bearing Once the bearing has been detached examine the end of the camshaft and bearing which will be held in the tool. Let loose the bearing by spinning the tool handle counterclockwise. Employ a shop towel to wipe clean the end of the camshaft where the new bearing will be mounted. Ensure the surface is devoid of dirt and grease to keep the bearing in place. 5. Match the New Pilot Bearing Examine both the original and previous bearings ensure the inside and outside diameters are the identical. If there are disparities, the new bearing won’t fit into the camshaft and may not permit the ABS input shaft to fit within if it which in turn will not allow the alternator to be reinstalled. To ensure proper functioning of the pilot bearing, fit it over the input shaft while the alternator is removed. 6. Install the New Pilot Bearing Place the pilot bearing in the freezer for about 30 minutes to shrink it a little to help ease the installation. Then lightly place the bearing into the end of the camshaft. Make use of a hammer and metallic drift to gently tap the bearing into position. Avoid hitting the bearing to hard so as not to destroy it. 7. Lubricate the Pilot Bearing Ensure you appropriately grease the pilot bearing to guarantee it would function accurately. Apply a small quantity of axle bearing or silicone-based grease to the interior the pilot bearing. Avoid adding excess quantity of lubricant so it wouldn’t get into the clutch disc. At this state, the clutch is prepared for replacement and the ABS for re-installation. Conclusion A defective pilot bearing will make a buzzing or grinding sound, which increases in intensity when the bearing gets completely condemned. It will be very loud if the bearing is completely damaged. It happens every time the camshaft and input shaft are revolving at diverse speeds. On the other hand, a clutch release bearing will give off a tweeting or squealing noise as soon as the bearing touches the pressure plate’s diaphragm. Pilot bearings can be bearings or bushings. The bearing type can be ball, roller or needle bearings crammed in grease. If the manufacturer proposes adding bearing grease, be careful not to contaminate the clutch disk or the exterior of the balance wheel. Pilot bushings are brass and instilled with lubrication. Adding lubrication will actually increase friction. Verify from manufacturer’s reference before adding any lubrication to a pilot bearing. A worn or damaged pilot bearing will make a whining or grinding noise. It will be very loud if the bearing is completely damaged. It occurs whenever the camshaft and input shaft are rotating at different speeds. A clutch release bearing is different; it will make a chirping or squealing noise as soon as the bearing touches the pressure plate’s diaphragm. Note that release bearings make noise with much less pedal travel. Endeavor to mark the position of balance wheel in relation to camshaft prior to removing it. This is to avoid disproportion when the balance wheel is reinstalled.
The direction of the pilot bearing is achieved by putting the bronze pilot bushing with the taper towards the air brake and the flat end into the crank. The pilot bearing is positioned it in clean engine oil and then fixed with thinning end to alternator. Avoid using grease or anti-seize as this will plug the pores in the bushing and it will fall short. The bushings are produced using powdered bronze and saturated with oil. Some persons prefer to use only just a bearing because worn bushing can break the input shaft bearing and make it tasking to get attain 4th gear. The bearing will live longer than the clutch as long as you replace it every time the clutch is out. Removing a defective pilot bearing can be a complicated duty and may call for a unique tool. Fixing a pilot bearing is typically uncomplicated as long as you ensure it is accurately balanced. Ensure the pilot bearing race is cut by means of a cutter to eliminate all fragments from the hole. In some cases, removing a bearing may only require stuffing the middle of the bearing with thick lubricant, and using a hammer to strike a rod that sits securely in the midpoint. When the clutch is disconnected, the transmission’s input shaft and the engine’s camshaft are revolving at dissimilar rate. The pilot bearing permits this dissimilarity. This causes a defective pilot bearing to produce its most noise when the clutch pedal is totally depressed and the clutch itself is entirely disconnected. It’s situated in the middle of the balance wheel. How Far Does a Pilot Bearing Go In? The pilot bearing has an o-ring gasket around the outer border to stop lubricant from leaking out onto the disc. A pilot bearing is roughly an inch across and it seats in a small fissure that is at the back. You may have to dismantle everything since you’ll need to use a pilot bushing which is about two inches across and sits flush with the crank. Just keep driving the pilot bearing in until it’s flush with the crank end. The new one had a projection on the outside circumference. The extension allows the pilot bearing to go in one way and let it go to the right deepness which is the entire outside race into the camshaft and prevents it from being driven in excessively far. When lubricating, use only a pea-sized quantity of grease to daub around the rollers. Most excess grease standing above the rollers gets hard-pressed into the rear when the alternator is installed. Pilot Bearing Replacement Cost The pilot bearing replacement cost will vary between $7.00 and $23.00 (US) which is obtainable from Amazon or the local parts store. If you are a novice who is unable to replace the pilot bearing, then you have to contact a local auto-repair shop. They will have to remove the alternator and clutch, making the labor cost to fall between $350.00 and $650.00 (US). If putting back the whole clutch as a kit, the pilot bearing will occasionally be added. Ensure you check the contents of the kit to be certain. The longevity of a pilot bearing should match the clutch. However, bearing can have a malfunction within 45,000 to 65,000 miles. How to Remove Pilot Bearing Race Removing a pilot bearing race can be achieved with set of special tools. However, a layperson may not be willing to buy a tool they wouldn’t always use. The pilot bearing race helps support the input shaft of a manual ABS. It has to be replaced when worn to prevent destroying the input shaft seal on the alternator. If this happens, it can pump out oil from the alternator, leading to clutch breakdown. Contemporary vehicles now make use of an anti-friction bearing (roller bearing), while older automobiles employ a bronze bushing which is pushed into the end of the camshaft. It is vital to removing the pilot bearing race cautiously to avoid damaging the interference fit in the camshaft. Then proceed to pack the area behind the bearing with bread and apply pressure through the opening for the input shaft. This will cause the bearing to push out efficiently. To apply pressure, utilize a rod of the similar diameter as the input shaft. Pilot Bearing Removal Tips Before you commence, the transmission has to be removed together with the clutch assembly. 1. Obtain a Pilot Bearing Removal Tool To remove the pilot bearing race, you need a removal tool which is sold on Amazon at $34.00. You don’t necessarily have to buy if you can rent it at an auto store. 2. Insert the Removal Tool Then proceed to slot in the removal tool into the pilot bearing, with the jam nut completely backed off. Turn the handle clockwise to extend the tool fingers outward in the rear of the bearing. The tool will relax beside the balance wheel which will maintain the pulling process. 3. Pull the Pilot Bearing Outward Take a tight hold of the tool and make tighter the jam nut using a wrench; you would hear a small 'pop', indicating that the bearing is starting to move from the camshaft. At this position the nut will get easier to move alongside the wrench. Maintain this act pending when the bearing is completely detached. 4. Inspect the Pilot Bearing Once the bearing has been detached examine the end of the camshaft and bearing which will be held in the tool. Let loose the bearing by spinning the tool handle counterclockwise. Employ a shop towel to wipe clean the end of the camshaft where the new bearing will be mounted. Ensure the surface is devoid of dirt and grease to keep the bearing in place. 5. Match the New Pilot Bearing Examine both the original and previous bearings ensure the inside and outside diameters are the identical. If there are disparities, the new bearing won’t fit into the camshaft and may not permit the ABS input shaft to fit within if it which in turn will not allow the alternator to be reinstalled. To ensure proper functioning of the pilot bearing, fit it over the input shaft while the alternator is removed. 6. Install the New Pilot Bearing Place the pilot bearing in the freezer for about 30 minutes to shrink it a little to help ease the installation. Then lightly place the bearing into the end of the camshaft. Make use of a hammer and metallic drift to gently tap the bearing into position. Avoid hitting the bearing to hard so as not to destroy it. 7. Lubricate the Pilot Bearing Ensure you appropriately grease the pilot bearing to guarantee it would function accurately. Apply a small quantity of axle bearing or silicone-based grease to the interior the pilot bearing. Avoid adding excess quantity of lubricant so it wouldn’t get into the clutch disc. At this state, the clutch is prepared for replacement and the ABS for re-installation. Conclusion A defective pilot bearing will make a buzzing or grinding sound, which increases in intensity when the bearing gets completely condemned. It will be very loud if the bearing is completely damaged. It happens every time the camshaft and input shaft are revolving at diverse speeds. On the other hand, a clutch release bearing will give off a tweeting or squealing noise as soon as the bearing touches the pressure plate’s diaphragm. Pilot bearings can be bearings or bushings. The bearing type can be ball, roller or needle bearings crammed in grease. If the manufacturer proposes adding bearing grease, be careful not to contaminate the clutch disk or the exterior of the balance wheel. Pilot bushings are brass and instilled with lubrication. Adding lubrication will actually increase friction. Verify from manufacturer’s reference before adding any lubrication to a pilot bearing. A worn or damaged pilot bearing will make a whining or grinding noise. It will be very loud if the bearing is completely damaged. It occurs whenever the camshaft and input shaft are rotating at different speeds. A clutch release bearing is different; it will make a chirping or squealing noise as soon as the bearing touches the pressure plate’s diaphragm. Note that release bearings make noise with much less pedal travel. Endeavor to mark the position of balance wheel in relation to camshaft prior to removing it. This is to avoid disproportion when the balance wheel is reinstalled.
Jan 11, 2005 — I believe the bushings in the swing arm are not replacable. You'd have to replace the whole arm. And you can get the arm for far less at bmaautoparts.com.
When the clutch is disconnected, the transmission’s input shaft and the engine’s camshaft are revolving at dissimilar rate. The pilot bearing permits this dissimilarity. This causes a defective pilot bearing to produce its most noise when the clutch pedal is totally depressed and the clutch itself is entirely disconnected. It’s situated in the middle of the balance wheel. How Far Does a Pilot Bearing Go In? The pilot bearing has an o-ring gasket around the outer border to stop lubricant from leaking out onto the disc. A pilot bearing is roughly an inch across and it seats in a small fissure that is at the back. You may have to dismantle everything since you’ll need to use a pilot bushing which is about two inches across and sits flush with the crank. Just keep driving the pilot bearing in until it’s flush with the crank end. The new one had a projection on the outside circumference. The extension allows the pilot bearing to go in one way and let it go to the right deepness which is the entire outside race into the camshaft and prevents it from being driven in excessively far. When lubricating, use only a pea-sized quantity of grease to daub around the rollers. Most excess grease standing above the rollers gets hard-pressed into the rear when the alternator is installed. Pilot Bearing Replacement Cost The pilot bearing replacement cost will vary between $7.00 and $23.00 (US) which is obtainable from Amazon or the local parts store. If you are a novice who is unable to replace the pilot bearing, then you have to contact a local auto-repair shop. They will have to remove the alternator and clutch, making the labor cost to fall between $350.00 and $650.00 (US). If putting back the whole clutch as a kit, the pilot bearing will occasionally be added. Ensure you check the contents of the kit to be certain. The longevity of a pilot bearing should match the clutch. However, bearing can have a malfunction within 45,000 to 65,000 miles. How to Remove Pilot Bearing Race Removing a pilot bearing race can be achieved with set of special tools. However, a layperson may not be willing to buy a tool they wouldn’t always use. The pilot bearing race helps support the input shaft of a manual ABS. It has to be replaced when worn to prevent destroying the input shaft seal on the alternator. If this happens, it can pump out oil from the alternator, leading to clutch breakdown. Contemporary vehicles now make use of an anti-friction bearing (roller bearing), while older automobiles employ a bronze bushing which is pushed into the end of the camshaft. It is vital to removing the pilot bearing race cautiously to avoid damaging the interference fit in the camshaft. Then proceed to pack the area behind the bearing with bread and apply pressure through the opening for the input shaft. This will cause the bearing to push out efficiently. To apply pressure, utilize a rod of the similar diameter as the input shaft. Pilot Bearing Removal Tips Before you commence, the transmission has to be removed together with the clutch assembly. 1. Obtain a Pilot Bearing Removal Tool To remove the pilot bearing race, you need a removal tool which is sold on Amazon at $34.00. You don’t necessarily have to buy if you can rent it at an auto store. 2. Insert the Removal Tool Then proceed to slot in the removal tool into the pilot bearing, with the jam nut completely backed off. Turn the handle clockwise to extend the tool fingers outward in the rear of the bearing. The tool will relax beside the balance wheel which will maintain the pulling process. 3. Pull the Pilot Bearing Outward Take a tight hold of the tool and make tighter the jam nut using a wrench; you would hear a small 'pop', indicating that the bearing is starting to move from the camshaft. At this position the nut will get easier to move alongside the wrench. Maintain this act pending when the bearing is completely detached. 4. Inspect the Pilot Bearing Once the bearing has been detached examine the end of the camshaft and bearing which will be held in the tool. Let loose the bearing by spinning the tool handle counterclockwise. Employ a shop towel to wipe clean the end of the camshaft where the new bearing will be mounted. Ensure the surface is devoid of dirt and grease to keep the bearing in place. 5. Match the New Pilot Bearing Examine both the original and previous bearings ensure the inside and outside diameters are the identical. If there are disparities, the new bearing won’t fit into the camshaft and may not permit the ABS input shaft to fit within if it which in turn will not allow the alternator to be reinstalled. To ensure proper functioning of the pilot bearing, fit it over the input shaft while the alternator is removed. 6. Install the New Pilot Bearing Place the pilot bearing in the freezer for about 30 minutes to shrink it a little to help ease the installation. Then lightly place the bearing into the end of the camshaft. Make use of a hammer and metallic drift to gently tap the bearing into position. Avoid hitting the bearing to hard so as not to destroy it. 7. Lubricate the Pilot Bearing Ensure you appropriately grease the pilot bearing to guarantee it would function accurately. Apply a small quantity of axle bearing or silicone-based grease to the interior the pilot bearing. Avoid adding excess quantity of lubricant so it wouldn’t get into the clutch disc. At this state, the clutch is prepared for replacement and the ABS for re-installation. Conclusion A defective pilot bearing will make a buzzing or grinding sound, which increases in intensity when the bearing gets completely condemned. It will be very loud if the bearing is completely damaged. It happens every time the camshaft and input shaft are revolving at diverse speeds. On the other hand, a clutch release bearing will give off a tweeting or squealing noise as soon as the bearing touches the pressure plate’s diaphragm. Pilot bearings can be bearings or bushings. The bearing type can be ball, roller or needle bearings crammed in grease. If the manufacturer proposes adding bearing grease, be careful not to contaminate the clutch disk or the exterior of the balance wheel. Pilot bushings are brass and instilled with lubrication. Adding lubrication will actually increase friction. Verify from manufacturer’s reference before adding any lubrication to a pilot bearing. A worn or damaged pilot bearing will make a whining or grinding noise. It will be very loud if the bearing is completely damaged. It occurs whenever the camshaft and input shaft are rotating at different speeds. A clutch release bearing is different; it will make a chirping or squealing noise as soon as the bearing touches the pressure plate’s diaphragm. Note that release bearings make noise with much less pedal travel. Endeavor to mark the position of balance wheel in relation to camshaft prior to removing it. This is to avoid disproportion when the balance wheel is reinstalled.
Symptoms of a bad pilot bad pilot bearing include: Noise Vibration No release Transmission pop out of gear Catastrophic malfunction of the alternator if not rectified Early symptoms of a bad pilot bearing might be noise every time the clutch is disconnected. The alternator may also be rigid to shift between gears or stiff to put into reverse or first gear after stopping the vehicle. When the pilot is weakening, or has malfunctioned, the input shaft will be allowed to walk around causing it to go off midpoint. This causes the alternator input duct to move about within the air brake triggering the mechanism and synchronizers to be off center resulting in the alternator popping out of gear. If the automobile has a high output engine, the misalignment will cause the input shaft gear to not connect with the counter shaft gear accurately and eventually will lead to failure of the gears. This causes the release bearing to release the clutch. The released bearing is intended to work with lowest amount friction between the revolving and fixed points of contact. Examine the bell housing area if noises come from it. You can begin by performing a road assessment of your car. Pay attention to check if you can hear noises with the air brake in gear and the clutch pedal to the floor. After that, release the clutch with the alternator in first gear. Noise under this condition indicates a worn release bearing or a worn pilot bearing. To separate the two, keep the clutch pedal on the floor and move the alternator into neutral. If you still hear the noise after this, it means the release bearing is bad. However, if the noise disappears, then it means the pilot bearing is bad. A pilot bearing noise that occurs when unhanding the clutch pedal to employ the clutch while in neutral, but disappears when the pedal is depressed is caused by a bad pilot bearing. Ensure that all other gears are in good condition. Check the clutch connection for binding. Check the clutch fork and input shafts for proper positioning. Pilot Bearing Install Direction The direction of the pilot bearing is achieved by putting the bronze pilot bushing with the taper towards the air brake and the flat end into the crank. The pilot bearing is positioned it in clean engine oil and then fixed with thinning end to alternator. Avoid using grease or anti-seize as this will plug the pores in the bushing and it will fall short. The bushings are produced using powdered bronze and saturated with oil. Some persons prefer to use only just a bearing because worn bushing can break the input shaft bearing and make it tasking to get attain 4th gear. The bearing will live longer than the clutch as long as you replace it every time the clutch is out. Removing a defective pilot bearing can be a complicated duty and may call for a unique tool. Fixing a pilot bearing is typically uncomplicated as long as you ensure it is accurately balanced. Ensure the pilot bearing race is cut by means of a cutter to eliminate all fragments from the hole. In some cases, removing a bearing may only require stuffing the middle of the bearing with thick lubricant, and using a hammer to strike a rod that sits securely in the midpoint. When the clutch is disconnected, the transmission’s input shaft and the engine’s camshaft are revolving at dissimilar rate. The pilot bearing permits this dissimilarity. This causes a defective pilot bearing to produce its most noise when the clutch pedal is totally depressed and the clutch itself is entirely disconnected. It’s situated in the middle of the balance wheel. How Far Does a Pilot Bearing Go In? The pilot bearing has an o-ring gasket around the outer border to stop lubricant from leaking out onto the disc. A pilot bearing is roughly an inch across and it seats in a small fissure that is at the back. You may have to dismantle everything since you’ll need to use a pilot bushing which is about two inches across and sits flush with the crank. Just keep driving the pilot bearing in until it’s flush with the crank end. The new one had a projection on the outside circumference. The extension allows the pilot bearing to go in one way and let it go to the right deepness which is the entire outside race into the camshaft and prevents it from being driven in excessively far. When lubricating, use only a pea-sized quantity of grease to daub around the rollers. Most excess grease standing above the rollers gets hard-pressed into the rear when the alternator is installed. Pilot Bearing Replacement Cost The pilot bearing replacement cost will vary between $7.00 and $23.00 (US) which is obtainable from Amazon or the local parts store. If you are a novice who is unable to replace the pilot bearing, then you have to contact a local auto-repair shop. They will have to remove the alternator and clutch, making the labor cost to fall between $350.00 and $650.00 (US). If putting back the whole clutch as a kit, the pilot bearing will occasionally be added. Ensure you check the contents of the kit to be certain. The longevity of a pilot bearing should match the clutch. However, bearing can have a malfunction within 45,000 to 65,000 miles. How to Remove Pilot Bearing Race Removing a pilot bearing race can be achieved with set of special tools. However, a layperson may not be willing to buy a tool they wouldn’t always use. The pilot bearing race helps support the input shaft of a manual ABS. It has to be replaced when worn to prevent destroying the input shaft seal on the alternator. If this happens, it can pump out oil from the alternator, leading to clutch breakdown. Contemporary vehicles now make use of an anti-friction bearing (roller bearing), while older automobiles employ a bronze bushing which is pushed into the end of the camshaft. It is vital to removing the pilot bearing race cautiously to avoid damaging the interference fit in the camshaft. Then proceed to pack the area behind the bearing with bread and apply pressure through the opening for the input shaft. This will cause the bearing to push out efficiently. To apply pressure, utilize a rod of the similar diameter as the input shaft. Pilot Bearing Removal Tips Before you commence, the transmission has to be removed together with the clutch assembly. 1. Obtain a Pilot Bearing Removal Tool To remove the pilot bearing race, you need a removal tool which is sold on Amazon at $34.00. You don’t necessarily have to buy if you can rent it at an auto store. 2. Insert the Removal Tool Then proceed to slot in the removal tool into the pilot bearing, with the jam nut completely backed off. Turn the handle clockwise to extend the tool fingers outward in the rear of the bearing. The tool will relax beside the balance wheel which will maintain the pulling process. 3. Pull the Pilot Bearing Outward Take a tight hold of the tool and make tighter the jam nut using a wrench; you would hear a small 'pop', indicating that the bearing is starting to move from the camshaft. At this position the nut will get easier to move alongside the wrench. Maintain this act pending when the bearing is completely detached. 4. Inspect the Pilot Bearing Once the bearing has been detached examine the end of the camshaft and bearing which will be held in the tool. Let loose the bearing by spinning the tool handle counterclockwise. Employ a shop towel to wipe clean the end of the camshaft where the new bearing will be mounted. Ensure the surface is devoid of dirt and grease to keep the bearing in place. 5. Match the New Pilot Bearing Examine both the original and previous bearings ensure the inside and outside diameters are the identical. If there are disparities, the new bearing won’t fit into the camshaft and may not permit the ABS input shaft to fit within if it which in turn will not allow the alternator to be reinstalled. To ensure proper functioning of the pilot bearing, fit it over the input shaft while the alternator is removed. 6. Install the New Pilot Bearing Place the pilot bearing in the freezer for about 30 minutes to shrink it a little to help ease the installation. Then lightly place the bearing into the end of the camshaft. Make use of a hammer and metallic drift to gently tap the bearing into position. Avoid hitting the bearing to hard so as not to destroy it. 7. Lubricate the Pilot Bearing Ensure you appropriately grease the pilot bearing to guarantee it would function accurately. Apply a small quantity of axle bearing or silicone-based grease to the interior the pilot bearing. Avoid adding excess quantity of lubricant so it wouldn’t get into the clutch disc. At this state, the clutch is prepared for replacement and the ABS for re-installation. Conclusion A defective pilot bearing will make a buzzing or grinding sound, which increases in intensity when the bearing gets completely condemned. It will be very loud if the bearing is completely damaged. It happens every time the camshaft and input shaft are revolving at diverse speeds. On the other hand, a clutch release bearing will give off a tweeting or squealing noise as soon as the bearing touches the pressure plate’s diaphragm. Pilot bearings can be bearings or bushings. The bearing type can be ball, roller or needle bearings crammed in grease. If the manufacturer proposes adding bearing grease, be careful not to contaminate the clutch disk or the exterior of the balance wheel. Pilot bushings are brass and instilled with lubrication. Adding lubrication will actually increase friction. Verify from manufacturer’s reference before adding any lubrication to a pilot bearing. A worn or damaged pilot bearing will make a whining or grinding noise. It will be very loud if the bearing is completely damaged. It occurs whenever the camshaft and input shaft are rotating at different speeds. A clutch release bearing is different; it will make a chirping or squealing noise as soon as the bearing touches the pressure plate’s diaphragm. Note that release bearings make noise with much less pedal travel. Endeavor to mark the position of balance wheel in relation to camshaft prior to removing it. This is to avoid disproportion when the balance wheel is reinstalled.
Falcon T581 - Grade 1 Heavy Duty Storeroom Lock ... MSRP: Now: $265.00. Was: — You save ... Lever: Required. Choose Options, Dane (D), Quantum (Q). Finish: Required.
Once a pilot bearing or bushing begins to develop issues, a vehicle may display certain symptoms. Now let’s look at the symptoms of bad pilot bearing. Symptoms of a Bad Pilot Bearing Symptoms of a bad pilot bad pilot bearing include: Noise Vibration No release Transmission pop out of gear Catastrophic malfunction of the alternator if not rectified Early symptoms of a bad pilot bearing might be noise every time the clutch is disconnected. The alternator may also be rigid to shift between gears or stiff to put into reverse or first gear after stopping the vehicle. When the pilot is weakening, or has malfunctioned, the input shaft will be allowed to walk around causing it to go off midpoint. This causes the alternator input duct to move about within the air brake triggering the mechanism and synchronizers to be off center resulting in the alternator popping out of gear. If the automobile has a high output engine, the misalignment will cause the input shaft gear to not connect with the counter shaft gear accurately and eventually will lead to failure of the gears. This causes the release bearing to release the clutch. The released bearing is intended to work with lowest amount friction between the revolving and fixed points of contact. Examine the bell housing area if noises come from it. You can begin by performing a road assessment of your car. Pay attention to check if you can hear noises with the air brake in gear and the clutch pedal to the floor. After that, release the clutch with the alternator in first gear. Noise under this condition indicates a worn release bearing or a worn pilot bearing. To separate the two, keep the clutch pedal on the floor and move the alternator into neutral. If you still hear the noise after this, it means the release bearing is bad. However, if the noise disappears, then it means the pilot bearing is bad. A pilot bearing noise that occurs when unhanding the clutch pedal to employ the clutch while in neutral, but disappears when the pedal is depressed is caused by a bad pilot bearing. Ensure that all other gears are in good condition. Check the clutch connection for binding. Check the clutch fork and input shafts for proper positioning. Pilot Bearing Install Direction The direction of the pilot bearing is achieved by putting the bronze pilot bushing with the taper towards the air brake and the flat end into the crank. The pilot bearing is positioned it in clean engine oil and then fixed with thinning end to alternator. Avoid using grease or anti-seize as this will plug the pores in the bushing and it will fall short. The bushings are produced using powdered bronze and saturated with oil. Some persons prefer to use only just a bearing because worn bushing can break the input shaft bearing and make it tasking to get attain 4th gear. The bearing will live longer than the clutch as long as you replace it every time the clutch is out. Removing a defective pilot bearing can be a complicated duty and may call for a unique tool. Fixing a pilot bearing is typically uncomplicated as long as you ensure it is accurately balanced. Ensure the pilot bearing race is cut by means of a cutter to eliminate all fragments from the hole. In some cases, removing a bearing may only require stuffing the middle of the bearing with thick lubricant, and using a hammer to strike a rod that sits securely in the midpoint. When the clutch is disconnected, the transmission’s input shaft and the engine’s camshaft are revolving at dissimilar rate. The pilot bearing permits this dissimilarity. This causes a defective pilot bearing to produce its most noise when the clutch pedal is totally depressed and the clutch itself is entirely disconnected. It’s situated in the middle of the balance wheel. How Far Does a Pilot Bearing Go In? The pilot bearing has an o-ring gasket around the outer border to stop lubricant from leaking out onto the disc. A pilot bearing is roughly an inch across and it seats in a small fissure that is at the back. You may have to dismantle everything since you’ll need to use a pilot bushing which is about two inches across and sits flush with the crank. Just keep driving the pilot bearing in until it’s flush with the crank end. The new one had a projection on the outside circumference. The extension allows the pilot bearing to go in one way and let it go to the right deepness which is the entire outside race into the camshaft and prevents it from being driven in excessively far. When lubricating, use only a pea-sized quantity of grease to daub around the rollers. Most excess grease standing above the rollers gets hard-pressed into the rear when the alternator is installed. Pilot Bearing Replacement Cost The pilot bearing replacement cost will vary between $7.00 and $23.00 (US) which is obtainable from Amazon or the local parts store. If you are a novice who is unable to replace the pilot bearing, then you have to contact a local auto-repair shop. They will have to remove the alternator and clutch, making the labor cost to fall between $350.00 and $650.00 (US). If putting back the whole clutch as a kit, the pilot bearing will occasionally be added. Ensure you check the contents of the kit to be certain. The longevity of a pilot bearing should match the clutch. However, bearing can have a malfunction within 45,000 to 65,000 miles. How to Remove Pilot Bearing Race Removing a pilot bearing race can be achieved with set of special tools. However, a layperson may not be willing to buy a tool they wouldn’t always use. The pilot bearing race helps support the input shaft of a manual ABS. It has to be replaced when worn to prevent destroying the input shaft seal on the alternator. If this happens, it can pump out oil from the alternator, leading to clutch breakdown. Contemporary vehicles now make use of an anti-friction bearing (roller bearing), while older automobiles employ a bronze bushing which is pushed into the end of the camshaft. It is vital to removing the pilot bearing race cautiously to avoid damaging the interference fit in the camshaft. Then proceed to pack the area behind the bearing with bread and apply pressure through the opening for the input shaft. This will cause the bearing to push out efficiently. To apply pressure, utilize a rod of the similar diameter as the input shaft. Pilot Bearing Removal Tips Before you commence, the transmission has to be removed together with the clutch assembly. 1. Obtain a Pilot Bearing Removal Tool To remove the pilot bearing race, you need a removal tool which is sold on Amazon at $34.00. You don’t necessarily have to buy if you can rent it at an auto store. 2. Insert the Removal Tool Then proceed to slot in the removal tool into the pilot bearing, with the jam nut completely backed off. Turn the handle clockwise to extend the tool fingers outward in the rear of the bearing. The tool will relax beside the balance wheel which will maintain the pulling process. 3. Pull the Pilot Bearing Outward Take a tight hold of the tool and make tighter the jam nut using a wrench; you would hear a small 'pop', indicating that the bearing is starting to move from the camshaft. At this position the nut will get easier to move alongside the wrench. Maintain this act pending when the bearing is completely detached. 4. Inspect the Pilot Bearing Once the bearing has been detached examine the end of the camshaft and bearing which will be held in the tool. Let loose the bearing by spinning the tool handle counterclockwise. Employ a shop towel to wipe clean the end of the camshaft where the new bearing will be mounted. Ensure the surface is devoid of dirt and grease to keep the bearing in place. 5. Match the New Pilot Bearing Examine both the original and previous bearings ensure the inside and outside diameters are the identical. If there are disparities, the new bearing won’t fit into the camshaft and may not permit the ABS input shaft to fit within if it which in turn will not allow the alternator to be reinstalled. To ensure proper functioning of the pilot bearing, fit it over the input shaft while the alternator is removed. 6. Install the New Pilot Bearing Place the pilot bearing in the freezer for about 30 minutes to shrink it a little to help ease the installation. Then lightly place the bearing into the end of the camshaft. Make use of a hammer and metallic drift to gently tap the bearing into position. Avoid hitting the bearing to hard so as not to destroy it. 7. Lubricate the Pilot Bearing Ensure you appropriately grease the pilot bearing to guarantee it would function accurately. Apply a small quantity of axle bearing or silicone-based grease to the interior the pilot bearing. Avoid adding excess quantity of lubricant so it wouldn’t get into the clutch disc. At this state, the clutch is prepared for replacement and the ABS for re-installation. Conclusion A defective pilot bearing will make a buzzing or grinding sound, which increases in intensity when the bearing gets completely condemned. It will be very loud if the bearing is completely damaged. It happens every time the camshaft and input shaft are revolving at diverse speeds. On the other hand, a clutch release bearing will give off a tweeting or squealing noise as soon as the bearing touches the pressure plate’s diaphragm. Pilot bearings can be bearings or bushings. The bearing type can be ball, roller or needle bearings crammed in grease. If the manufacturer proposes adding bearing grease, be careful not to contaminate the clutch disk or the exterior of the balance wheel. Pilot bushings are brass and instilled with lubrication. Adding lubrication will actually increase friction. Verify from manufacturer’s reference before adding any lubrication to a pilot bearing. A worn or damaged pilot bearing will make a whining or grinding noise. It will be very loud if the bearing is completely damaged. It occurs whenever the camshaft and input shaft are rotating at different speeds. A clutch release bearing is different; it will make a chirping or squealing noise as soon as the bearing touches the pressure plate’s diaphragm. Note that release bearings make noise with much less pedal travel. Endeavor to mark the position of balance wheel in relation to camshaft prior to removing it. This is to avoid disproportion when the balance wheel is reinstalled.


 8613869596835