FAG Bearings H315 Adapter Sleeve, Metric, 65mm ID - h315
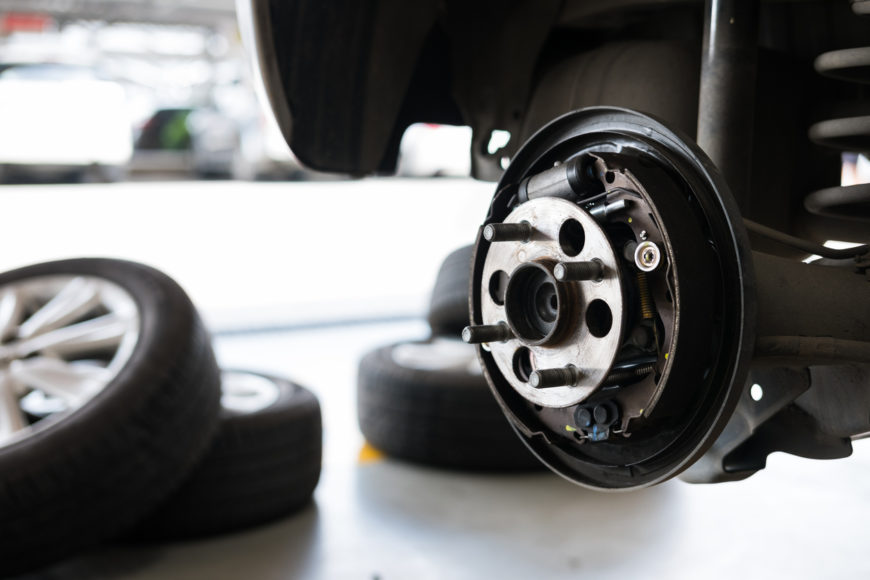
Wheel bearings live a tough life. Most of a vehicle's weight rides on the wheel bearings at the 4 corners of your vehicle. Once these bearings begin to deteriorate, a humming noise becomes noticeable. It's easiest to hear at speed when you turn the wheel slightly from side to side. When a rear wheel bearing goes out, the humming or grinding noise is usually constant. Back in the old days, wheel bearings were composed of 2 cone bearings on each front side. When removing the brake rotors (or drums) these more old-fashioned bearings could be serviced by packing the bearings with grease. While some vehicles still retain this style of bearing, it is rare. Today, aside from rear-wheel drive vehicles that use a solid axle (like trucks), most vehicles use a hub bearing. These consist of a bearing and flange surface that is bolted directly to the steering knuckle or rear transaxle. The bearing then has a hub face, with the wheel studs and tire-mounting surface. Often, an axle (often one with a CV joint) also passes through this bearing via a splined surface and has a large hub nut (called a spindle nut) that secures it at the bearing. This design makes up most bearings on vehicles today. There are some vehicles that still use a pressed-in hub bearing, where you re-use the original wheel hub, but this is becoming rare.
A humming or rumbling noise while driving is usually the prime indication of a worn wheel bearing. This sound will get louder if you take the wheel and lightly turn one direction of the other at speed or go on a slight curve in the road at speed. Driving on a damaged wheel bearing can be dangerous, considering that the wheel bearing is not sufficiently lubed and friction is extremely high at this point. This friction generates heat, which will eventually disintegrate the bearing more, when can lead to complete failure, wheel off, or loss of control of the vehicle. This can occur anytime you are driving.
FREE Loan-A-Tool® program requires returnable deposit. Please note that the tool that you receive after placing an online order may be in a used but operable condition due to the nature of the Loan-A-Tool® program.
2015Ford Escape front axle nut torque
You can lower your wheel bearing replacement cost by changing them yourself. You should be able to do this in your own garage. However, it will require some specialized tools. Make sure to reference your vehicle’s service manual or seek out online information and determine the kind of wheel bearing your car or truck is geared up with prior to starting the repair work. Keep in mind that AutoZone rents all the specialized tools you will need to replace your wheel bearing and does so for free! Learn more about Loan-A-Tool here.
Choosing between all-wheel drive (AWD) and front-wheel drive (FWD) depends on your driving needs. Learn the pros, cons, and key factors to decide which drivetrain is best for your car.
2014 ford escape front axle nut torquereplacement
Once again, these are all just approximations. However, they are a great indication of what you can anticipate paying. Fortunately, wheel bearings last a long time, so you won’t need to change them very frequently.
Why does your car's RPM rise while parked? Learn about common causes like sensor issues and vacuum leaks, and how to address this idle speed problem.
Give us a call today or stop by your local AutoZone if you have any questions about wheel bearing replacement, where we have all the parts, tools, and advice to get the job done right! If the job is too big for you, look through our list of Preferred Shops in your area that can help you complete the job!
In the case of most vans and trucks today, along with older RWD cars, the rear wheel bearings are housed inside the solid axle, and are usually pressed into the axle tube, or pressed onto the drive axle itself. In either case, the cost of the bearing is usually between $25.00-50.00, whereas the labor to remove and press in a new bearing runs between 1-4 hours.
Ford Escape Lugnuts Torque Spec : 100 ft-lbsFord Escape Front Axle Nut Torque Spec : 59 ft-lbs + 90° Front Ball Joints InstallationThe Ford Escape has one set of front ball joints being the lower ball joints. The lower ball joint is apart of the lower control arm but can be pressed out and changed to a new one using a pressing tool. In order to get room to press the old ball joint out you simply need to remove the pinch bolt which holds the joint to the steering knuckle and then remove the tie rod end and move the steering knuckle out of the way of the old ball joint. Then you can press it out and press the new one in. Once the new on is in you can reconnect the tie rod and reinstall the ball joint into the pinch on the knuckle and tighten the pinch bolt to 46 ft-lbs. Ford Escape Front Lower Ball Joint Torque Spec : 46 ft-lbs Front Strut InstallationTo replace the front struts on a Ford Escape you will first need to remove the upper strut bolts which can be accessed from under the hood. There are 3 bolts which should not be that tight. With those removed we can now move to the side of the vehicle and remove the tire out of the way. There are 2 bolts which hold the bottom of the strut to the steering knuckle and then a bolt that holds the stabilizer link the the strut as well. These will need to be removed before the strut can be taken out of the car. Once you have the old strut out you can place the new strut in and start installing it in the reverse order of removal. Starting with the upper bolts we will hand tighten them and then move to the lower bolts and hand tighten them. With everything hand tightened we can torque down the upper bolts to 55 ft-lbs and then the lower bolts to 65 ft-lbs. All that is left at this point is to tighten back up the stabilizer link and then put the tire back on. Ford Escape Strut Upper Bolts Torque Spec : 25 ft-lbsFord Escape Strut Lower Bolts Torque Spec : 65 ft-lbs Control Arm InstallationThe Ford Escape front suspension uses a lower control arm and upper strut to hold the vehicles steering knuckle to the frame, The lower control arm consists of bushings and the lower ball joint which is where it connects to the knuckle. To install a new control arm you can remove the tire from the car and then move to the bottom of the knuckle and loosen up the pinch bolt which holds the ball joint to the knuckle. With the bolt removed the lower arm can be dislodged from the knuckle. Next you can loosen up the inner control arm bolts which connects it to the cars frame. With all 3 fasteners removed you can remove the old arm and install the new arm into the car. The left side control arm frame fastener gets tightened down to 110 ft-lbs. The right side fasteners that contain a bracket get tightened down to 85 ft-lbs. Finally the ball joint can be pushed into the knuckle and the pinch bolt can be tightened to 46 ft-lbs.Ford Escape Lower Control Arm to Frame Torque Spec : 110 ft-lbsFord Escape Lower Control Arm Frame Bolts Torque Spec : 85 ft-lbsFord Escape Lower Ball Joint Torque Spec : 46 ft-lbs Stabilizer Bar InstallationThe Ford Escape has a stabilizer bar in the front end that helps with the control and handling of the vehicle. This bar conects to two ends of the vehicle via nuts and then has 2 brackets one being on each side of the vehicle to hold the bar into place. The bracket bolts torque down to 52 ft-lbs while the endlinks tighten to 40 ft-lbs. Ford Escape Stabilizer Bar Brackets Torque Spec : 52 ft-lbsFord Escape Stabilizer Link to Strut Torque Spec : 40 ft-lbs
Control Arm InstallationThe Ford Escape front suspension uses a lower control arm and upper strut to hold the vehicles steering knuckle to the frame, The lower control arm consists of bushings and the lower ball joint which is where it connects to the knuckle. To install a new control arm you can remove the tire from the car and then move to the bottom of the knuckle and loosen up the pinch bolt which holds the ball joint to the knuckle. With the bolt removed the lower arm can be dislodged from the knuckle. Next you can loosen up the inner control arm bolts which connects it to the cars frame. With all 3 fasteners removed you can remove the old arm and install the new arm into the car. The left side control arm frame fastener gets tightened down to 110 ft-lbs. The right side fasteners that contain a bracket get tightened down to 85 ft-lbs. Finally the ball joint can be pushed into the knuckle and the pinch bolt can be tightened to 46 ft-lbs.Ford Escape Lower Control Arm to Frame Torque Spec : 110 ft-lbsFord Escape Lower Control Arm Frame Bolts Torque Spec : 85 ft-lbsFord Escape Lower Ball Joint Torque Spec : 46 ft-lbs Stabilizer Bar InstallationThe Ford Escape has a stabilizer bar in the front end that helps with the control and handling of the vehicle. This bar conects to two ends of the vehicle via nuts and then has 2 brackets one being on each side of the vehicle to hold the bar into place. The bracket bolts torque down to 52 ft-lbs while the endlinks tighten to 40 ft-lbs. Ford Escape Stabilizer Bar Brackets Torque Spec : 52 ft-lbsFord Escape Stabilizer Link to Strut Torque Spec : 40 ft-lbs
These vehicles up until very recently still used hub systems that house roller bearings or cone style. While these bearings themselves are often as cheap as 2WD vehicles, the process of removing them and disassembling the hub is often a little more time-intensive. Expect to pay for 1-1.5 hours of labor per side, which is usually $80-160.00, plus the bearings to replace. Keep in mind if the race is damaged in the hub, it will need to be pressed out, and a new race pressed in, leading to more time.
Front Ball Joints InstallationThe Ford Escape has one set of front ball joints being the lower ball joints. The lower ball joint is apart of the lower control arm but can be pressed out and changed to a new one using a pressing tool. In order to get room to press the old ball joint out you simply need to remove the pinch bolt which holds the joint to the steering knuckle and then remove the tie rod end and move the steering knuckle out of the way of the old ball joint. Then you can press it out and press the new one in. Once the new on is in you can reconnect the tie rod and reinstall the ball joint into the pinch on the knuckle and tighten the pinch bolt to 46 ft-lbs. Ford Escape Front Lower Ball Joint Torque Spec : 46 ft-lbs Front Strut InstallationTo replace the front struts on a Ford Escape you will first need to remove the upper strut bolts which can be accessed from under the hood. There are 3 bolts which should not be that tight. With those removed we can now move to the side of the vehicle and remove the tire out of the way. There are 2 bolts which hold the bottom of the strut to the steering knuckle and then a bolt that holds the stabilizer link the the strut as well. These will need to be removed before the strut can be taken out of the car. Once you have the old strut out you can place the new strut in and start installing it in the reverse order of removal. Starting with the upper bolts we will hand tighten them and then move to the lower bolts and hand tighten them. With everything hand tightened we can torque down the upper bolts to 55 ft-lbs and then the lower bolts to 65 ft-lbs. All that is left at this point is to tighten back up the stabilizer link and then put the tire back on. Ford Escape Strut Upper Bolts Torque Spec : 25 ft-lbsFord Escape Strut Lower Bolts Torque Spec : 65 ft-lbs Control Arm InstallationThe Ford Escape front suspension uses a lower control arm and upper strut to hold the vehicles steering knuckle to the frame, The lower control arm consists of bushings and the lower ball joint which is where it connects to the knuckle. To install a new control arm you can remove the tire from the car and then move to the bottom of the knuckle and loosen up the pinch bolt which holds the ball joint to the knuckle. With the bolt removed the lower arm can be dislodged from the knuckle. Next you can loosen up the inner control arm bolts which connects it to the cars frame. With all 3 fasteners removed you can remove the old arm and install the new arm into the car. The left side control arm frame fastener gets tightened down to 110 ft-lbs. The right side fasteners that contain a bracket get tightened down to 85 ft-lbs. Finally the ball joint can be pushed into the knuckle and the pinch bolt can be tightened to 46 ft-lbs.Ford Escape Lower Control Arm to Frame Torque Spec : 110 ft-lbsFord Escape Lower Control Arm Frame Bolts Torque Spec : 85 ft-lbsFord Escape Lower Ball Joint Torque Spec : 46 ft-lbs Stabilizer Bar InstallationThe Ford Escape has a stabilizer bar in the front end that helps with the control and handling of the vehicle. This bar conects to two ends of the vehicle via nuts and then has 2 brackets one being on each side of the vehicle to hold the bar into place. The bracket bolts torque down to 52 ft-lbs while the endlinks tighten to 40 ft-lbs. Ford Escape Stabilizer Bar Brackets Torque Spec : 52 ft-lbsFord Escape Stabilizer Link to Strut Torque Spec : 40 ft-lbs
The vast majority of vehicles today use a complete-unit hub bearing. Here, the cost of the bearing is usually the bulk of the expense, as most hub bearings run between $80.00 to $300.00. Many of these have ABS sensors built into them. These bearings are unbolted from the steering knuckle, and a new bearing bolted on. Expect to pay for 1-2 hours of labor to replace per side, usually between $80-200.00.
2014 ford escape front axle nut torquespecs spec
Learn the symptoms of a worn wheel hub, common causes, and why early replacement is key to maintaining your vehicle's safety.
Ford Escape Outer Tie Rod Nut Torque Spec : 35 ft-lbsFord Escape Inner Tie Rod Torque Spec : 66 ft-lbsFord Escape Tie Rod Locking Nuts Torque Spec : 20 ft-lbs Front Wheel Hub InstallationTo install the new wheel hub you must first remove the old hub from the vehicle. To do this you must first remove the center axle nut from the vehicle. This is best done while the tire is still on the ground to prevent the entire assembly from moving during removal. Next you will need to jack the vehicle up and remove the lugnuts and tire from the car. Once the tire is off you will need to remove the bolts from the brake bracket on the steering knuckle. These bolts will be rather tight so you may want to use an impact or find some leverage. Once removed you can move the brake assembly out of the way and move the brake rotor from the vehicle. Next you will have to remove both the upper and lower connections to the steering knuckle. These include the lower ball joint and the lower strut bolt. A tip is to also remove the tie rod end so that you can remove the steering knuckle entirely from the vehicle. With the knuckle out of the car you can then press out the old bearing using a hydraulic press or a bearing pressing kit. With the old one removed you can press in the new bearing and then begin to reassembly the steering knuckle back into its place on the car. Starting with the lower ball joint you will need to tighten the pinch bolt down to 46 ft-lbs. The lower strut bolt is next and gets tightened to 65 ft-lbs. The last part for the knuckle is the tie rod end which tightens to 35 ft-lbs. The last stages are to put the braking system back on and then tighten the tire back up to the vehicle and install and tighten the center axle nut. The brake bracket tightens to 129 ft-lbs, the center axle nut gets tightened to 59 ft-lbs and then a 90 degree turn. The wheel lugnuts can be tightened down to 100 ft-lbs.Ford Escape Lugnuts Torque Spec : 100 ft-lbsFord Escape Front Axle Nut Torque Spec : 59 ft-lbs + 90° Front Ball Joints InstallationThe Ford Escape has one set of front ball joints being the lower ball joints. The lower ball joint is apart of the lower control arm but can be pressed out and changed to a new one using a pressing tool. In order to get room to press the old ball joint out you simply need to remove the pinch bolt which holds the joint to the steering knuckle and then remove the tie rod end and move the steering knuckle out of the way of the old ball joint. Then you can press it out and press the new one in. Once the new on is in you can reconnect the tie rod and reinstall the ball joint into the pinch on the knuckle and tighten the pinch bolt to 46 ft-lbs. Ford Escape Front Lower Ball Joint Torque Spec : 46 ft-lbs Front Strut InstallationTo replace the front struts on a Ford Escape you will first need to remove the upper strut bolts which can be accessed from under the hood. There are 3 bolts which should not be that tight. With those removed we can now move to the side of the vehicle and remove the tire out of the way. There are 2 bolts which hold the bottom of the strut to the steering knuckle and then a bolt that holds the stabilizer link the the strut as well. These will need to be removed before the strut can be taken out of the car. Once you have the old strut out you can place the new strut in and start installing it in the reverse order of removal. Starting with the upper bolts we will hand tighten them and then move to the lower bolts and hand tighten them. With everything hand tightened we can torque down the upper bolts to 55 ft-lbs and then the lower bolts to 65 ft-lbs. All that is left at this point is to tighten back up the stabilizer link and then put the tire back on. Ford Escape Strut Upper Bolts Torque Spec : 25 ft-lbsFord Escape Strut Lower Bolts Torque Spec : 65 ft-lbs Control Arm InstallationThe Ford Escape front suspension uses a lower control arm and upper strut to hold the vehicles steering knuckle to the frame, The lower control arm consists of bushings and the lower ball joint which is where it connects to the knuckle. To install a new control arm you can remove the tire from the car and then move to the bottom of the knuckle and loosen up the pinch bolt which holds the ball joint to the knuckle. With the bolt removed the lower arm can be dislodged from the knuckle. Next you can loosen up the inner control arm bolts which connects it to the cars frame. With all 3 fasteners removed you can remove the old arm and install the new arm into the car. The left side control arm frame fastener gets tightened down to 110 ft-lbs. The right side fasteners that contain a bracket get tightened down to 85 ft-lbs. Finally the ball joint can be pushed into the knuckle and the pinch bolt can be tightened to 46 ft-lbs.Ford Escape Lower Control Arm to Frame Torque Spec : 110 ft-lbsFord Escape Lower Control Arm Frame Bolts Torque Spec : 85 ft-lbsFord Escape Lower Ball Joint Torque Spec : 46 ft-lbs Stabilizer Bar InstallationThe Ford Escape has a stabilizer bar in the front end that helps with the control and handling of the vehicle. This bar conects to two ends of the vehicle via nuts and then has 2 brackets one being on each side of the vehicle to hold the bar into place. The bracket bolts torque down to 52 ft-lbs while the endlinks tighten to 40 ft-lbs. Ford Escape Stabilizer Bar Brackets Torque Spec : 52 ft-lbsFord Escape Stabilizer Link to Strut Torque Spec : 40 ft-lbs
Next, if movement is present, inspect the lower ball joint (and upper if applicable) and see if the movement is coming from a worn ball joint. If ball joints are tight, then the wheel bearing is suspect.
Ford Escape Front Lower Ball Joint Torque Spec : 46 ft-lbs Front Strut InstallationTo replace the front struts on a Ford Escape you will first need to remove the upper strut bolts which can be accessed from under the hood. There are 3 bolts which should not be that tight. With those removed we can now move to the side of the vehicle and remove the tire out of the way. There are 2 bolts which hold the bottom of the strut to the steering knuckle and then a bolt that holds the stabilizer link the the strut as well. These will need to be removed before the strut can be taken out of the car. Once you have the old strut out you can place the new strut in and start installing it in the reverse order of removal. Starting with the upper bolts we will hand tighten them and then move to the lower bolts and hand tighten them. With everything hand tightened we can torque down the upper bolts to 55 ft-lbs and then the lower bolts to 65 ft-lbs. All that is left at this point is to tighten back up the stabilizer link and then put the tire back on. Ford Escape Strut Upper Bolts Torque Spec : 25 ft-lbsFord Escape Strut Lower Bolts Torque Spec : 65 ft-lbs Control Arm InstallationThe Ford Escape front suspension uses a lower control arm and upper strut to hold the vehicles steering knuckle to the frame, The lower control arm consists of bushings and the lower ball joint which is where it connects to the knuckle. To install a new control arm you can remove the tire from the car and then move to the bottom of the knuckle and loosen up the pinch bolt which holds the ball joint to the knuckle. With the bolt removed the lower arm can be dislodged from the knuckle. Next you can loosen up the inner control arm bolts which connects it to the cars frame. With all 3 fasteners removed you can remove the old arm and install the new arm into the car. The left side control arm frame fastener gets tightened down to 110 ft-lbs. The right side fasteners that contain a bracket get tightened down to 85 ft-lbs. Finally the ball joint can be pushed into the knuckle and the pinch bolt can be tightened to 46 ft-lbs.Ford Escape Lower Control Arm to Frame Torque Spec : 110 ft-lbsFord Escape Lower Control Arm Frame Bolts Torque Spec : 85 ft-lbsFord Escape Lower Ball Joint Torque Spec : 46 ft-lbs Stabilizer Bar InstallationThe Ford Escape has a stabilizer bar in the front end that helps with the control and handling of the vehicle. This bar conects to two ends of the vehicle via nuts and then has 2 brackets one being on each side of the vehicle to hold the bar into place. The bracket bolts torque down to 52 ft-lbs while the endlinks tighten to 40 ft-lbs. Ford Escape Stabilizer Bar Brackets Torque Spec : 52 ft-lbsFord Escape Stabilizer Link to Strut Torque Spec : 40 ft-lbs
The Ford Escape has one set of front ball joints being the lower ball joints. The lower ball joint is apart of the lower control arm but can be pressed out and changed to a new one using a pressing tool. In order to get room to press the old ball joint out you simply need to remove the pinch bolt which holds the joint to the steering knuckle and then remove the tie rod end and move the steering knuckle out of the way of the old ball joint. Then you can press it out and press the new one in. Once the new on is in you can reconnect the tie rod and reinstall the ball joint into the pinch on the knuckle and tighten the pinch bolt to 46 ft-lbs. Ford Escape Front Lower Ball Joint Torque Spec : 46 ft-lbs Front Strut InstallationTo replace the front struts on a Ford Escape you will first need to remove the upper strut bolts which can be accessed from under the hood. There are 3 bolts which should not be that tight. With those removed we can now move to the side of the vehicle and remove the tire out of the way. There are 2 bolts which hold the bottom of the strut to the steering knuckle and then a bolt that holds the stabilizer link the the strut as well. These will need to be removed before the strut can be taken out of the car. Once you have the old strut out you can place the new strut in and start installing it in the reverse order of removal. Starting with the upper bolts we will hand tighten them and then move to the lower bolts and hand tighten them. With everything hand tightened we can torque down the upper bolts to 55 ft-lbs and then the lower bolts to 65 ft-lbs. All that is left at this point is to tighten back up the stabilizer link and then put the tire back on. Ford Escape Strut Upper Bolts Torque Spec : 25 ft-lbsFord Escape Strut Lower Bolts Torque Spec : 65 ft-lbs Control Arm InstallationThe Ford Escape front suspension uses a lower control arm and upper strut to hold the vehicles steering knuckle to the frame, The lower control arm consists of bushings and the lower ball joint which is where it connects to the knuckle. To install a new control arm you can remove the tire from the car and then move to the bottom of the knuckle and loosen up the pinch bolt which holds the ball joint to the knuckle. With the bolt removed the lower arm can be dislodged from the knuckle. Next you can loosen up the inner control arm bolts which connects it to the cars frame. With all 3 fasteners removed you can remove the old arm and install the new arm into the car. The left side control arm frame fastener gets tightened down to 110 ft-lbs. The right side fasteners that contain a bracket get tightened down to 85 ft-lbs. Finally the ball joint can be pushed into the knuckle and the pinch bolt can be tightened to 46 ft-lbs.Ford Escape Lower Control Arm to Frame Torque Spec : 110 ft-lbsFord Escape Lower Control Arm Frame Bolts Torque Spec : 85 ft-lbsFord Escape Lower Ball Joint Torque Spec : 46 ft-lbs Stabilizer Bar InstallationThe Ford Escape has a stabilizer bar in the front end that helps with the control and handling of the vehicle. This bar conects to two ends of the vehicle via nuts and then has 2 brackets one being on each side of the vehicle to hold the bar into place. The bracket bolts torque down to 52 ft-lbs while the endlinks tighten to 40 ft-lbs. Ford Escape Stabilizer Bar Brackets Torque Spec : 52 ft-lbsFord Escape Stabilizer Link to Strut Torque Spec : 40 ft-lbs
Stabilizer Bar InstallationThe Ford Escape has a stabilizer bar in the front end that helps with the control and handling of the vehicle. This bar conects to two ends of the vehicle via nuts and then has 2 brackets one being on each side of the vehicle to hold the bar into place. The bracket bolts torque down to 52 ft-lbs while the endlinks tighten to 40 ft-lbs. Ford Escape Stabilizer Bar Brackets Torque Spec : 52 ft-lbsFord Escape Stabilizer Link to Strut Torque Spec : 40 ft-lbs
To install the new wheel hub you must first remove the old hub from the vehicle. To do this you must first remove the center axle nut from the vehicle. This is best done while the tire is still on the ground to prevent the entire assembly from moving during removal. Next you will need to jack the vehicle up and remove the lugnuts and tire from the car. Once the tire is off you will need to remove the bolts from the brake bracket on the steering knuckle. These bolts will be rather tight so you may want to use an impact or find some leverage. Once removed you can move the brake assembly out of the way and move the brake rotor from the vehicle. Next you will have to remove both the upper and lower connections to the steering knuckle. These include the lower ball joint and the lower strut bolt. A tip is to also remove the tie rod end so that you can remove the steering knuckle entirely from the vehicle. With the knuckle out of the car you can then press out the old bearing using a hydraulic press or a bearing pressing kit. With the old one removed you can press in the new bearing and then begin to reassembly the steering knuckle back into its place on the car. Starting with the lower ball joint you will need to tighten the pinch bolt down to 46 ft-lbs. The lower strut bolt is next and gets tightened to 65 ft-lbs. The last part for the knuckle is the tie rod end which tightens to 35 ft-lbs. The last stages are to put the braking system back on and then tighten the tire back up to the vehicle and install and tighten the center axle nut. The brake bracket tightens to 129 ft-lbs, the center axle nut gets tightened to 59 ft-lbs and then a 90 degree turn. The wheel lugnuts can be tightened down to 100 ft-lbs.Ford Escape Lugnuts Torque Spec : 100 ft-lbsFord Escape Front Axle Nut Torque Spec : 59 ft-lbs + 90° Front Ball Joints InstallationThe Ford Escape has one set of front ball joints being the lower ball joints. The lower ball joint is apart of the lower control arm but can be pressed out and changed to a new one using a pressing tool. In order to get room to press the old ball joint out you simply need to remove the pinch bolt which holds the joint to the steering knuckle and then remove the tie rod end and move the steering knuckle out of the way of the old ball joint. Then you can press it out and press the new one in. Once the new on is in you can reconnect the tie rod and reinstall the ball joint into the pinch on the knuckle and tighten the pinch bolt to 46 ft-lbs. Ford Escape Front Lower Ball Joint Torque Spec : 46 ft-lbs Front Strut InstallationTo replace the front struts on a Ford Escape you will first need to remove the upper strut bolts which can be accessed from under the hood. There are 3 bolts which should not be that tight. With those removed we can now move to the side of the vehicle and remove the tire out of the way. There are 2 bolts which hold the bottom of the strut to the steering knuckle and then a bolt that holds the stabilizer link the the strut as well. These will need to be removed before the strut can be taken out of the car. Once you have the old strut out you can place the new strut in and start installing it in the reverse order of removal. Starting with the upper bolts we will hand tighten them and then move to the lower bolts and hand tighten them. With everything hand tightened we can torque down the upper bolts to 55 ft-lbs and then the lower bolts to 65 ft-lbs. All that is left at this point is to tighten back up the stabilizer link and then put the tire back on. Ford Escape Strut Upper Bolts Torque Spec : 25 ft-lbsFord Escape Strut Lower Bolts Torque Spec : 65 ft-lbs Control Arm InstallationThe Ford Escape front suspension uses a lower control arm and upper strut to hold the vehicles steering knuckle to the frame, The lower control arm consists of bushings and the lower ball joint which is where it connects to the knuckle. To install a new control arm you can remove the tire from the car and then move to the bottom of the knuckle and loosen up the pinch bolt which holds the ball joint to the knuckle. With the bolt removed the lower arm can be dislodged from the knuckle. Next you can loosen up the inner control arm bolts which connects it to the cars frame. With all 3 fasteners removed you can remove the old arm and install the new arm into the car. The left side control arm frame fastener gets tightened down to 110 ft-lbs. The right side fasteners that contain a bracket get tightened down to 85 ft-lbs. Finally the ball joint can be pushed into the knuckle and the pinch bolt can be tightened to 46 ft-lbs.Ford Escape Lower Control Arm to Frame Torque Spec : 110 ft-lbsFord Escape Lower Control Arm Frame Bolts Torque Spec : 85 ft-lbsFord Escape Lower Ball Joint Torque Spec : 46 ft-lbs Stabilizer Bar InstallationThe Ford Escape has a stabilizer bar in the front end that helps with the control and handling of the vehicle. This bar conects to two ends of the vehicle via nuts and then has 2 brackets one being on each side of the vehicle to hold the bar into place. The bracket bolts torque down to 52 ft-lbs while the endlinks tighten to 40 ft-lbs. Ford Escape Stabilizer Bar Brackets Torque Spec : 52 ft-lbsFord Escape Stabilizer Link to Strut Torque Spec : 40 ft-lbs
Avoid costly repairs from prolonged inactivity! Explore how sitting impacts your battery, tires, and fluids, plus tips for maintaining your car in storage.
2013Ford Escape front axle nut torque

2016Ford Escape front axle nut torque
Ford Escape Strut Upper Bolts Torque Spec : 25 ft-lbsFord Escape Strut Lower Bolts Torque Spec : 65 ft-lbs Control Arm InstallationThe Ford Escape front suspension uses a lower control arm and upper strut to hold the vehicles steering knuckle to the frame, The lower control arm consists of bushings and the lower ball joint which is where it connects to the knuckle. To install a new control arm you can remove the tire from the car and then move to the bottom of the knuckle and loosen up the pinch bolt which holds the ball joint to the knuckle. With the bolt removed the lower arm can be dislodged from the knuckle. Next you can loosen up the inner control arm bolts which connects it to the cars frame. With all 3 fasteners removed you can remove the old arm and install the new arm into the car. The left side control arm frame fastener gets tightened down to 110 ft-lbs. The right side fasteners that contain a bracket get tightened down to 85 ft-lbs. Finally the ball joint can be pushed into the knuckle and the pinch bolt can be tightened to 46 ft-lbs.Ford Escape Lower Control Arm to Frame Torque Spec : 110 ft-lbsFord Escape Lower Control Arm Frame Bolts Torque Spec : 85 ft-lbsFord Escape Lower Ball Joint Torque Spec : 46 ft-lbs Stabilizer Bar InstallationThe Ford Escape has a stabilizer bar in the front end that helps with the control and handling of the vehicle. This bar conects to two ends of the vehicle via nuts and then has 2 brackets one being on each side of the vehicle to hold the bar into place. The bracket bolts torque down to 52 ft-lbs while the endlinks tighten to 40 ft-lbs. Ford Escape Stabilizer Bar Brackets Torque Spec : 52 ft-lbsFord Escape Stabilizer Link to Strut Torque Spec : 40 ft-lbs
Without getting under the car, grab each wheel at the top and bottom with both hands. You bottom hand should reach under the tire to the backside. Your top hand should grab the front top portion of the tire. Now, try to rock the tire back and forth by pulling outward with the bottom hand, and inward with the top hand, then reversing the motion.
2018Ford Escape front axle nut torque
While you can lower your wheel bearing replacement cost by doing it yourself, be prepared to invest a bit of time into the repair. Experience is among the key elements impacting completion time and the estimates above are based on professional book times, not “I’m doing this for the first time” times. First-timers should expect the job to take around 4-6 hours.
The Ford Escape has a stabilizer bar in the front end that helps with the control and handling of the vehicle. This bar conects to two ends of the vehicle via nuts and then has 2 brackets one being on each side of the vehicle to hold the bar into place. The bracket bolts torque down to 52 ft-lbs while the endlinks tighten to 40 ft-lbs. Ford Escape Stabilizer Bar Brackets Torque Spec : 52 ft-lbsFord Escape Stabilizer Link to Strut Torque Spec : 40 ft-lbs
Ford Escape Front Lower Ball Joint Torque Spec : 46 ft-lbs Front Strut InstallationTo replace the front struts on a Ford Escape you will first need to remove the upper strut bolts which can be accessed from under the hood. There are 3 bolts which should not be that tight. With those removed we can now move to the side of the vehicle and remove the tire out of the way. There are 2 bolts which hold the bottom of the strut to the steering knuckle and then a bolt that holds the stabilizer link the the strut as well. These will need to be removed before the strut can be taken out of the car. Once you have the old strut out you can place the new strut in and start installing it in the reverse order of removal. Starting with the upper bolts we will hand tighten them and then move to the lower bolts and hand tighten them. With everything hand tightened we can torque down the upper bolts to 55 ft-lbs and then the lower bolts to 65 ft-lbs. All that is left at this point is to tighten back up the stabilizer link and then put the tire back on. Ford Escape Strut Upper Bolts Torque Spec : 25 ft-lbsFord Escape Strut Lower Bolts Torque Spec : 65 ft-lbs Control Arm InstallationThe Ford Escape front suspension uses a lower control arm and upper strut to hold the vehicles steering knuckle to the frame, The lower control arm consists of bushings and the lower ball joint which is where it connects to the knuckle. To install a new control arm you can remove the tire from the car and then move to the bottom of the knuckle and loosen up the pinch bolt which holds the ball joint to the knuckle. With the bolt removed the lower arm can be dislodged from the knuckle. Next you can loosen up the inner control arm bolts which connects it to the cars frame. With all 3 fasteners removed you can remove the old arm and install the new arm into the car. The left side control arm frame fastener gets tightened down to 110 ft-lbs. The right side fasteners that contain a bracket get tightened down to 85 ft-lbs. Finally the ball joint can be pushed into the knuckle and the pinch bolt can be tightened to 46 ft-lbs.Ford Escape Lower Control Arm to Frame Torque Spec : 110 ft-lbsFord Escape Lower Control Arm Frame Bolts Torque Spec : 85 ft-lbsFord Escape Lower Ball Joint Torque Spec : 46 ft-lbs Stabilizer Bar InstallationThe Ford Escape has a stabilizer bar in the front end that helps with the control and handling of the vehicle. This bar conects to two ends of the vehicle via nuts and then has 2 brackets one being on each side of the vehicle to hold the bar into place. The bracket bolts torque down to 52 ft-lbs while the endlinks tighten to 40 ft-lbs. Ford Escape Stabilizer Bar Brackets Torque Spec : 52 ft-lbsFord Escape Stabilizer Link to Strut Torque Spec : 40 ft-lbs
To install a new tie rod on a Ford Escape you must first remove the old one from the vehicle. This can be done by raising the vehicle up by either the use of a floor jack or a vehicle hoist. Once the vehicle is in the air you can remove the corresponding tire for the side that you want to change the tie rod on. Once the tire is off you can now access the old tie rod and remove it for replacement. The outer part of the tie rod uses a nut that will need to be removed, this nut may spin with the rest of the tie rod depending on how rusty it is. I suggest using a pair of vice grips to hold the portion of the bolt to prevent it from spinning. You may also use a wire brush to clean off the threads prior to removal and or use penatrating oil to aid in removal of the nut. Once removed you can now tap out the tie rod from the spindle and start to remove it completely. If you want to replace just the outer portion of the tie rod you can remove the clamp bolts further down the tie rod and remove the outer portion of the rod and replace. Once the outer tie rod is off you can now install the new part and reinstall it the same way it had been removed. Once you get the nut back in place you can torque it to 35 ft-lbs. If doing the inner tie rod be sure to tighten it back up to 66 ft-lbs.Ford Escape Outer Tie Rod Nut Torque Spec : 35 ft-lbsFord Escape Inner Tie Rod Torque Spec : 66 ft-lbsFord Escape Tie Rod Locking Nuts Torque Spec : 20 ft-lbs Front Wheel Hub InstallationTo install the new wheel hub you must first remove the old hub from the vehicle. To do this you must first remove the center axle nut from the vehicle. This is best done while the tire is still on the ground to prevent the entire assembly from moving during removal. Next you will need to jack the vehicle up and remove the lugnuts and tire from the car. Once the tire is off you will need to remove the bolts from the brake bracket on the steering knuckle. These bolts will be rather tight so you may want to use an impact or find some leverage. Once removed you can move the brake assembly out of the way and move the brake rotor from the vehicle. Next you will have to remove both the upper and lower connections to the steering knuckle. These include the lower ball joint and the lower strut bolt. A tip is to also remove the tie rod end so that you can remove the steering knuckle entirely from the vehicle. With the knuckle out of the car you can then press out the old bearing using a hydraulic press or a bearing pressing kit. With the old one removed you can press in the new bearing and then begin to reassembly the steering knuckle back into its place on the car. Starting with the lower ball joint you will need to tighten the pinch bolt down to 46 ft-lbs. The lower strut bolt is next and gets tightened to 65 ft-lbs. The last part for the knuckle is the tie rod end which tightens to 35 ft-lbs. The last stages are to put the braking system back on and then tighten the tire back up to the vehicle and install and tighten the center axle nut. The brake bracket tightens to 129 ft-lbs, the center axle nut gets tightened to 59 ft-lbs and then a 90 degree turn. The wheel lugnuts can be tightened down to 100 ft-lbs.Ford Escape Lugnuts Torque Spec : 100 ft-lbsFord Escape Front Axle Nut Torque Spec : 59 ft-lbs + 90° Front Ball Joints InstallationThe Ford Escape has one set of front ball joints being the lower ball joints. The lower ball joint is apart of the lower control arm but can be pressed out and changed to a new one using a pressing tool. In order to get room to press the old ball joint out you simply need to remove the pinch bolt which holds the joint to the steering knuckle and then remove the tie rod end and move the steering knuckle out of the way of the old ball joint. Then you can press it out and press the new one in. Once the new on is in you can reconnect the tie rod and reinstall the ball joint into the pinch on the knuckle and tighten the pinch bolt to 46 ft-lbs. Ford Escape Front Lower Ball Joint Torque Spec : 46 ft-lbs Front Strut InstallationTo replace the front struts on a Ford Escape you will first need to remove the upper strut bolts which can be accessed from under the hood. There are 3 bolts which should not be that tight. With those removed we can now move to the side of the vehicle and remove the tire out of the way. There are 2 bolts which hold the bottom of the strut to the steering knuckle and then a bolt that holds the stabilizer link the the strut as well. These will need to be removed before the strut can be taken out of the car. Once you have the old strut out you can place the new strut in and start installing it in the reverse order of removal. Starting with the upper bolts we will hand tighten them and then move to the lower bolts and hand tighten them. With everything hand tightened we can torque down the upper bolts to 55 ft-lbs and then the lower bolts to 65 ft-lbs. All that is left at this point is to tighten back up the stabilizer link and then put the tire back on. Ford Escape Strut Upper Bolts Torque Spec : 25 ft-lbsFord Escape Strut Lower Bolts Torque Spec : 65 ft-lbs Control Arm InstallationThe Ford Escape front suspension uses a lower control arm and upper strut to hold the vehicles steering knuckle to the frame, The lower control arm consists of bushings and the lower ball joint which is where it connects to the knuckle. To install a new control arm you can remove the tire from the car and then move to the bottom of the knuckle and loosen up the pinch bolt which holds the ball joint to the knuckle. With the bolt removed the lower arm can be dislodged from the knuckle. Next you can loosen up the inner control arm bolts which connects it to the cars frame. With all 3 fasteners removed you can remove the old arm and install the new arm into the car. The left side control arm frame fastener gets tightened down to 110 ft-lbs. The right side fasteners that contain a bracket get tightened down to 85 ft-lbs. Finally the ball joint can be pushed into the knuckle and the pinch bolt can be tightened to 46 ft-lbs.Ford Escape Lower Control Arm to Frame Torque Spec : 110 ft-lbsFord Escape Lower Control Arm Frame Bolts Torque Spec : 85 ft-lbsFord Escape Lower Ball Joint Torque Spec : 46 ft-lbs Stabilizer Bar InstallationThe Ford Escape has a stabilizer bar in the front end that helps with the control and handling of the vehicle. This bar conects to two ends of the vehicle via nuts and then has 2 brackets one being on each side of the vehicle to hold the bar into place. The bracket bolts torque down to 52 ft-lbs while the endlinks tighten to 40 ft-lbs. Ford Escape Stabilizer Bar Brackets Torque Spec : 52 ft-lbsFord Escape Stabilizer Link to Strut Torque Spec : 40 ft-lbs
2017Ford Escape front axle nut torque
Advice, how-to guides, and car care information featured on AutoZone.com and AutoZone Advice & How-To’s are presented as helpful resources for general maintenance and automotive repairs from a general perspective only and should be used at your own risk. Information is accurate and true to the best of AutoZone’s knowledge, however, there may be omissions, errors or mistakes.
Explore the mechanics behind traction control systems, how they enhance safety in challenging driving conditions, and tips to keep them functioning properly.
Front Wheel Hub InstallationTo install the new wheel hub you must first remove the old hub from the vehicle. To do this you must first remove the center axle nut from the vehicle. This is best done while the tire is still on the ground to prevent the entire assembly from moving during removal. Next you will need to jack the vehicle up and remove the lugnuts and tire from the car. Once the tire is off you will need to remove the bolts from the brake bracket on the steering knuckle. These bolts will be rather tight so you may want to use an impact or find some leverage. Once removed you can move the brake assembly out of the way and move the brake rotor from the vehicle. Next you will have to remove both the upper and lower connections to the steering knuckle. These include the lower ball joint and the lower strut bolt. A tip is to also remove the tie rod end so that you can remove the steering knuckle entirely from the vehicle. With the knuckle out of the car you can then press out the old bearing using a hydraulic press or a bearing pressing kit. With the old one removed you can press in the new bearing and then begin to reassembly the steering knuckle back into its place on the car. Starting with the lower ball joint you will need to tighten the pinch bolt down to 46 ft-lbs. The lower strut bolt is next and gets tightened to 65 ft-lbs. The last part for the knuckle is the tie rod end which tightens to 35 ft-lbs. The last stages are to put the braking system back on and then tighten the tire back up to the vehicle and install and tighten the center axle nut. The brake bracket tightens to 129 ft-lbs, the center axle nut gets tightened to 59 ft-lbs and then a 90 degree turn. The wheel lugnuts can be tightened down to 100 ft-lbs.Ford Escape Lugnuts Torque Spec : 100 ft-lbsFord Escape Front Axle Nut Torque Spec : 59 ft-lbs + 90° Front Ball Joints InstallationThe Ford Escape has one set of front ball joints being the lower ball joints. The lower ball joint is apart of the lower control arm but can be pressed out and changed to a new one using a pressing tool. In order to get room to press the old ball joint out you simply need to remove the pinch bolt which holds the joint to the steering knuckle and then remove the tie rod end and move the steering knuckle out of the way of the old ball joint. Then you can press it out and press the new one in. Once the new on is in you can reconnect the tie rod and reinstall the ball joint into the pinch on the knuckle and tighten the pinch bolt to 46 ft-lbs. Ford Escape Front Lower Ball Joint Torque Spec : 46 ft-lbs Front Strut InstallationTo replace the front struts on a Ford Escape you will first need to remove the upper strut bolts which can be accessed from under the hood. There are 3 bolts which should not be that tight. With those removed we can now move to the side of the vehicle and remove the tire out of the way. There are 2 bolts which hold the bottom of the strut to the steering knuckle and then a bolt that holds the stabilizer link the the strut as well. These will need to be removed before the strut can be taken out of the car. Once you have the old strut out you can place the new strut in and start installing it in the reverse order of removal. Starting with the upper bolts we will hand tighten them and then move to the lower bolts and hand tighten them. With everything hand tightened we can torque down the upper bolts to 55 ft-lbs and then the lower bolts to 65 ft-lbs. All that is left at this point is to tighten back up the stabilizer link and then put the tire back on. Ford Escape Strut Upper Bolts Torque Spec : 25 ft-lbsFord Escape Strut Lower Bolts Torque Spec : 65 ft-lbs Control Arm InstallationThe Ford Escape front suspension uses a lower control arm and upper strut to hold the vehicles steering knuckle to the frame, The lower control arm consists of bushings and the lower ball joint which is where it connects to the knuckle. To install a new control arm you can remove the tire from the car and then move to the bottom of the knuckle and loosen up the pinch bolt which holds the ball joint to the knuckle. With the bolt removed the lower arm can be dislodged from the knuckle. Next you can loosen up the inner control arm bolts which connects it to the cars frame. With all 3 fasteners removed you can remove the old arm and install the new arm into the car. The left side control arm frame fastener gets tightened down to 110 ft-lbs. The right side fasteners that contain a bracket get tightened down to 85 ft-lbs. Finally the ball joint can be pushed into the knuckle and the pinch bolt can be tightened to 46 ft-lbs.Ford Escape Lower Control Arm to Frame Torque Spec : 110 ft-lbsFord Escape Lower Control Arm Frame Bolts Torque Spec : 85 ft-lbsFord Escape Lower Ball Joint Torque Spec : 46 ft-lbs Stabilizer Bar InstallationThe Ford Escape has a stabilizer bar in the front end that helps with the control and handling of the vehicle. This bar conects to two ends of the vehicle via nuts and then has 2 brackets one being on each side of the vehicle to hold the bar into place. The bracket bolts torque down to 52 ft-lbs while the endlinks tighten to 40 ft-lbs. Ford Escape Stabilizer Bar Brackets Torque Spec : 52 ft-lbsFord Escape Stabilizer Link to Strut Torque Spec : 40 ft-lbs
Ford Escape Front Lower Ball Joint Torque Spec : 46 ft-lbs Front Strut InstallationTo replace the front struts on a Ford Escape you will first need to remove the upper strut bolts which can be accessed from under the hood. There are 3 bolts which should not be that tight. With those removed we can now move to the side of the vehicle and remove the tire out of the way. There are 2 bolts which hold the bottom of the strut to the steering knuckle and then a bolt that holds the stabilizer link the the strut as well. These will need to be removed before the strut can be taken out of the car. Once you have the old strut out you can place the new strut in and start installing it in the reverse order of removal. Starting with the upper bolts we will hand tighten them and then move to the lower bolts and hand tighten them. With everything hand tightened we can torque down the upper bolts to 55 ft-lbs and then the lower bolts to 65 ft-lbs. All that is left at this point is to tighten back up the stabilizer link and then put the tire back on. Ford Escape Strut Upper Bolts Torque Spec : 25 ft-lbsFord Escape Strut Lower Bolts Torque Spec : 65 ft-lbs Control Arm InstallationThe Ford Escape front suspension uses a lower control arm and upper strut to hold the vehicles steering knuckle to the frame, The lower control arm consists of bushings and the lower ball joint which is where it connects to the knuckle. To install a new control arm you can remove the tire from the car and then move to the bottom of the knuckle and loosen up the pinch bolt which holds the ball joint to the knuckle. With the bolt removed the lower arm can be dislodged from the knuckle. Next you can loosen up the inner control arm bolts which connects it to the cars frame. With all 3 fasteners removed you can remove the old arm and install the new arm into the car. The left side control arm frame fastener gets tightened down to 110 ft-lbs. The right side fasteners that contain a bracket get tightened down to 85 ft-lbs. Finally the ball joint can be pushed into the knuckle and the pinch bolt can be tightened to 46 ft-lbs.Ford Escape Lower Control Arm to Frame Torque Spec : 110 ft-lbsFord Escape Lower Control Arm Frame Bolts Torque Spec : 85 ft-lbsFord Escape Lower Ball Joint Torque Spec : 46 ft-lbs Stabilizer Bar InstallationThe Ford Escape has a stabilizer bar in the front end that helps with the control and handling of the vehicle. This bar conects to two ends of the vehicle via nuts and then has 2 brackets one being on each side of the vehicle to hold the bar into place. The bracket bolts torque down to 52 ft-lbs while the endlinks tighten to 40 ft-lbs. Ford Escape Stabilizer Bar Brackets Torque Spec : 52 ft-lbsFord Escape Stabilizer Link to Strut Torque Spec : 40 ft-lbs
Click the area you are looking for!Front Steering Torque SpecsOuter Tie Rod Nut Torque Spec35 ft-lbsInner Tie Rod Torque Spec66 ft-lbsTie Rod Connecting Nuts Torque Spec20 ft-lbsFront Wheel Hub / KnuckleBrake Caliper Bracket Torque Spec75 ft-lbsWheel Axle Nut Torque Spec59 ft-lbs + 90°Wheel Lugnut Torque Spec100 ft-lbsFront Control Arms and Ball JointsLower Control Arm to Frame Bolt Torque Spec110 ft-lbsLower Control Arm Frame Bolts Torque Spec85 ft-lbsLower ball Joint Torque Spec46 ft-lbsFront Shocks Torque SpecUpper Strut Mounting Bolts Torque Spec25 ft-lbsStrut Lower Bolt Torque Spec65 ft-lbsStabilizer Link to Strut Torque Spec40 ft-lbsStabilizer Bracket to Frame Torque Spec52 ft-lbsFord Escape 1.6L Repair InformationFord Escape 1.6L Engine Repair InformationHere you can find information regarding the assembly of the Ford Escape front end. In this guide we will cover the essential repairs for the front end of this vehicle. Included within these repairs is the inner and outer tie rod removal and change, the front wheel hubs installation, ball joint removal and installation, the upper and lower control arms, and the front shock installation. Along with the repair procedures we also include the corresponding bolt torque specs for each fastener involved. These guides are intended to assist in each procedure to help diyers with the job.Ford Escape Tie Rod Change/RemovalTo install a new tie rod on a Ford Escape you must first remove the old one from the vehicle. This can be done by raising the vehicle up by either the use of a floor jack or a vehicle hoist. Once the vehicle is in the air you can remove the corresponding tire for the side that you want to change the tie rod on. Once the tire is off you can now access the old tie rod and remove it for replacement. The outer part of the tie rod uses a nut that will need to be removed, this nut may spin with the rest of the tie rod depending on how rusty it is. I suggest using a pair of vice grips to hold the portion of the bolt to prevent it from spinning. You may also use a wire brush to clean off the threads prior to removal and or use penatrating oil to aid in removal of the nut. Once removed you can now tap out the tie rod from the spindle and start to remove it completely. If you want to replace just the outer portion of the tie rod you can remove the clamp bolts further down the tie rod and remove the outer portion of the rod and replace. Once the outer tie rod is off you can now install the new part and reinstall it the same way it had been removed. Once you get the nut back in place you can torque it to 35 ft-lbs. If doing the inner tie rod be sure to tighten it back up to 66 ft-lbs.Ford Escape Outer Tie Rod Nut Torque Spec : 35 ft-lbsFord Escape Inner Tie Rod Torque Spec : 66 ft-lbsFord Escape Tie Rod Locking Nuts Torque Spec : 20 ft-lbs Front Wheel Hub InstallationTo install the new wheel hub you must first remove the old hub from the vehicle. To do this you must first remove the center axle nut from the vehicle. This is best done while the tire is still on the ground to prevent the entire assembly from moving during removal. Next you will need to jack the vehicle up and remove the lugnuts and tire from the car. Once the tire is off you will need to remove the bolts from the brake bracket on the steering knuckle. These bolts will be rather tight so you may want to use an impact or find some leverage. Once removed you can move the brake assembly out of the way and move the brake rotor from the vehicle. Next you will have to remove both the upper and lower connections to the steering knuckle. These include the lower ball joint and the lower strut bolt. A tip is to also remove the tie rod end so that you can remove the steering knuckle entirely from the vehicle. With the knuckle out of the car you can then press out the old bearing using a hydraulic press or a bearing pressing kit. With the old one removed you can press in the new bearing and then begin to reassembly the steering knuckle back into its place on the car. Starting with the lower ball joint you will need to tighten the pinch bolt down to 46 ft-lbs. The lower strut bolt is next and gets tightened to 65 ft-lbs. The last part for the knuckle is the tie rod end which tightens to 35 ft-lbs. The last stages are to put the braking system back on and then tighten the tire back up to the vehicle and install and tighten the center axle nut. The brake bracket tightens to 129 ft-lbs, the center axle nut gets tightened to 59 ft-lbs and then a 90 degree turn. The wheel lugnuts can be tightened down to 100 ft-lbs.Ford Escape Lugnuts Torque Spec : 100 ft-lbsFord Escape Front Axle Nut Torque Spec : 59 ft-lbs + 90° Front Ball Joints InstallationThe Ford Escape has one set of front ball joints being the lower ball joints. The lower ball joint is apart of the lower control arm but can be pressed out and changed to a new one using a pressing tool. In order to get room to press the old ball joint out you simply need to remove the pinch bolt which holds the joint to the steering knuckle and then remove the tie rod end and move the steering knuckle out of the way of the old ball joint. Then you can press it out and press the new one in. Once the new on is in you can reconnect the tie rod and reinstall the ball joint into the pinch on the knuckle and tighten the pinch bolt to 46 ft-lbs. Ford Escape Front Lower Ball Joint Torque Spec : 46 ft-lbs Front Strut InstallationTo replace the front struts on a Ford Escape you will first need to remove the upper strut bolts which can be accessed from under the hood. There are 3 bolts which should not be that tight. With those removed we can now move to the side of the vehicle and remove the tire out of the way. There are 2 bolts which hold the bottom of the strut to the steering knuckle and then a bolt that holds the stabilizer link the the strut as well. These will need to be removed before the strut can be taken out of the car. Once you have the old strut out you can place the new strut in and start installing it in the reverse order of removal. Starting with the upper bolts we will hand tighten them and then move to the lower bolts and hand tighten them. With everything hand tightened we can torque down the upper bolts to 55 ft-lbs and then the lower bolts to 65 ft-lbs. All that is left at this point is to tighten back up the stabilizer link and then put the tire back on. Ford Escape Strut Upper Bolts Torque Spec : 25 ft-lbsFord Escape Strut Lower Bolts Torque Spec : 65 ft-lbs Control Arm InstallationThe Ford Escape front suspension uses a lower control arm and upper strut to hold the vehicles steering knuckle to the frame, The lower control arm consists of bushings and the lower ball joint which is where it connects to the knuckle. To install a new control arm you can remove the tire from the car and then move to the bottom of the knuckle and loosen up the pinch bolt which holds the ball joint to the knuckle. With the bolt removed the lower arm can be dislodged from the knuckle. Next you can loosen up the inner control arm bolts which connects it to the cars frame. With all 3 fasteners removed you can remove the old arm and install the new arm into the car. The left side control arm frame fastener gets tightened down to 110 ft-lbs. The right side fasteners that contain a bracket get tightened down to 85 ft-lbs. Finally the ball joint can be pushed into the knuckle and the pinch bolt can be tightened to 46 ft-lbs.Ford Escape Lower Control Arm to Frame Torque Spec : 110 ft-lbsFord Escape Lower Control Arm Frame Bolts Torque Spec : 85 ft-lbsFord Escape Lower Ball Joint Torque Spec : 46 ft-lbs Stabilizer Bar InstallationThe Ford Escape has a stabilizer bar in the front end that helps with the control and handling of the vehicle. This bar conects to two ends of the vehicle via nuts and then has 2 brackets one being on each side of the vehicle to hold the bar into place. The bracket bolts torque down to 52 ft-lbs while the endlinks tighten to 40 ft-lbs. Ford Escape Stabilizer Bar Brackets Torque Spec : 52 ft-lbsFord Escape Stabilizer Link to Strut Torque Spec : 40 ft-lbs
Axle nut torquespecs chart
Shift back into park (for an automated transmission) or gear (for a manual transmission) prior to lowering the vehicle to the ground.
Traditional cone or roller bearings in older 2WD vehicles are often serviced when removing the rotors during a brake job. These bearings can easily be replaced, are less expensive to buy, and generally cost around $6-20.00 per unit, and $80-100.00 to service, along with the cost of replacing the rotor usually, as the bearing race is pressed in. All in, labor and rotor, most vehicles will run around $150.00 to replace and go up depending on rotor cost. In many cases, it’s cheaper to replace the rotor than it is to remove and press in a new bearing race.
Ford Escape Lower Control Arm to Frame Torque Spec : 110 ft-lbsFord Escape Lower Control Arm Frame Bolts Torque Spec : 85 ft-lbsFord Escape Lower Ball Joint Torque Spec : 46 ft-lbs Stabilizer Bar InstallationThe Ford Escape has a stabilizer bar in the front end that helps with the control and handling of the vehicle. This bar conects to two ends of the vehicle via nuts and then has 2 brackets one being on each side of the vehicle to hold the bar into place. The bracket bolts torque down to 52 ft-lbs while the endlinks tighten to 40 ft-lbs. Ford Escape Stabilizer Bar Brackets Torque Spec : 52 ft-lbsFord Escape Stabilizer Link to Strut Torque Spec : 40 ft-lbs
Ford Escape Front Lower Ball Joint Torque Spec : 46 ft-lbs Front Strut InstallationTo replace the front struts on a Ford Escape you will first need to remove the upper strut bolts which can be accessed from under the hood. There are 3 bolts which should not be that tight. With those removed we can now move to the side of the vehicle and remove the tire out of the way. There are 2 bolts which hold the bottom of the strut to the steering knuckle and then a bolt that holds the stabilizer link the the strut as well. These will need to be removed before the strut can be taken out of the car. Once you have the old strut out you can place the new strut in and start installing it in the reverse order of removal. Starting with the upper bolts we will hand tighten them and then move to the lower bolts and hand tighten them. With everything hand tightened we can torque down the upper bolts to 55 ft-lbs and then the lower bolts to 65 ft-lbs. All that is left at this point is to tighten back up the stabilizer link and then put the tire back on. Ford Escape Strut Upper Bolts Torque Spec : 25 ft-lbsFord Escape Strut Lower Bolts Torque Spec : 65 ft-lbs Control Arm InstallationThe Ford Escape front suspension uses a lower control arm and upper strut to hold the vehicles steering knuckle to the frame, The lower control arm consists of bushings and the lower ball joint which is where it connects to the knuckle. To install a new control arm you can remove the tire from the car and then move to the bottom of the knuckle and loosen up the pinch bolt which holds the ball joint to the knuckle. With the bolt removed the lower arm can be dislodged from the knuckle. Next you can loosen up the inner control arm bolts which connects it to the cars frame. With all 3 fasteners removed you can remove the old arm and install the new arm into the car. The left side control arm frame fastener gets tightened down to 110 ft-lbs. The right side fasteners that contain a bracket get tightened down to 85 ft-lbs. Finally the ball joint can be pushed into the knuckle and the pinch bolt can be tightened to 46 ft-lbs.Ford Escape Lower Control Arm to Frame Torque Spec : 110 ft-lbsFord Escape Lower Control Arm Frame Bolts Torque Spec : 85 ft-lbsFord Escape Lower Ball Joint Torque Spec : 46 ft-lbs Stabilizer Bar InstallationThe Ford Escape has a stabilizer bar in the front end that helps with the control and handling of the vehicle. This bar conects to two ends of the vehicle via nuts and then has 2 brackets one being on each side of the vehicle to hold the bar into place. The bracket bolts torque down to 52 ft-lbs while the endlinks tighten to 40 ft-lbs. Ford Escape Stabilizer Bar Brackets Torque Spec : 52 ft-lbsFord Escape Stabilizer Link to Strut Torque Spec : 40 ft-lbs
Be sure to consult your owner’s manual, a repair guide, an AutoZoner at a store near you, or a licensed, professional mechanic for vehicle-specific repair information. Refer to the service manual for specific diagnostic, repair and tool information for your particular vehicle. Always chock your wheels prior to lifting a vehicle. Always disconnect the negative battery cable before servicing an electrical application on the vehicle to protect its electrical circuits in the event that a wire is accidentally pierced or grounded. Use caution when working with automotive batteries. Sulfuric acid is caustic and can burn clothing and skin or cause blindness. Always wear gloves and safety glasses and other personal protection equipment, and work in a well-ventilated area. Should electrolyte get on your body or clothing, neutralize it immediately with a solution of baking soda and water. Do not wear ties or loose clothing when working on your vehicle.
Ford Escape Strut Upper Bolts Torque Spec : 25 ft-lbsFord Escape Strut Lower Bolts Torque Spec : 65 ft-lbs Control Arm InstallationThe Ford Escape front suspension uses a lower control arm and upper strut to hold the vehicles steering knuckle to the frame, The lower control arm consists of bushings and the lower ball joint which is where it connects to the knuckle. To install a new control arm you can remove the tire from the car and then move to the bottom of the knuckle and loosen up the pinch bolt which holds the ball joint to the knuckle. With the bolt removed the lower arm can be dislodged from the knuckle. Next you can loosen up the inner control arm bolts which connects it to the cars frame. With all 3 fasteners removed you can remove the old arm and install the new arm into the car. The left side control arm frame fastener gets tightened down to 110 ft-lbs. The right side fasteners that contain a bracket get tightened down to 85 ft-lbs. Finally the ball joint can be pushed into the knuckle and the pinch bolt can be tightened to 46 ft-lbs.Ford Escape Lower Control Arm to Frame Torque Spec : 110 ft-lbsFord Escape Lower Control Arm Frame Bolts Torque Spec : 85 ft-lbsFord Escape Lower Ball Joint Torque Spec : 46 ft-lbs Stabilizer Bar InstallationThe Ford Escape has a stabilizer bar in the front end that helps with the control and handling of the vehicle. This bar conects to two ends of the vehicle via nuts and then has 2 brackets one being on each side of the vehicle to hold the bar into place. The bracket bolts torque down to 52 ft-lbs while the endlinks tighten to 40 ft-lbs. Ford Escape Stabilizer Bar Brackets Torque Spec : 52 ft-lbsFord Escape Stabilizer Link to Strut Torque Spec : 40 ft-lbs
When doing any regular vehicle maintenance or if you suspect a wheel bearing issue, they can be inspected. Do the following to check your bearings for wear without taking the wheels off.
Front Strut InstallationTo replace the front struts on a Ford Escape you will first need to remove the upper strut bolts which can be accessed from under the hood. There are 3 bolts which should not be that tight. With those removed we can now move to the side of the vehicle and remove the tire out of the way. There are 2 bolts which hold the bottom of the strut to the steering knuckle and then a bolt that holds the stabilizer link the the strut as well. These will need to be removed before the strut can be taken out of the car. Once you have the old strut out you can place the new strut in and start installing it in the reverse order of removal. Starting with the upper bolts we will hand tighten them and then move to the lower bolts and hand tighten them. With everything hand tightened we can torque down the upper bolts to 55 ft-lbs and then the lower bolts to 65 ft-lbs. All that is left at this point is to tighten back up the stabilizer link and then put the tire back on. Ford Escape Strut Upper Bolts Torque Spec : 25 ft-lbsFord Escape Strut Lower Bolts Torque Spec : 65 ft-lbs Control Arm InstallationThe Ford Escape front suspension uses a lower control arm and upper strut to hold the vehicles steering knuckle to the frame, The lower control arm consists of bushings and the lower ball joint which is where it connects to the knuckle. To install a new control arm you can remove the tire from the car and then move to the bottom of the knuckle and loosen up the pinch bolt which holds the ball joint to the knuckle. With the bolt removed the lower arm can be dislodged from the knuckle. Next you can loosen up the inner control arm bolts which connects it to the cars frame. With all 3 fasteners removed you can remove the old arm and install the new arm into the car. The left side control arm frame fastener gets tightened down to 110 ft-lbs. The right side fasteners that contain a bracket get tightened down to 85 ft-lbs. Finally the ball joint can be pushed into the knuckle and the pinch bolt can be tightened to 46 ft-lbs.Ford Escape Lower Control Arm to Frame Torque Spec : 110 ft-lbsFord Escape Lower Control Arm Frame Bolts Torque Spec : 85 ft-lbsFord Escape Lower Ball Joint Torque Spec : 46 ft-lbs Stabilizer Bar InstallationThe Ford Escape has a stabilizer bar in the front end that helps with the control and handling of the vehicle. This bar conects to two ends of the vehicle via nuts and then has 2 brackets one being on each side of the vehicle to hold the bar into place. The bracket bolts torque down to 52 ft-lbs while the endlinks tighten to 40 ft-lbs. Ford Escape Stabilizer Bar Brackets Torque Spec : 52 ft-lbsFord Escape Stabilizer Link to Strut Torque Spec : 40 ft-lbs
Here you can find information regarding the assembly of the Ford Escape front end. In this guide we will cover the essential repairs for the front end of this vehicle. Included within these repairs is the inner and outer tie rod removal and change, the front wheel hubs installation, ball joint removal and installation, the upper and lower control arms, and the front shock installation. Along with the repair procedures we also include the corresponding bolt torque specs for each fastener involved. These guides are intended to assist in each procedure to help diyers with the job.Ford Escape Tie Rod Change/RemovalTo install a new tie rod on a Ford Escape you must first remove the old one from the vehicle. This can be done by raising the vehicle up by either the use of a floor jack or a vehicle hoist. Once the vehicle is in the air you can remove the corresponding tire for the side that you want to change the tie rod on. Once the tire is off you can now access the old tie rod and remove it for replacement. The outer part of the tie rod uses a nut that will need to be removed, this nut may spin with the rest of the tie rod depending on how rusty it is. I suggest using a pair of vice grips to hold the portion of the bolt to prevent it from spinning. You may also use a wire brush to clean off the threads prior to removal and or use penatrating oil to aid in removal of the nut. Once removed you can now tap out the tie rod from the spindle and start to remove it completely. If you want to replace just the outer portion of the tie rod you can remove the clamp bolts further down the tie rod and remove the outer portion of the rod and replace. Once the outer tie rod is off you can now install the new part and reinstall it the same way it had been removed. Once you get the nut back in place you can torque it to 35 ft-lbs. If doing the inner tie rod be sure to tighten it back up to 66 ft-lbs.Ford Escape Outer Tie Rod Nut Torque Spec : 35 ft-lbsFord Escape Inner Tie Rod Torque Spec : 66 ft-lbsFord Escape Tie Rod Locking Nuts Torque Spec : 20 ft-lbs Front Wheel Hub InstallationTo install the new wheel hub you must first remove the old hub from the vehicle. To do this you must first remove the center axle nut from the vehicle. This is best done while the tire is still on the ground to prevent the entire assembly from moving during removal. Next you will need to jack the vehicle up and remove the lugnuts and tire from the car. Once the tire is off you will need to remove the bolts from the brake bracket on the steering knuckle. These bolts will be rather tight so you may want to use an impact or find some leverage. Once removed you can move the brake assembly out of the way and move the brake rotor from the vehicle. Next you will have to remove both the upper and lower connections to the steering knuckle. These include the lower ball joint and the lower strut bolt. A tip is to also remove the tie rod end so that you can remove the steering knuckle entirely from the vehicle. With the knuckle out of the car you can then press out the old bearing using a hydraulic press or a bearing pressing kit. With the old one removed you can press in the new bearing and then begin to reassembly the steering knuckle back into its place on the car. Starting with the lower ball joint you will need to tighten the pinch bolt down to 46 ft-lbs. The lower strut bolt is next and gets tightened to 65 ft-lbs. The last part for the knuckle is the tie rod end which tightens to 35 ft-lbs. The last stages are to put the braking system back on and then tighten the tire back up to the vehicle and install and tighten the center axle nut. The brake bracket tightens to 129 ft-lbs, the center axle nut gets tightened to 59 ft-lbs and then a 90 degree turn. The wheel lugnuts can be tightened down to 100 ft-lbs.Ford Escape Lugnuts Torque Spec : 100 ft-lbsFord Escape Front Axle Nut Torque Spec : 59 ft-lbs + 90° Front Ball Joints InstallationThe Ford Escape has one set of front ball joints being the lower ball joints. The lower ball joint is apart of the lower control arm but can be pressed out and changed to a new one using a pressing tool. In order to get room to press the old ball joint out you simply need to remove the pinch bolt which holds the joint to the steering knuckle and then remove the tie rod end and move the steering knuckle out of the way of the old ball joint. Then you can press it out and press the new one in. Once the new on is in you can reconnect the tie rod and reinstall the ball joint into the pinch on the knuckle and tighten the pinch bolt to 46 ft-lbs. Ford Escape Front Lower Ball Joint Torque Spec : 46 ft-lbs Front Strut InstallationTo replace the front struts on a Ford Escape you will first need to remove the upper strut bolts which can be accessed from under the hood. There are 3 bolts which should not be that tight. With those removed we can now move to the side of the vehicle and remove the tire out of the way. There are 2 bolts which hold the bottom of the strut to the steering knuckle and then a bolt that holds the stabilizer link the the strut as well. These will need to be removed before the strut can be taken out of the car. Once you have the old strut out you can place the new strut in and start installing it in the reverse order of removal. Starting with the upper bolts we will hand tighten them and then move to the lower bolts and hand tighten them. With everything hand tightened we can torque down the upper bolts to 55 ft-lbs and then the lower bolts to 65 ft-lbs. All that is left at this point is to tighten back up the stabilizer link and then put the tire back on. Ford Escape Strut Upper Bolts Torque Spec : 25 ft-lbsFord Escape Strut Lower Bolts Torque Spec : 65 ft-lbs Control Arm InstallationThe Ford Escape front suspension uses a lower control arm and upper strut to hold the vehicles steering knuckle to the frame, The lower control arm consists of bushings and the lower ball joint which is where it connects to the knuckle. To install a new control arm you can remove the tire from the car and then move to the bottom of the knuckle and loosen up the pinch bolt which holds the ball joint to the knuckle. With the bolt removed the lower arm can be dislodged from the knuckle. Next you can loosen up the inner control arm bolts which connects it to the cars frame. With all 3 fasteners removed you can remove the old arm and install the new arm into the car. The left side control arm frame fastener gets tightened down to 110 ft-lbs. The right side fasteners that contain a bracket get tightened down to 85 ft-lbs. Finally the ball joint can be pushed into the knuckle and the pinch bolt can be tightened to 46 ft-lbs.Ford Escape Lower Control Arm to Frame Torque Spec : 110 ft-lbsFord Escape Lower Control Arm Frame Bolts Torque Spec : 85 ft-lbsFord Escape Lower Ball Joint Torque Spec : 46 ft-lbs Stabilizer Bar InstallationThe Ford Escape has a stabilizer bar in the front end that helps with the control and handling of the vehicle. This bar conects to two ends of the vehicle via nuts and then has 2 brackets one being on each side of the vehicle to hold the bar into place. The bracket bolts torque down to 52 ft-lbs while the endlinks tighten to 40 ft-lbs. Ford Escape Stabilizer Bar Brackets Torque Spec : 52 ft-lbsFord Escape Stabilizer Link to Strut Torque Spec : 40 ft-lbs
Back in the old days, wheel bearings were composed of 2 cone bearings on each front side. When removing the brake rotors (or drums) these more old-fashioned bearings could be serviced by packing the bearings with grease. While some vehicles still retain this style of bearing, it is rare.
There should be very little motion in the tire. If you have any movement at all, either a wheel bearing, or ball joint is at fault.
To replace the front struts on a Ford Escape you will first need to remove the upper strut bolts which can be accessed from under the hood. There are 3 bolts which should not be that tight. With those removed we can now move to the side of the vehicle and remove the tire out of the way. There are 2 bolts which hold the bottom of the strut to the steering knuckle and then a bolt that holds the stabilizer link the the strut as well. These will need to be removed before the strut can be taken out of the car. Once you have the old strut out you can place the new strut in and start installing it in the reverse order of removal. Starting with the upper bolts we will hand tighten them and then move to the lower bolts and hand tighten them. With everything hand tightened we can torque down the upper bolts to 55 ft-lbs and then the lower bolts to 65 ft-lbs. All that is left at this point is to tighten back up the stabilizer link and then put the tire back on. Ford Escape Strut Upper Bolts Torque Spec : 25 ft-lbsFord Escape Strut Lower Bolts Torque Spec : 65 ft-lbs Control Arm InstallationThe Ford Escape front suspension uses a lower control arm and upper strut to hold the vehicles steering knuckle to the frame, The lower control arm consists of bushings and the lower ball joint which is where it connects to the knuckle. To install a new control arm you can remove the tire from the car and then move to the bottom of the knuckle and loosen up the pinch bolt which holds the ball joint to the knuckle. With the bolt removed the lower arm can be dislodged from the knuckle. Next you can loosen up the inner control arm bolts which connects it to the cars frame. With all 3 fasteners removed you can remove the old arm and install the new arm into the car. The left side control arm frame fastener gets tightened down to 110 ft-lbs. The right side fasteners that contain a bracket get tightened down to 85 ft-lbs. Finally the ball joint can be pushed into the knuckle and the pinch bolt can be tightened to 46 ft-lbs.Ford Escape Lower Control Arm to Frame Torque Spec : 110 ft-lbsFord Escape Lower Control Arm Frame Bolts Torque Spec : 85 ft-lbsFord Escape Lower Ball Joint Torque Spec : 46 ft-lbs Stabilizer Bar InstallationThe Ford Escape has a stabilizer bar in the front end that helps with the control and handling of the vehicle. This bar conects to two ends of the vehicle via nuts and then has 2 brackets one being on each side of the vehicle to hold the bar into place. The bracket bolts torque down to 52 ft-lbs while the endlinks tighten to 40 ft-lbs. Ford Escape Stabilizer Bar Brackets Torque Spec : 52 ft-lbsFord Escape Stabilizer Link to Strut Torque Spec : 40 ft-lbs
With the wheel bearing replacement cost in mind, you may be wondering if you can drive with a bad wheel bearing. A bad wheel bearing needs to be changed as soon as possible. There is no lubrication on a bad wheel bearing. Consequently, as you drive with a bad wheel bearing, you run the risk of the wheel bearing completely failing and breaking apart, which can cause massive stability problems when driving, even a crash. If you’re in the middle of nowhere and you need to drive a short way to get help to prevent this scenario, you should drive at a slower speed so that your wheel remains intact for a couple more hours.
Today, aside from rear-wheel drive vehicles that use a solid axle (like trucks), most vehicles use a hub bearing. These consist of a bearing and flange surface that is bolted directly to the steering knuckle or rear transaxle. The bearing then has a hub face, with the wheel studs and tire-mounting surface. Often, an axle (often one with a CV joint) also passes through this bearing via a splined surface and has a large hub nut (called a spindle nut) that secures it at the bearing. This design makes up most bearings on vehicles today. There are some vehicles that still use a pressed-in hub bearing, where you re-use the original wheel hub, but this is becoming rare.
Wheel bearings live a tough life. Most of a vehicle's weight rides on the wheel bearings at the 4 corners of your vehicle. Once these bearings begin to deteriorate, a humming noise becomes noticeable. It's easiest to hear at speed when you turn the wheel slightly from side to side. When a rear wheel bearing goes out, the humming or grinding noise is usually constant.
Spin the wheel/tire by hand and listen carefully. You should hear a soft rubbing sound which is just the brake pads gliding over the rotor. A grinding sound centered in the very middle of the wheel is a dead giveaway for a failing wheel bearing. It’s important to note that when wheel bearings first start to go, it will normally be difficult to hear and tell. Usually only a road test under the weight of the vehicle will reveal that the bearing is going out.
The Ford Escape front suspension uses a lower control arm and upper strut to hold the vehicles steering knuckle to the frame, The lower control arm consists of bushings and the lower ball joint which is where it connects to the knuckle. To install a new control arm you can remove the tire from the car and then move to the bottom of the knuckle and loosen up the pinch bolt which holds the ball joint to the knuckle. With the bolt removed the lower arm can be dislodged from the knuckle. Next you can loosen up the inner control arm bolts which connects it to the cars frame. With all 3 fasteners removed you can remove the old arm and install the new arm into the car. The left side control arm frame fastener gets tightened down to 110 ft-lbs. The right side fasteners that contain a bracket get tightened down to 85 ft-lbs. Finally the ball joint can be pushed into the knuckle and the pinch bolt can be tightened to 46 ft-lbs.Ford Escape Lower Control Arm to Frame Torque Spec : 110 ft-lbsFord Escape Lower Control Arm Frame Bolts Torque Spec : 85 ft-lbsFord Escape Lower Ball Joint Torque Spec : 46 ft-lbs Stabilizer Bar InstallationThe Ford Escape has a stabilizer bar in the front end that helps with the control and handling of the vehicle. This bar conects to two ends of the vehicle via nuts and then has 2 brackets one being on each side of the vehicle to hold the bar into place. The bracket bolts torque down to 52 ft-lbs while the endlinks tighten to 40 ft-lbs. Ford Escape Stabilizer Bar Brackets Torque Spec : 52 ft-lbsFord Escape Stabilizer Link to Strut Torque Spec : 40 ft-lbs
Rear wheel bearings today are usually no different than fronts in terms of a complete hub bearing or pressed-on units. In the vast majority of cases here, a complete unit is used and unbolted / bolted to the rear transaxle (2WD vehicles) or independent rear axle.
Popular in German and Japanese vehicles, these units are the sealed roller bearing that you see on the back of the complete unit. In these cases, the entire steering knuckle must often be removed from the vehicle, and the bearing pressed out, and the new one pressed in. While the cost of the bearing drastically diminishes (usually these run between $25.00-50.00) the labor involved to replace the bearing goes up, usually to the tune of 2-4 hours to replace ($160-400.00).


 8613869596835