Nucleus Blog | SSVC Vulnerability Prioritization Framework - ssvc
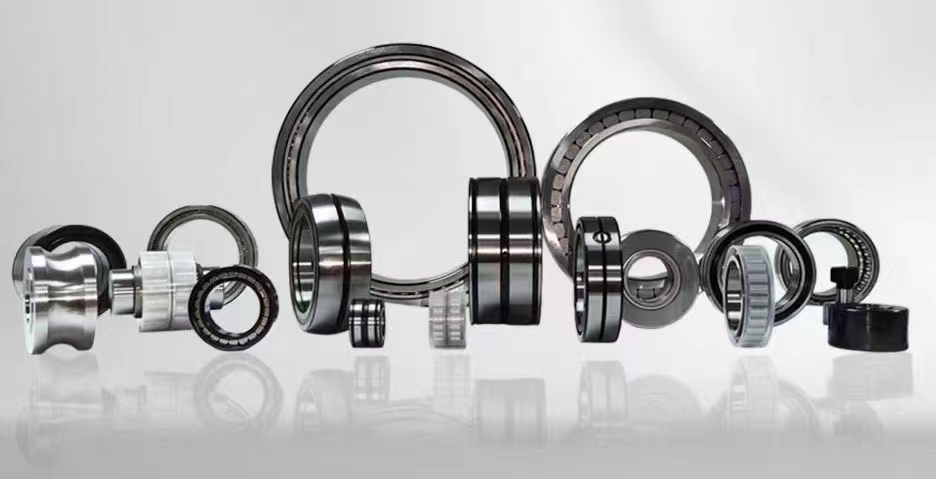
Axial and radialload capacity
Mar 5, 2007 — Remove inner races by cutting a groove (not all the way through) with a dremel - chisel ad BFH to shatter race. replace by heating ineer race as ...
As with any application, it is crucial that you choose the right seal. Therefore, it is imperative that you understand the different factors that might determine the seal that you need. It can also be of benefit to obtain professional advice and guidance as this will ensure that you get it right as if you fail to choose the correct seal then you are at risk of experiencing a wide range of problems depending on the industry that the machinery operates in. This highlights how important it is to understand the difference between seals and the benefits they offer.
Axialload
While they can be tricky to remove and replace, with a little elbow grease and know-how, you can repair your worn out wheel bearings.
Best sales skateboard bearings, Bones Reds Bearings Single Set Amazon Sports Outdoors sales.
Radialplay vsaxialplay
When it comes to seals, there might be a lot to think about, after all, it’s imperative that you get it right and that it works for your application. However, get it wrong and it could prove costly and cause a wide range of problems. Therefore, when it comes to static seals they are categorised as either axial seals or radial seals.
FREE Shipping is standard on orders shipped to the lower 48 States (Contiguous United States). Standard shipping charges apply to Hawaii and Alaska.
NA 10/360 GLOSSY 3001-0036-0.
It is common to see radial seals used in bore, piston, cap and plug style applications. They then fall into one of two main categories known as dynamic radial seals and static radial seals. Dynamic radial seals are developed to be used in an environment where there is reciprocating, rotating or oscillating movements between two mating components. In contrast to this, static radial seals are traditionally used in those environments where there is very little or no motion between the mating surfaces that are being sealed. It is this specific reason that static seals are then considered to be more forgiving than dynamic seals. They have the ability to manage wider, larger gaps as well as surfaces that have a rough finish and higher pressures.
Axial and radialbearing
This item is backed by our limited lifetime warranty. In the event that this item should fail due to manufacturing defects during intended use, we will replace the part free of charge. This warranty covers the cost of the part only.
Does your car have noisy wheel bearings? Visit your local Meineke for wheel bearing repairs and replacements. Schedule your appointment today.
WARNING: This product can expose you to chemicals including Lead and Lead Compounds, which are known to the State of California to cause cancer, and birth defects or other reproductive harm. For more information, go to www.P65Warnings.ca.gov.
Axial and radialload
FREE Shipping is standard on orders shipped to the lower 48 States (Contiguous United States). Standard shipping charges apply to Hawaii and Alaska. Shipping is not available to a P.O. Box, APO/FPO/DPO addresses, US Territories, or Canada for this item. Expedited is available on checkout to the United States, excluding Alaska, Hawaii. Final shipping costs are available at checkout.
10 MS35338 Military Split Lock Washer DFAR 316 Stainless Steel. Model #: VFMS35338-138. Quantity of Cartons: Add to Cart & ...
Aug 5, 2022 — Well-Known Member ... It's a sealed unit that doesn't need to be greased. If it's making noises it should be replaced. I certainly wouldn't force ...
Axial and radialalignment
Brought to you by 1AAuto.com-- your source for quality replacement parts and the best service on the internet.Hi, I'm Mike Green. I'm one of the owners of 1A Auto. I want to help you save time and money repairing and maintaining your vehicle. I'm going to use my 20 plus years' experience restoring and repairing cars and trucks like this to show you the correct way to install parts from 1AAuto.com. The right parts installed correctly, that's going to save you time and money. Thank you and enjoy the video.In this video, we're going to show you how to remove and replace the front wheel bearing hub on this 2004 Trailblazer. This is the same for many 02' to 09' Trailblazer, Envoy, Bravada, Rainier, Saab 9-7X, as well as Isuzu Ascenders. Tools you'll need are various millimeter sockets, a breaker bar or pipe, if you need some extra leverage. I actually didn't need the extra leverage on this vehicle, but I do show you how to use it, flat blade screwdriver, wire brush, a large c-clamp to reset the pistons in the caliper, torque wrench, 35-millimeter socket, which is something that most toolboxes don't have, but you do need that 35-millimeter socket and then jack and jack stands.Start by prying your cap off. That's a 19 millimeter and if you don't have air tools, you want to start with the wheel on the ground, loosen the lug nut, then raise it, port it with jack stands and then remove the wheel and the tire. I'll just fast forward taking off the rest of those lug nuts and then removing the wheel and tire. Now either pull or using the steering wheel, turn your wheels, so you have easy access to the back of the brake calipers. Now, we're going to check the condition of the brakes. Now, I spin this, you'll the rotor move. Okay. Then right to the right there, there's actually your pad. As you can see, there's not that much life left and it's not looking well on the outside either. We're going to remove the caliper, which is removing a bolt up here and a bolt down here and then after that, we're going to remove the caliper bracket, which is two large bolts, 18 millimeter one here and one up here.The bolts on the caliper, relatively easy, 13 millimeter, use a small wrench. We'll just speed it up here as I remove those two bolts. Okay, the caliper comes right off. You can put that over here. Okay. These are 18-millimeter bolts for the caliper bracket. You're going to want a breaker bar, which is a bar to give you extra leverage. Okay. As you can see, it actually come apart pretty easy. If you don't have a breaker bar like this, you just have a ratchet, you can put a piece of pipe on to give you extra leverage and pull it easy on the pipe and it should have come loose. When you're all the way up, you can just take your pads off. Take your screwdriver, which should pretty easily pry out. All right. You can see this one. That little line down the middle is the wear and tear. It's actually just about at the end of its life.We'll fast forward again as we remove those two 18-millimeter bolts that hold that caliper bracket. Okay, that comes off. Then your discs should just come off. If your discs don't come off, there are threaded holes and you need to use some bolts. What you do is you put the bolts in there and the bolts crack against the hub to push them out. Okay. These rotors are pretty crusty looking so I am going to replace them using a 35-millimeter socket. If you don't have an impact wrench, what you'll need to do is, you'll do this at the beginning, you pull that cap off your wheel and then with the big breaker bar and a pipe, you'll loosen this hub nut. Because I have an impact wrench, I can do it this way.When you're replacing the hub, you don't want to go just hammering away on the axle because you can damage your CV joint, but most of the time, if you just give this one good whack, you'll see that it's broken loose. Basically, just watch the relationship of your axle to your hub when you give it a good hit. Okay and it moved just fine. Just a note, I've yet to have a GM car, where just hitting it with the hammer once didn't break it free.Right in behind there are three bolts, one here, one up there and then there's one around the back side as well, right down there. Now I get to those bolts. I'm going to take an 18-millimeter socket with a short extension. Okay, put it right on there. I'm going to use the poor man's method. I've got my ratchet and keep the pipe for leverage. Okay. Now I'm going to pull nice and easy and actually these come apart pretty nicely.Now I'm going to speed up as I loosen the other two and remove those three bolts. Okay, your lead comes out. Okay, follow it around and we'll clip back here, push with the screwdriver, push on the other side, and push that out. Okay, and pry these right out. Now I'm going to really speed through here. All I'm going to do is follow the ABS lead up and pry out the connectors. One note is to check your new hub because that will tell you kind of how the connectors come apart, whether or not you need to pry them out of the frame or just open them up, so that you can put the new lead in.This last connector with a tab right beside here, go in, lift up, and pull that off here. Okay, turn to the side, that out, off. All three of my bolts are off and my harness is disconnected. Just take a hammer. Okay. It all pops off. You need to get this metal shield off. Okay, get the metal shield off by using a combination of tap it off with a hammer and there's your hub. Take a wire brush here. Just clean off some of the scale. Okay, put that back on and a new hub from 1A Auto, exact same thing as the old one. Take the harness and put it back in place, work it onto the CV, push it on, take one of the bolts, put it through here, move the back end plate and start it into the hub. Grab the other two bolts.I'm just going to speed it up as I reconnect that harness and route all the clips. It's very important to clip it back into place as it was originally, keeps the ABS harness from rubbing against anything and possibly damaging your ABS brakes.Now we're going to put the torque on these three bolts to 90-foot pounds. I'll fast forward a little bit as I torque the other two bolts and again, I said I torqued them to 90-foot pounds. We're going to put our hub nut on and we're just going to ... we're not torquing it right now. We're just pulling the CV axle into the hub. Here, I'm going to fast forward through putting the brakes back together. If you'd like to see this in real time, just check out our video for the Trailblazer brakes and do please keep watching because I do go through torquing the center nut on the hub, as well as some other important information about what you need to do after you've had your brakes apart.With the tire back on the ground, I'm going to torque the lug nuts to between 100 and 120-foot pounds, kind of just using a crossing pattern. Now here, I'm going to tighten that lug nut to 103-foot pounds. Very important after doing brake work, always pump your brakes many times and then before you do a road test, make sure the brakes hold the vehicle in gear and then do a stop from five miles an hour and ten miles per hour before hitting the brakes.We hope this helps you out. Brought to you by www.1AAuto.com-- your source for quality replacement parts and the best service on the internet.Please feel free to call us toll free, (888) 844-3393. We're the company that serves you on the internet and in person.
Dedicated to advancing elastomeric technologies, NES provides superior expertise in the innovation, development, and manufacturing of advanced sealing solutions for some of the world’s most demanding and safety-critical applications.
NES is an agile business with a diverse range of capabilities that facilitate the provision of high-quality, value added solutions to a wide range of customers and end markets. With strong technical capabilities and expertise provided in-house through our dedicated people, we provide customer focus that is responsive to ever-changing circumstances.
Axialload bearing
Axial and radialdirection
This categorisation is defined by the way in which compression is applied to the cross-section of the O-ring. So, what we aim to do is explain the difference between these two types of seals even though they might seem quite similar. The main difference between radial seals and axial seals essentially comes down to the direction in which compression is applied to the seal cross-sections. In the case of radial seals, compression is applied to the outside diameter and the inside diameter. In contrast to this, axial seals will have compression applied to both the top and the bottom of the cross-section of the seal. So, let’s delve deeper into the different properties and functions of both seals.
In applications where axial seals are used the top and bottom of the O-rings cross-section will be squeezed. Therefore, axial seals are the ideal solution for primary seals but also secondary seals in those applications where the primary seal is subjected to a significant amount of fluid or solid contaminants. This kind of seal is commonly used in face or flange type applications and they are a lot easier to manufacture when compared to static radial seals.
ECCPP Wheel Bearing Hub 512025 Hub Bearing Assembly Hub Assemblies ... ECCPP 513294 New Brand Front Wheel Hub Bearing Assembly Replacement for Left Right ...
Integrated Polymer Solutions is a leading developer and manufacturer of Advanced Materials and engineered components for high-value end markets.
The average cost for a Chevrolet Malibu Wheel Hub Assembly Replacement is between $341 and $420. Labor costs are estimated between $130 and $164 while parts ...
Lifetime Warranty This item is backed by our limited lifetime warranty. In the event that this item should fail due to manufacturing defects during intended use, we will replace the part free of charge. This warranty covers the cost of the part only.
GSZ | 400V / 50Hz. 4-poliger Motor, Langsamläufer, vermindert Verschleiß erheblich. GROUP46 ...


 8613869596835