NYCWY 3x25 RM/25 0,6/1kV - Power and control cables - LAPP - 3x25
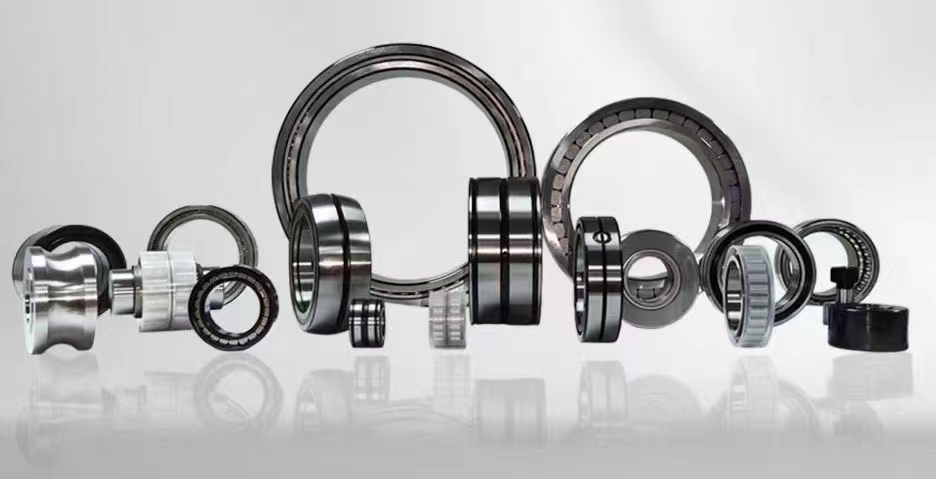
WheelHub Assembly Kit
Raise the front of the vehicle on jack stands. Remove the front wheels. Remove the brake pads using BRAKE-02. Remove the two caliper retaining bolts that attach the caliper to the steering knuckle, slide the caliper off the rotor, and hang the caliper out of the way with shock cord or wire. Remove the wheel bearing grease cap by tapping around the back edge with of the cap with a hammer and chisel. On early models (pre-1985.5), the speedometer is driven by a cable off of the left front wheel. To remove the grease cap on that side, you'll first have to remove the E-clip from the end of the cable using a small flat tip screwdriver or probe. After the grease cap is removed, loosen the locking collar Allen head bolt using a 6 mm Allen head wrench or long Allen head socket. To get the wrench into the head you'll have to turn the hub until the detent in the lip of the hub lines up with the head of Allen bolt. Turn the locking collar counter-clockwise to remove it from the spindle. Then, pull the hub and rotor assembly as a unit straight off of the spindle. The thrust washer and outer wheel bearing will likely fall out of the hub when you slide it off the spindle so, be prepared to catch them. Pry the grease seal out of the back of the hub and remove the inner wheel bearing. Use the hammer and round punch to tap the bearing races out of the hub. Alternate tapping on one side of the bearing and then the other along the two channels inside the hub. If you do not have access to a brass punch, be extremely careful of the angle you hold the punch to keep from damaging the inner surface of the hub. Once both bearing races are removed, clean the inner surfaces of the hub thoroughly. Install the new bearing races into the hub as follows: Place the new bearing races in a freezer for a minimum of an hour, preferably overnight. Heat the hub assemblies in an oven at 250°F for at least 30 minutes. The longer you leave the hubs in the oven the easier the races will go into the hub. Using a pair of gloves, remove the hub(s) from the oven and place on a flat working surface which can not be damaged by the hub. Remove the races from the freezer and insert them into the hub. The bearing should drop right into the hub with little or no effort. Pack the new bearings with a good quality moly bearing grease. A bearing packer is the preferred method of packing the bearing but, they can be packed almost as well by placing the bearing in the palm of your hand and pushing grease into the bearing rollers using your fingers. Place the inner bearing into the back of the hub and install a new bearing seal. Place the hub assembly onto the spindle an insert the outer wheel bearing. Place the thrust washer and locking collar onto the spindle. Adjust the bearing as described in the "Checking and Adjustment" section of this procedure. When the bearing is properly adjusted, tighten the Allen head bolt on the locking collar, replace the bearing cap, replace the front wheel, and lower the vehicle. Clark's Garage © 1998
The position is primarily on-site at each location, however telework may be authorized one day per week.Required Education, Experience, & Skills High school diploma and at least 6 years of related experience OR Associate degree and at least 4 years of related experience OR Bachelor's degree and at least 2 years of related experiencePreferred Education, Experience, & Skills Prior Navy experiencePay InformationFull-Time Salary Range: $75570 - $128480Please note: This range is based on our market pay structures. However, individual salaries are determined by a variety of factors including, but not limited to: business considerations, local market conditions, and internal equity, as well as candidate qualifications, such as skills, education, and experience. Employee Benefits: At BAE Systems, we support our employees in all aspects of their life, including their health and financial well-being. Regular employees scheduled to work 20+ hours per week are offered: health, dental, and vision insurance; health savings accounts; a 401(k) savings plan; disability coverage; and life and accident insurance. We also have an employee assistance program, a legal plan, and other perks including discounts on things like home, auto, and pet insurance. Our leave programs include paid time off, paid holidays, as well as other types of leave, including paid parental, military, bereavement, and any applicable federal and state sick leave. Employees may participate in the company recognition program to receive monetary or non-monetary recognition awards. Other incentives may be available based on position level and/or job specifics.About BAE Systems Intelligence & Security BAE Systems, Inc. is the U.S. subsidiary of BAE Systems plc, an international defense, aerospace and security company which delivers a full range of products and services for air, land and naval forces, as well as advanced electronics, security, information technology solutions and customer support services. Improving the future and protecting lives is an ambitious mission, but it's what we do at BAE Systems. Working here means using your passion and ingenuity where it counts - defending national security with breakthrough technology, superior products, and intelligence solutions. As you develop the latest technology and defend national security, you will continually hone your skills on a team-making a big impact on a global scale. At BAE Systems, you'll find a rewarding career that truly makes a difference.Intelligence & Security (I&S), based in McLean, Virginia, designs and delivers advanced defense, intelligence, and security solutions that support the important missions of our customers. Our pride and dedication shows in everything we do-from intelligence analysis, cyber operations and IT expertise to systems development, systems integration, and operations and maintenance services. Knowing that our work enables the U.S. military and government to recognize, manage and defeat threats inspires us to push ourselves and our technologies to new levels. Our Commitment to Diversity, Equity, and Inclusion:At BAE Systems, we work hard every day to nurture an inclusive culture where employees are valued and feel like they belong. We are conscious of the need for all employees to see themselves reflected at every level of the company and know that in order to unlock the full potential of our workforce, everyone must feel confident being their best, most sincere self and be equipped to thrive. We provide impactful professional development experiences to our employees and invest in social impact partnerships to uplift communities and drive purposeful change. Here you will find significant opportunities to do meaningful work in an environment intentionally designed to be one where you will learn, grow and belong.
Wheel bearings frontsymptoms
Acrobat Printable Version Checking and Adjustment Tools Small Flat Tip Screwdriver or Probe (Early Cars) Medium Flat Tip Screwdriver Hammer Chisel 6 mm Allen Head Wrench or Long Allen Head Socket Floor Jack Jack Stands Raise the front of the vehicle on jack stands. Spin the front wheel and listen for noise. Also, make sure the wheel rolls freely without excessive resistance. To check the wheel bearing adjustment, first remove the front wheel. Remove the wheel bearing grease cap by tapping around the back edge with of the cap with a hammer and chisel. On early models (pre-1985.5), the speedometer is driven by a cable off of the left front wheel. To remove the grease cap on that side, you'll first have to remove the E-clip from the end of the cable using a small flat tip screwdriver or probe. After the grease cap is removed, use the medium flat tip screwdriver to turn the bearing thrust washer (just behind the locking collar). When you try to turn the washer ensure that the screwdriver is not resting on the locking collar or on the hub. If the washer spins freely or if you are unable to turn the washer using the screwdriver, the wheel bearing needs to be adjusted. If adjustment is required, loosen the locking collar Allen head bolt using a 6 mm Allen head wrench or long Allen head socket. To get the wrench into the head you'll have to turn the hub until the detent in the lip of the hub lines up with the head of Allen bolt. Once the Allen head bolt is loosened, turn the locking collar as necessary to achieve proper adjustment on the bearing (as described in the previous steps). If the washer turns too freely, turn the locking collar in the clockwise direction to tighten the bearing. If the washer is too tight, turn the collar in the counter-clockwise direction to loosen the bearing. When the bearing is properly adjusted, tighten the Allen head bolt on the locking collar, replace the bearing cap, replace the front wheel, and lower the vehicle. Bearing Replacement Tools Small Flat Tip Screwdriver or Probe (Early Cars) Hammer Chisel Medium Round Tip Punch preferably Brass 6 mm Allen Head Wrench or Long Allen Head Socket Floor Jack Jack Stands Raise the front of the vehicle on jack stands. Remove the front wheels. Remove the brake pads using BRAKE-02. Remove the two caliper retaining bolts that attach the caliper to the steering knuckle, slide the caliper off the rotor, and hang the caliper out of the way with shock cord or wire. Remove the wheel bearing grease cap by tapping around the back edge with of the cap with a hammer and chisel. On early models (pre-1985.5), the speedometer is driven by a cable off of the left front wheel. To remove the grease cap on that side, you'll first have to remove the E-clip from the end of the cable using a small flat tip screwdriver or probe. After the grease cap is removed, loosen the locking collar Allen head bolt using a 6 mm Allen head wrench or long Allen head socket. To get the wrench into the head you'll have to turn the hub until the detent in the lip of the hub lines up with the head of Allen bolt. Turn the locking collar counter-clockwise to remove it from the spindle. Then, pull the hub and rotor assembly as a unit straight off of the spindle. The thrust washer and outer wheel bearing will likely fall out of the hub when you slide it off the spindle so, be prepared to catch them. Pry the grease seal out of the back of the hub and remove the inner wheel bearing. Use the hammer and round punch to tap the bearing races out of the hub. Alternate tapping on one side of the bearing and then the other along the two channels inside the hub. If you do not have access to a brass punch, be extremely careful of the angle you hold the punch to keep from damaging the inner surface of the hub. Once both bearing races are removed, clean the inner surfaces of the hub thoroughly. Install the new bearing races into the hub as follows: Place the new bearing races in a freezer for a minimum of an hour, preferably overnight. Heat the hub assemblies in an oven at 250°F for at least 30 minutes. The longer you leave the hubs in the oven the easier the races will go into the hub. Using a pair of gloves, remove the hub(s) from the oven and place on a flat working surface which can not be damaged by the hub. Remove the races from the freezer and insert them into the hub. The bearing should drop right into the hub with little or no effort. Pack the new bearings with a good quality moly bearing grease. A bearing packer is the preferred method of packing the bearing but, they can be packed almost as well by placing the bearing in the palm of your hand and pushing grease into the bearing rollers using your fingers. Place the inner bearing into the back of the hub and install a new bearing seal. Place the hub assembly onto the spindle an insert the outer wheel bearing. Place the thrust washer and locking collar onto the spindle. Adjust the bearing as described in the "Checking and Adjustment" section of this procedure. When the bearing is properly adjusted, tighten the Allen head bolt on the locking collar, replace the bearing cap, replace the front wheel, and lower the vehicle. Clark's Garage © 1998
Small Flat Tip Screwdriver or Probe (Early Cars) Medium Flat Tip Screwdriver Hammer Chisel 6 mm Allen Head Wrench or Long Allen Head Socket Floor Jack Jack Stands Raise the front of the vehicle on jack stands. Spin the front wheel and listen for noise. Also, make sure the wheel rolls freely without excessive resistance. To check the wheel bearing adjustment, first remove the front wheel. Remove the wheel bearing grease cap by tapping around the back edge with of the cap with a hammer and chisel. On early models (pre-1985.5), the speedometer is driven by a cable off of the left front wheel. To remove the grease cap on that side, you'll first have to remove the E-clip from the end of the cable using a small flat tip screwdriver or probe. After the grease cap is removed, use the medium flat tip screwdriver to turn the bearing thrust washer (just behind the locking collar). When you try to turn the washer ensure that the screwdriver is not resting on the locking collar or on the hub. If the washer spins freely or if you are unable to turn the washer using the screwdriver, the wheel bearing needs to be adjusted. If adjustment is required, loosen the locking collar Allen head bolt using a 6 mm Allen head wrench or long Allen head socket. To get the wrench into the head you'll have to turn the hub until the detent in the lip of the hub lines up with the head of Allen bolt. Once the Allen head bolt is loosened, turn the locking collar as necessary to achieve proper adjustment on the bearing (as described in the previous steps). If the washer turns too freely, turn the locking collar in the clockwise direction to tighten the bearing. If the washer is too tight, turn the collar in the counter-clockwise direction to loosen the bearing. When the bearing is properly adjusted, tighten the Allen head bolt on the locking collar, replace the bearing cap, replace the front wheel, and lower the vehicle. Bearing Replacement Tools Small Flat Tip Screwdriver or Probe (Early Cars) Hammer Chisel Medium Round Tip Punch preferably Brass 6 mm Allen Head Wrench or Long Allen Head Socket Floor Jack Jack Stands Raise the front of the vehicle on jack stands. Remove the front wheels. Remove the brake pads using BRAKE-02. Remove the two caliper retaining bolts that attach the caliper to the steering knuckle, slide the caliper off the rotor, and hang the caliper out of the way with shock cord or wire. Remove the wheel bearing grease cap by tapping around the back edge with of the cap with a hammer and chisel. On early models (pre-1985.5), the speedometer is driven by a cable off of the left front wheel. To remove the grease cap on that side, you'll first have to remove the E-clip from the end of the cable using a small flat tip screwdriver or probe. After the grease cap is removed, loosen the locking collar Allen head bolt using a 6 mm Allen head wrench or long Allen head socket. To get the wrench into the head you'll have to turn the hub until the detent in the lip of the hub lines up with the head of Allen bolt. Turn the locking collar counter-clockwise to remove it from the spindle. Then, pull the hub and rotor assembly as a unit straight off of the spindle. The thrust washer and outer wheel bearing will likely fall out of the hub when you slide it off the spindle so, be prepared to catch them. Pry the grease seal out of the back of the hub and remove the inner wheel bearing. Use the hammer and round punch to tap the bearing races out of the hub. Alternate tapping on one side of the bearing and then the other along the two channels inside the hub. If you do not have access to a brass punch, be extremely careful of the angle you hold the punch to keep from damaging the inner surface of the hub. Once both bearing races are removed, clean the inner surfaces of the hub thoroughly. Install the new bearing races into the hub as follows: Place the new bearing races in a freezer for a minimum of an hour, preferably overnight. Heat the hub assemblies in an oven at 250°F for at least 30 minutes. The longer you leave the hubs in the oven the easier the races will go into the hub. Using a pair of gloves, remove the hub(s) from the oven and place on a flat working surface which can not be damaged by the hub. Remove the races from the freezer and insert them into the hub. The bearing should drop right into the hub with little or no effort. Pack the new bearings with a good quality moly bearing grease. A bearing packer is the preferred method of packing the bearing but, they can be packed almost as well by placing the bearing in the palm of your hand and pushing grease into the bearing rollers using your fingers. Place the inner bearing into the back of the hub and install a new bearing seal. Place the hub assembly onto the spindle an insert the outer wheel bearing. Place the thrust washer and locking collar onto the spindle. Adjust the bearing as described in the "Checking and Adjustment" section of this procedure. When the bearing is properly adjusted, tighten the Allen head bolt on the locking collar, replace the bearing cap, replace the front wheel, and lower the vehicle. Clark's Garage © 1998
Whatever your talents, goals and ambitions, you’ll find a distinctive place to thrive at BAE Systems. Join our team and see how you can make a bigger difference.
Wheel bearings frontcost
Front Wheel Hub Bearing Assembly For Chevrolet Malibu 2004-2007 Pontiac G6 2005 · Description: Wheel Bearing & Hub Assembly · Part Type: Hubs and Related ...
Raise the front of the vehicle on jack stands. Spin the front wheel and listen for noise. Also, make sure the wheel rolls freely without excessive resistance. To check the wheel bearing adjustment, first remove the front wheel. Remove the wheel bearing grease cap by tapping around the back edge with of the cap with a hammer and chisel. On early models (pre-1985.5), the speedometer is driven by a cable off of the left front wheel. To remove the grease cap on that side, you'll first have to remove the E-clip from the end of the cable using a small flat tip screwdriver or probe. After the grease cap is removed, use the medium flat tip screwdriver to turn the bearing thrust washer (just behind the locking collar). When you try to turn the washer ensure that the screwdriver is not resting on the locking collar or on the hub. If the washer spins freely or if you are unable to turn the washer using the screwdriver, the wheel bearing needs to be adjusted. If adjustment is required, loosen the locking collar Allen head bolt using a 6 mm Allen head wrench or long Allen head socket. To get the wrench into the head you'll have to turn the hub until the detent in the lip of the hub lines up with the head of Allen bolt. Once the Allen head bolt is loosened, turn the locking collar as necessary to achieve proper adjustment on the bearing (as described in the previous steps). If the washer turns too freely, turn the locking collar in the clockwise direction to tighten the bearing. If the washer is too tight, turn the collar in the counter-clockwise direction to loosen the bearing. When the bearing is properly adjusted, tighten the Allen head bolt on the locking collar, replace the bearing cap, replace the front wheel, and lower the vehicle. Bearing Replacement Tools Small Flat Tip Screwdriver or Probe (Early Cars) Hammer Chisel Medium Round Tip Punch preferably Brass 6 mm Allen Head Wrench or Long Allen Head Socket Floor Jack Jack Stands Raise the front of the vehicle on jack stands. Remove the front wheels. Remove the brake pads using BRAKE-02. Remove the two caliper retaining bolts that attach the caliper to the steering knuckle, slide the caliper off the rotor, and hang the caliper out of the way with shock cord or wire. Remove the wheel bearing grease cap by tapping around the back edge with of the cap with a hammer and chisel. On early models (pre-1985.5), the speedometer is driven by a cable off of the left front wheel. To remove the grease cap on that side, you'll first have to remove the E-clip from the end of the cable using a small flat tip screwdriver or probe. After the grease cap is removed, loosen the locking collar Allen head bolt using a 6 mm Allen head wrench or long Allen head socket. To get the wrench into the head you'll have to turn the hub until the detent in the lip of the hub lines up with the head of Allen bolt. Turn the locking collar counter-clockwise to remove it from the spindle. Then, pull the hub and rotor assembly as a unit straight off of the spindle. The thrust washer and outer wheel bearing will likely fall out of the hub when you slide it off the spindle so, be prepared to catch them. Pry the grease seal out of the back of the hub and remove the inner wheel bearing. Use the hammer and round punch to tap the bearing races out of the hub. Alternate tapping on one side of the bearing and then the other along the two channels inside the hub. If you do not have access to a brass punch, be extremely careful of the angle you hold the punch to keep from damaging the inner surface of the hub. Once both bearing races are removed, clean the inner surfaces of the hub thoroughly. Install the new bearing races into the hub as follows: Place the new bearing races in a freezer for a minimum of an hour, preferably overnight. Heat the hub assemblies in an oven at 250°F for at least 30 minutes. The longer you leave the hubs in the oven the easier the races will go into the hub. Using a pair of gloves, remove the hub(s) from the oven and place on a flat working surface which can not be damaged by the hub. Remove the races from the freezer and insert them into the hub. The bearing should drop right into the hub with little or no effort. Pack the new bearings with a good quality moly bearing grease. A bearing packer is the preferred method of packing the bearing but, they can be packed almost as well by placing the bearing in the palm of your hand and pushing grease into the bearing rollers using your fingers. Place the inner bearing into the back of the hub and install a new bearing seal. Place the hub assembly onto the spindle an insert the outer wheel bearing. Place the thrust washer and locking collar onto the spindle. Adjust the bearing as described in the "Checking and Adjustment" section of this procedure. When the bearing is properly adjusted, tighten the Allen head bolt on the locking collar, replace the bearing cap, replace the front wheel, and lower the vehicle. Clark's Garage © 1998
Tools Small Flat Tip Screwdriver or Probe (Early Cars) Hammer Chisel Medium Round Tip Punch preferably Brass 6 mm Allen Head Wrench or Long Allen Head Socket Floor Jack Jack Stands Raise the front of the vehicle on jack stands. Remove the front wheels. Remove the brake pads using BRAKE-02. Remove the two caliper retaining bolts that attach the caliper to the steering knuckle, slide the caliper off the rotor, and hang the caliper out of the way with shock cord or wire. Remove the wheel bearing grease cap by tapping around the back edge with of the cap with a hammer and chisel. On early models (pre-1985.5), the speedometer is driven by a cable off of the left front wheel. To remove the grease cap on that side, you'll first have to remove the E-clip from the end of the cable using a small flat tip screwdriver or probe. After the grease cap is removed, loosen the locking collar Allen head bolt using a 6 mm Allen head wrench or long Allen head socket. To get the wrench into the head you'll have to turn the hub until the detent in the lip of the hub lines up with the head of Allen bolt. Turn the locking collar counter-clockwise to remove it from the spindle. Then, pull the hub and rotor assembly as a unit straight off of the spindle. The thrust washer and outer wheel bearing will likely fall out of the hub when you slide it off the spindle so, be prepared to catch them. Pry the grease seal out of the back of the hub and remove the inner wheel bearing. Use the hammer and round punch to tap the bearing races out of the hub. Alternate tapping on one side of the bearing and then the other along the two channels inside the hub. If you do not have access to a brass punch, be extremely careful of the angle you hold the punch to keep from damaging the inner surface of the hub. Once both bearing races are removed, clean the inner surfaces of the hub thoroughly. Install the new bearing races into the hub as follows: Place the new bearing races in a freezer for a minimum of an hour, preferably overnight. Heat the hub assemblies in an oven at 250°F for at least 30 minutes. The longer you leave the hubs in the oven the easier the races will go into the hub. Using a pair of gloves, remove the hub(s) from the oven and place on a flat working surface which can not be damaged by the hub. Remove the races from the freezer and insert them into the hub. The bearing should drop right into the hub with little or no effort. Pack the new bearings with a good quality moly bearing grease. A bearing packer is the preferred method of packing the bearing but, they can be packed almost as well by placing the bearing in the palm of your hand and pushing grease into the bearing rollers using your fingers. Place the inner bearing into the back of the hub and install a new bearing seal. Place the hub assembly onto the spindle an insert the outer wheel bearing. Place the thrust washer and locking collar onto the spindle. Adjust the bearing as described in the "Checking and Adjustment" section of this procedure. When the bearing is properly adjusted, tighten the Allen head bolt on the locking collar, replace the bearing cap, replace the front wheel, and lower the vehicle. Clark's Garage © 1998
Wheel bearings frontreplacement
GE Profile 5-cu ft High-Efficiency Impeller Washer and Dryer Set at Lowe's. Built on the belief that modern life needs modern solutions, GE Profile ...
Mar 26, 2013 — ... Precision hub assemblies. Id like to buy from him b/c of the discount. Im not even positive that my wheel bearings are bad. I have a little ...
Wheel bearings frontfailure symptoms
Bearing Replacement Tools Small Flat Tip Screwdriver or Probe (Early Cars) Hammer Chisel Medium Round Tip Punch preferably Brass 6 mm Allen Head Wrench or Long Allen Head Socket Floor Jack Jack Stands Raise the front of the vehicle on jack stands. Remove the front wheels. Remove the brake pads using BRAKE-02. Remove the two caliper retaining bolts that attach the caliper to the steering knuckle, slide the caliper off the rotor, and hang the caliper out of the way with shock cord or wire. Remove the wheel bearing grease cap by tapping around the back edge with of the cap with a hammer and chisel. On early models (pre-1985.5), the speedometer is driven by a cable off of the left front wheel. To remove the grease cap on that side, you'll first have to remove the E-clip from the end of the cable using a small flat tip screwdriver or probe. After the grease cap is removed, loosen the locking collar Allen head bolt using a 6 mm Allen head wrench or long Allen head socket. To get the wrench into the head you'll have to turn the hub until the detent in the lip of the hub lines up with the head of Allen bolt. Turn the locking collar counter-clockwise to remove it from the spindle. Then, pull the hub and rotor assembly as a unit straight off of the spindle. The thrust washer and outer wheel bearing will likely fall out of the hub when you slide it off the spindle so, be prepared to catch them. Pry the grease seal out of the back of the hub and remove the inner wheel bearing. Use the hammer and round punch to tap the bearing races out of the hub. Alternate tapping on one side of the bearing and then the other along the two channels inside the hub. If you do not have access to a brass punch, be extremely careful of the angle you hold the punch to keep from damaging the inner surface of the hub. Once both bearing races are removed, clean the inner surfaces of the hub thoroughly. Install the new bearing races into the hub as follows: Place the new bearing races in a freezer for a minimum of an hour, preferably overnight. Heat the hub assemblies in an oven at 250°F for at least 30 minutes. The longer you leave the hubs in the oven the easier the races will go into the hub. Using a pair of gloves, remove the hub(s) from the oven and place on a flat working surface which can not be damaged by the hub. Remove the races from the freezer and insert them into the hub. The bearing should drop right into the hub with little or no effort. Pack the new bearings with a good quality moly bearing grease. A bearing packer is the preferred method of packing the bearing but, they can be packed almost as well by placing the bearing in the palm of your hand and pushing grease into the bearing rollers using your fingers. Place the inner bearing into the back of the hub and install a new bearing seal. Place the hub assembly onto the spindle an insert the outer wheel bearing. Place the thrust washer and locking collar onto the spindle. Adjust the bearing as described in the "Checking and Adjustment" section of this procedure. When the bearing is properly adjusted, tighten the Allen head bolt on the locking collar, replace the bearing cap, replace the front wheel, and lower the vehicle. Clark's Garage © 1998
Job Description What is a career like as an Integrated Logistics-Configuration Analyst? If you enjoy performing important and rewarding work in team oriented & supportive learning culture, while coordinating with engineers, technicians, contractors, and government customer following the Navy modernization processes, then this is the role for you! BAE Systems Air traffic Control Team is seeking an experienced Integrated Logistics-Configuration Analyst to provide lifecycle support for Air Traffic Control and Landing Systems. Experience with electronics or electrical systems, preparing and modifying engineering documents and drawings, using, reviewing, writing, and updating technical documentation, procedures, schematics, technical manuals, drawings, and wire lists are some of the areas this role will touch! The ideal candidate shall be able to perform the following Integrated Logistics Support (ILS) tasks:
Wheel bearings frontnoise
2012 Ram 3500. $0. Marshall,Texas · Weber Spirit Grill with Cover. $200 ... Honda 2" High Pressure Pump. $600. Oakwood/Butler · Male Lionhead Rabbits/Bunny.
Acrobat Printable Version Checking and Adjustment Tools Small Flat Tip Screwdriver or Probe (Early Cars) Medium Flat Tip Screwdriver Hammer Chisel 6 mm Allen Head Wrench or Long Allen Head Socket Floor Jack Jack Stands Raise the front of the vehicle on jack stands. Spin the front wheel and listen for noise. Also, make sure the wheel rolls freely without excessive resistance. To check the wheel bearing adjustment, first remove the front wheel. Remove the wheel bearing grease cap by tapping around the back edge with of the cap with a hammer and chisel. On early models (pre-1985.5), the speedometer is driven by a cable off of the left front wheel. To remove the grease cap on that side, you'll first have to remove the E-clip from the end of the cable using a small flat tip screwdriver or probe. After the grease cap is removed, use the medium flat tip screwdriver to turn the bearing thrust washer (just behind the locking collar). When you try to turn the washer ensure that the screwdriver is not resting on the locking collar or on the hub. If the washer spins freely or if you are unable to turn the washer using the screwdriver, the wheel bearing needs to be adjusted. If adjustment is required, loosen the locking collar Allen head bolt using a 6 mm Allen head wrench or long Allen head socket. To get the wrench into the head you'll have to turn the hub until the detent in the lip of the hub lines up with the head of Allen bolt. Once the Allen head bolt is loosened, turn the locking collar as necessary to achieve proper adjustment on the bearing (as described in the previous steps). If the washer turns too freely, turn the locking collar in the clockwise direction to tighten the bearing. If the washer is too tight, turn the collar in the counter-clockwise direction to loosen the bearing. When the bearing is properly adjusted, tighten the Allen head bolt on the locking collar, replace the bearing cap, replace the front wheel, and lower the vehicle. Bearing Replacement Tools Small Flat Tip Screwdriver or Probe (Early Cars) Hammer Chisel Medium Round Tip Punch preferably Brass 6 mm Allen Head Wrench or Long Allen Head Socket Floor Jack Jack Stands Raise the front of the vehicle on jack stands. Remove the front wheels. Remove the brake pads using BRAKE-02. Remove the two caliper retaining bolts that attach the caliper to the steering knuckle, slide the caliper off the rotor, and hang the caliper out of the way with shock cord or wire. Remove the wheel bearing grease cap by tapping around the back edge with of the cap with a hammer and chisel. On early models (pre-1985.5), the speedometer is driven by a cable off of the left front wheel. To remove the grease cap on that side, you'll first have to remove the E-clip from the end of the cable using a small flat tip screwdriver or probe. After the grease cap is removed, loosen the locking collar Allen head bolt using a 6 mm Allen head wrench or long Allen head socket. To get the wrench into the head you'll have to turn the hub until the detent in the lip of the hub lines up with the head of Allen bolt. Turn the locking collar counter-clockwise to remove it from the spindle. Then, pull the hub and rotor assembly as a unit straight off of the spindle. The thrust washer and outer wheel bearing will likely fall out of the hub when you slide it off the spindle so, be prepared to catch them. Pry the grease seal out of the back of the hub and remove the inner wheel bearing. Use the hammer and round punch to tap the bearing races out of the hub. Alternate tapping on one side of the bearing and then the other along the two channels inside the hub. If you do not have access to a brass punch, be extremely careful of the angle you hold the punch to keep from damaging the inner surface of the hub. Once both bearing races are removed, clean the inner surfaces of the hub thoroughly. Install the new bearing races into the hub as follows: Place the new bearing races in a freezer for a minimum of an hour, preferably overnight. Heat the hub assemblies in an oven at 250°F for at least 30 minutes. The longer you leave the hubs in the oven the easier the races will go into the hub. Using a pair of gloves, remove the hub(s) from the oven and place on a flat working surface which can not be damaged by the hub. Remove the races from the freezer and insert them into the hub. The bearing should drop right into the hub with little or no effort. Pack the new bearings with a good quality moly bearing grease. A bearing packer is the preferred method of packing the bearing but, they can be packed almost as well by placing the bearing in the palm of your hand and pushing grease into the bearing rollers using your fingers. Place the inner bearing into the back of the hub and install a new bearing seal. Place the hub assembly onto the spindle an insert the outer wheel bearing. Place the thrust washer and locking collar onto the spindle. Adjust the bearing as described in the "Checking and Adjustment" section of this procedure. When the bearing is properly adjusted, tighten the Allen head bolt on the locking collar, replace the bearing cap, replace the front wheel, and lower the vehicle. Clark's Garage © 1998
Wheelbearing replacement cost
Accurate and precise to within +/-2%, this system not only protects your compressor but also your bottom line, by eliminating oil waste and reducing maintenance ...
2018531 — Find the equivalent fraction of 64/80 having denominator 20 - 3926792.
Improving the future and protecting lives is an ambitious mission, but it’s what we do at BAE Systems. A career here means using your passion and ingenuity to defend national security with breakthrough technology and intelligence solutions. It’s rewarding work that truly makes a difference. And as you tackle critical projects, you’ll work alongside a supportive team – driven by a shared ambition to protect what really matters. At BAE Systems, you’ll find an extraordinary career where you can realize your true potential.
Order this MITYVAC Brake Bleeder Kit - Mityvac MV6840 Pressure Bleed System today. This MITYVAC Brake Bleeder Kit - Mityvac MV6840 Pressure Bleed System ...
WheelBearing Hub AssemblyFront
Define Fourth point of contact. Fourth point of contact synonyms, Fourth point of contact pronunciation, Fourth point of contact translation, ...
Dec 13, 2024 — Water-Quality-Standards Quick links · Surface Water Quality Standards Classes, Uses, Criteria · Water Quality Standards Meeting Calendar ...
Tools Small Flat Tip Screwdriver or Probe (Early Cars) Medium Flat Tip Screwdriver Hammer Chisel 6 mm Allen Head Wrench or Long Allen Head Socket Floor Jack Jack Stands Raise the front of the vehicle on jack stands. Spin the front wheel and listen for noise. Also, make sure the wheel rolls freely without excessive resistance. To check the wheel bearing adjustment, first remove the front wheel. Remove the wheel bearing grease cap by tapping around the back edge with of the cap with a hammer and chisel. On early models (pre-1985.5), the speedometer is driven by a cable off of the left front wheel. To remove the grease cap on that side, you'll first have to remove the E-clip from the end of the cable using a small flat tip screwdriver or probe. After the grease cap is removed, use the medium flat tip screwdriver to turn the bearing thrust washer (just behind the locking collar). When you try to turn the washer ensure that the screwdriver is not resting on the locking collar or on the hub. If the washer spins freely or if you are unable to turn the washer using the screwdriver, the wheel bearing needs to be adjusted. If adjustment is required, loosen the locking collar Allen head bolt using a 6 mm Allen head wrench or long Allen head socket. To get the wrench into the head you'll have to turn the hub until the detent in the lip of the hub lines up with the head of Allen bolt. Once the Allen head bolt is loosened, turn the locking collar as necessary to achieve proper adjustment on the bearing (as described in the previous steps). If the washer turns too freely, turn the locking collar in the clockwise direction to tighten the bearing. If the washer is too tight, turn the collar in the counter-clockwise direction to loosen the bearing. When the bearing is properly adjusted, tighten the Allen head bolt on the locking collar, replace the bearing cap, replace the front wheel, and lower the vehicle. Bearing Replacement Tools Small Flat Tip Screwdriver or Probe (Early Cars) Hammer Chisel Medium Round Tip Punch preferably Brass 6 mm Allen Head Wrench or Long Allen Head Socket Floor Jack Jack Stands Raise the front of the vehicle on jack stands. Remove the front wheels. Remove the brake pads using BRAKE-02. Remove the two caliper retaining bolts that attach the caliper to the steering knuckle, slide the caliper off the rotor, and hang the caliper out of the way with shock cord or wire. Remove the wheel bearing grease cap by tapping around the back edge with of the cap with a hammer and chisel. On early models (pre-1985.5), the speedometer is driven by a cable off of the left front wheel. To remove the grease cap on that side, you'll first have to remove the E-clip from the end of the cable using a small flat tip screwdriver or probe. After the grease cap is removed, loosen the locking collar Allen head bolt using a 6 mm Allen head wrench or long Allen head socket. To get the wrench into the head you'll have to turn the hub until the detent in the lip of the hub lines up with the head of Allen bolt. Turn the locking collar counter-clockwise to remove it from the spindle. Then, pull the hub and rotor assembly as a unit straight off of the spindle. The thrust washer and outer wheel bearing will likely fall out of the hub when you slide it off the spindle so, be prepared to catch them. Pry the grease seal out of the back of the hub and remove the inner wheel bearing. Use the hammer and round punch to tap the bearing races out of the hub. Alternate tapping on one side of the bearing and then the other along the two channels inside the hub. If you do not have access to a brass punch, be extremely careful of the angle you hold the punch to keep from damaging the inner surface of the hub. Once both bearing races are removed, clean the inner surfaces of the hub thoroughly. Install the new bearing races into the hub as follows: Place the new bearing races in a freezer for a minimum of an hour, preferably overnight. Heat the hub assemblies in an oven at 250°F for at least 30 minutes. The longer you leave the hubs in the oven the easier the races will go into the hub. Using a pair of gloves, remove the hub(s) from the oven and place on a flat working surface which can not be damaged by the hub. Remove the races from the freezer and insert them into the hub. The bearing should drop right into the hub with little or no effort. Pack the new bearings with a good quality moly bearing grease. A bearing packer is the preferred method of packing the bearing but, they can be packed almost as well by placing the bearing in the palm of your hand and pushing grease into the bearing rollers using your fingers. Place the inner bearing into the back of the hub and install a new bearing seal. Place the hub assembly onto the spindle an insert the outer wheel bearing. Place the thrust washer and locking collar onto the spindle. Adjust the bearing as described in the "Checking and Adjustment" section of this procedure. When the bearing is properly adjusted, tighten the Allen head bolt on the locking collar, replace the bearing cap, replace the front wheel, and lower the vehicle. Clark's Garage © 1998
TrailerTek stocks a huge selection of both premium quality and economy-sealed cartridge bearings in all standard sizes to suit your trailer.
Small Flat Tip Screwdriver or Probe (Early Cars) Hammer Chisel Medium Round Tip Punch preferably Brass 6 mm Allen Head Wrench or Long Allen Head Socket Floor Jack Jack Stands Raise the front of the vehicle on jack stands. Remove the front wheels. Remove the brake pads using BRAKE-02. Remove the two caliper retaining bolts that attach the caliper to the steering knuckle, slide the caliper off the rotor, and hang the caliper out of the way with shock cord or wire. Remove the wheel bearing grease cap by tapping around the back edge with of the cap with a hammer and chisel. On early models (pre-1985.5), the speedometer is driven by a cable off of the left front wheel. To remove the grease cap on that side, you'll first have to remove the E-clip from the end of the cable using a small flat tip screwdriver or probe. After the grease cap is removed, loosen the locking collar Allen head bolt using a 6 mm Allen head wrench or long Allen head socket. To get the wrench into the head you'll have to turn the hub until the detent in the lip of the hub lines up with the head of Allen bolt. Turn the locking collar counter-clockwise to remove it from the spindle. Then, pull the hub and rotor assembly as a unit straight off of the spindle. The thrust washer and outer wheel bearing will likely fall out of the hub when you slide it off the spindle so, be prepared to catch them. Pry the grease seal out of the back of the hub and remove the inner wheel bearing. Use the hammer and round punch to tap the bearing races out of the hub. Alternate tapping on one side of the bearing and then the other along the two channels inside the hub. If you do not have access to a brass punch, be extremely careful of the angle you hold the punch to keep from damaging the inner surface of the hub. Once both bearing races are removed, clean the inner surfaces of the hub thoroughly. Install the new bearing races into the hub as follows: Place the new bearing races in a freezer for a minimum of an hour, preferably overnight. Heat the hub assemblies in an oven at 250°F for at least 30 minutes. The longer you leave the hubs in the oven the easier the races will go into the hub. Using a pair of gloves, remove the hub(s) from the oven and place on a flat working surface which can not be damaged by the hub. Remove the races from the freezer and insert them into the hub. The bearing should drop right into the hub with little or no effort. Pack the new bearings with a good quality moly bearing grease. A bearing packer is the preferred method of packing the bearing but, they can be packed almost as well by placing the bearing in the palm of your hand and pushing grease into the bearing rollers using your fingers. Place the inner bearing into the back of the hub and install a new bearing seal. Place the hub assembly onto the spindle an insert the outer wheel bearing. Place the thrust washer and locking collar onto the spindle. Adjust the bearing as described in the "Checking and Adjustment" section of this procedure. When the bearing is properly adjusted, tighten the Allen head bolt on the locking collar, replace the bearing cap, replace the front wheel, and lower the vehicle. Clark's Garage © 1998


 8613869596835