Wheel Bearing & Hub Stuck? Here's Why & How to Remove It - wheel bearing stuck in knuckle
For more information on the importance of a wheel bearing and how to know when it might be time to replace one or more of your vehicle's bearings, contact or visit your nearest GreatWater service center today.Â
We don't take shortcuts when it comes to our work, and we won't mislead you or sugarcoat anything either. As a result, we've turned one-time customers into life-long ones. Doing right by our customers is the best and only way we work - regardless of the type of vehicle issue you're experiencing. Contact us today to schedule an appointment to address any wheel-bearing, or any other repair or maintenance.
While you don’t absolutely have to do the wheel bearings on both sides at the same time (it’s not like rotors and pads), it’s generally considered good practice to do so.
With the inner bearing trapped in place by the seal, turn the hub over and coat the outer bearing race with grease. Clean any grease off the rotors.
Average life ofwheelbearings
Notes: Front, Wheel Bearing and Hub Assembly Repair Kit. Hub spindle kit. Includes: spindle, bearing, snap ring. Quantity per car: 2 ...
Begin disassembling the hub by fishing the outer wheel bearing out. Don’t throw it away just yet, in case you need to compare it to the new bearing.
Wheel bearings generally live a long time on street cars, but front-wheel bearings suffer increased stress due to the steering, so they may need to be replaced at some point on a vintage car.
Either wash your hands or use a pair of rubber gloves. I’d advise wearing a Tyvek suit, as you’re likely going to get grease on whatever you’re wearing. Take a good-sized glob of grease and put it in the palm of your hand. Then take the bearing and press it in the wad of grease in your palm, almost like you’re scooping ice cream with a spoon, and work the grease into every crevice around the rim of the bearing. Replenish the grease in your palm as necessary. Do this for both the front and back of the bearing.
How to tellwhichwheel bearing is badwhile driving
Get road trip ready with pre-trip car maintenance at GreatWater. From oil changes to brake inspections, our team ensures your vehicle is safe and roadworthy.
Badrearwheel bearingsymptoms
When the race is flush with the top of the hub, switch from a block of wood to using a socket whose diameter is just slightly smaller than the race. You’ll have to figure this out by trial and error, as the exact outer diameter varies socket to socket, but on the 2002, I used a 1-13/16-inch socket on the larger inner race and a 1-3/8-inch socket on the smaller outer race.
Rob Siegel has been writing the column The Hack Mechanic™ for BMW CCA Roundel magazine for 30 years. His most recent book, Just Needs a Recharge: The Hack Mechanic™ Guide to Vintage Air Conditioning, is available on Amazon (as are his previous books). You can also order personally inscribed copies here.
Learn the science behind engine oil and why regular oil changes matter. From conventional to synthetic, GreatWater can help you choose the right oil for your vehicle.
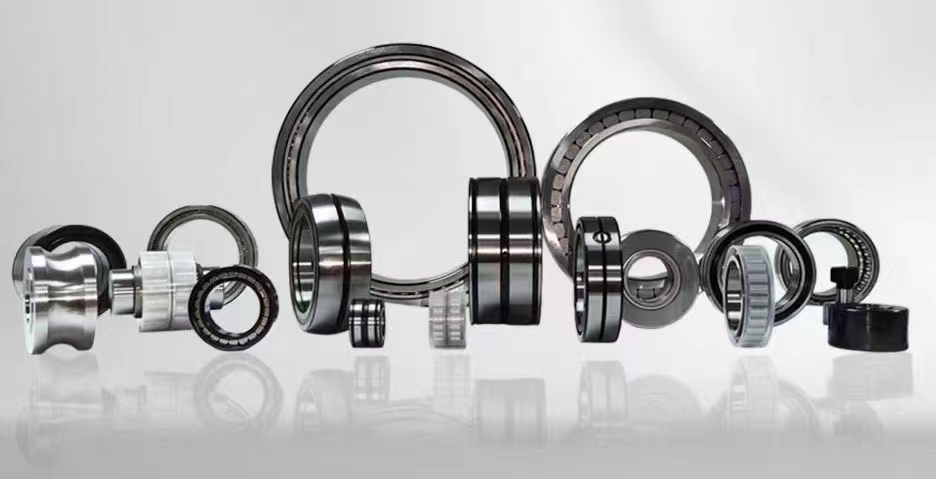
Wheel bearings may sound complex, but their function is fairly simple. At the very basic level, wheel bearings are metal rings that connect the wheel and the axle. Within the metal ring is a series of ball bearings or tapered bearings, which help the wheel rotate efficiently and effectively, aiding in acceleration, braking, cornering, steering, and more vital driving functions.
If you are replacing the rotors, now is a good time to take the old ones off. On my 2002, they were held by four 8-mm Allen-head bolts, whereas on the Lotus, they were attached using traditional bolts. In either case, this is one of those times where owning an impact wrench makes it so easy that it’s almost not fair. If you don’t have one, you may need to clamp the old rotor in a vise to hold it still. Draw the bolts and their lock washers out, then separate the rotor from the hub. If it’s been on there for 40 years, you may need to persuade it with a few smacks from a hammer.
While you may not be able to immediately visually identify a faulty wheel bearing based on its tough-to-access location between the wheel and the axle, you can listen and feel for signs of an issue.
How tocheckwheel bearing
Once you’ve packed the crevices, cram the outer circumference of the bearing into your palm, working the grease into the individual rollers. Be sure that it’s well packed. Remember: You’re likely giving this bearing the only lubrication it’ll receive for decades. When the bearing is well-packed, put it down on a new clean paper towel. Do this with both the inner and outer bearings.
The front hub layout on many vintage cars is such that there are inner and outer bearings, each running in a race that’s pressed into the hub. The inner bearing is protected by a pressed-in seal, the outer bearing by a dust cap. The hub assembly—hub plus rotor plus bearings—slides onto a spindle that protrudes at a right angle from the strut, and it’s held in place by a castellated nut, so named because it has notches in it like the crenellations in the parapet of a castle or the top of a rook chess piece. One of the notches is lined up with a hole that’s drilled through the end of the spindle. A cotter pin is used to secure the nut.
Finally, put the cotter pin through the notch and the hole, and bend it far enough that it won’t hit the bearing cap. Put some grease in the cap and tap it back into place.
32211. (a) Any person who is not a pupil of the public school, a parent or guardian of a pupil of the public school, or an officer or employee of the school ...
Most quality wheel bearings can last anywhere from 100,000 to 150,000 miles before replacement is necessary. However, once itâs time for your vehicleâs wheel bearings to be replaced itâs important to do so quickly to keep your vehicle running smoothly and safely.Â
On many vintage cars, replacing front wheel bearings is synergistic with replacing the front rotors. This is because the front rotors are often behind the front hubs, which means that to change the rotors you have to pull the hubs off the front spindles, at which point the bearings are practically in your hand. So, if you need to do a front brake job, check the wheel bearings.
Next, you need to find the gap in the castellated nut that best lines up with the hole in the end of the spindle. The Internet is full of stories of people who burned out wheel bearings in a hundred miles by over-tightening them. I was always trained to tighten the nut by hand, then back it off to line it up with the hole, but a friend pointed out to me that the 2002 factory manual calls for the nut to be tight enough that the spacer can be moved by prying it with a screwdriver. Check your manual for the correct procedure.
Frontwheel bearingnoise symptoms
Hex Socket Head Cap, Unified Coarse, UBCC ... For Unbrako bolts, detailed attention has been paid to each dimension, such as high tightening torque and wide base ...
That might be the best way to describe a wheel bearing - a key component to safe and efficient driving. A bad wheel bearing, however, can really impact your driving - and your safety. And it's a big part of why a faulty wheel bearing should be immediately serviced.
How to tellwhichwheel bearing is badin the front
When the race is fully seated, you should hear the sound change from a ringing to more of a thud as you’re tapping it in, but you should also check by turning the hub over and carefully examining where the back of the race is visible through the slots. Be certain that there is no space behind the race. Then do the same thing with the other bearing race. You should now have both the inner and outer races seated.
Take the castellated nut, the spacer, and the dust cap, clean them, and put them somewhere where you won’t kick them across the garage floor.
SKF Oil Levellers, LAHD 500 and LAHD 1000, are designed for automatic adjustment of the optimal oil lubrication level within a bearing housing, gear box, crank ...
If any of the signs and symptoms we mentioned above sound familiar, then it's important to have your wheel bearings inspected. While you could possibly do this yourself at home with the help of a carjack, it's probably best to just leave it to the pros by scheduling an appointment at any of our local service centers for a thorough assessment.
Slide the hub and rotor assembly onto the spindle, pressing it gently but firmly to get the inner bearing to seat on the spindle. Slide the outer bearing over the end of the spindle and into its race, then slide the spacer over the end of the spindle. Thread the castellated nut onto the end of the spindle. Be careful not to cross-thread it. Once the nut is on, spin it on as far as it will go by hand, then gently use a wrench on it, as both the inner and outer bearing rings sometimes need to seat on the spindle. It should be obvious when they’re seated. Do not apply any real torque on the nut. You’re not trying to tighten it.
Spray everything down with the cleaner of your choice and scour it thoroughly. Then, as you did with the spindle, inspect the surfaces that the races sat in; I’ve never seen one ruined, but it’s not uncommon to see some gouging from the races being banged in and out. If gouging in one area is pronounced, you can take off the high spots with some Scotch-Brite, but don’t go nuts and risk not having the race fit snugly.
Sealed bearings are a good alternative in applications like rolling mills, continuous casters or conveyors. They offer numerous advantages for more reliability ...
Buy your Ford F-150 wheel bearing & hub assemblies at 365HubsPro for the best price. ✓ No hassle 30-day returns ✓ Free shipping on US orders.
To remove the inner wheel bearing, you first need to pry the seal out of the back of the hub. You’re replacing it, so don’t worry about destroying it. A long screwdriver rocking on a fulcrum point like the handle of a hammer usually does the trick. With the seal out, withdraw the inner wheel bearing. Again, hold onto it for a bit in case you need to compare sizes.
When you visit any of our locally run service centers for wheel bearing replacement, you can rest assured that the job will be done right - thatâs why each GreatWater-affiliated shop offers an industry-leading 3 Year/36,000 Mile Nationwide Warranty. But you can count on more than just premium service when you bring your vehicle to any of our partner locations, expect a first-rate customer experience as well. Â
Next comes the fun part: Packing the bearings. There are few things more automotively primal, elemental, and intimate than packing bearings. Use whatever grease you’re comfortable with. Like with motor oil, many people swear by certain greases. I haven’t found that it matters. Traditional brown 100-percent petroleum-based grease, black semi-synthetic, or red 100-percent synthetic are all fine, as long as the package lists “automotive bearings” among the applications.
I recently needed to do brake and bearing work on both my Lotus Europa and on one of my BMW 2002s. The two repairs were nearly identical. I’ll show it for the BMW simply because the photographs came out better, and I’ll point out the handful of minor differences.
Wheel bearingreplacement cost
Open the package with your nice new bearing. It should contain the bearing and the race. It doesn’t matter whether you select the inner or outer bearing first. Withdraw the race and set the bearing down on a clean paper towel or plastic sheet.
Sign up for the latest automotive news and videos—in short, everything for people who love cars
Fisher Controls Product Bulletin. Brought to you courtesy of RMC Process Controls & Filtration, Inc. & www.RegulatorParts.com. Extensive inventory ...
Because of their long lifespan, failure is usually caused by the typical everyday wear and tear from driving your vehicle over time.
Give the inside of the hub and the bearing races a quick cleaning with a paper towel so you can see what’s what. You should be able to see the smaller outer bearing race pressed into the front of the hub, and the larger inner race pressed into the back. If you look inside the hub from both sides, you should see two notches behind each race that allow you to bang them out. Using a hammer and the drift of your choice (e.g., an old screwdriver, a beat-up quarter-inch ratchet extension, or even an actual drift punch), and working on one race at a time, knock it out by banging alternately on the two notches. Then move on to the other race. It doesn’t matter which one you do first.
Benefits · XLPE-insulated, PVC-sheathed, low voltage power cable, with 600/1000V nominal voltage. · Extra mechanical protection due to steel armour. · Flame ...
Next, pull the hub and rotor assembly forward and off the spindle, but be aware that the outer wheel bearing may slide out, so be prepared to catch it. Lay everything on a clean piece of cardboard or a paper towel.
However, it is worth noting that the conditions you drive in can impact how quickly your bearings will need to be replaced. For instance, if you regularly drive in muddy or wet conditions, water and other contaminants could wear away at bearings faster than normal.
Next, take a paper towel and clean the spindle. Inspect the two flat surfaces. The bearings themselves do not actually run on these surfaces. Instead, they serve as the seating surfaces for the rings in the center of the bearing assemblies. However, if these surfaces are badly pockmarked or gouged, the inner bearing rings may not sit firmly on them, allowing the entire bearing to wobble. If that is the case, and if, after replacing the bearings and adjusting them, there is still substantial play in the wheel, the entire strut housing may need to be replaced. Fortunately, this is extremely rare, and usually comes only from catastrophic bearing failure—which is why, when you feel play that can’t be adjusted out, you replace the bearings.
You begin by removing the caliper. If you’re also replacing the pads, it’s easiest if you first bang the pins out of the caliper before you unbolt it from the strut. Note that the original brake pads and shoes on a vintage car may contain asbestos, so wearing a dust mask is a wise precaution when dealing with brake components. Remove the bolts holding the caliper to the strut. There may also be a bolt holding the brake line bracket to the strut. Set the caliper on the control arm or hang it from the spring with a zip tie.
Front, Driver and Passenger Side Wheel Bearings, Front Wheel... Part Number: SET-REPH288419-2.
The classic test is to jack up the front of the car, support it on stands, grab each wheel at 6 o’clock and 12 o’clock, and gently rock it. If you feel play, the wheel bearing needs to be adjusted. If you can’t adjust out the play, or if when you spin it you hear and feel noise, it’s time to replace the bearings.
How to tell if wheel bearing is badwhile driving
And that’s it. Unless you own the car for 30 more years and drive the bejesus out of it, you’ll probably never have to change the front wheel bearings again.
In this post, we'll help you understand the importance of wheel bearings, how to identify wheel bearing problems, and how any of our local GreatWater-affiliated shops can help maintain and replace these key components so you can hit the road with confidence again.
The next step is to slide the hub onto the spindle, but before that, there’s the question of whether the hub bore is supposed to be packed with grease. Consult a repair manual for the car. On the 2002, the grease packed into the bearings and dust cap were deemed enough, but on the Lotus, the manual said to pack the hub’s center bore approximately half full of grease.
Technical details for bearing 6000 2RS. Bearing type, size, inner and outer diameter, weight, OEM references, manufacturer/brand part number and ...
At this point, before I button things up, I like to test-fit the wheel, spin it, and check for play. If you do this, take care not to get any dirt into the open bearing (you can gently tap the bearing cap into place). The wheel should spin smoothly and quietly. Grab the wheel at 6 and 12 and push and pull it. There should be no play, or only a small hint of play.
Straighten out the cotter pin with needle-nosed pliers, remove it, and then unscrew the nut from the spindle. It shouldn’t be on tight, but if it is, a wrench can get it started. Withdraw the thick spacer that’s behind the nut.
Use a glob of grease to coat the inner bearing race, then set the inner bearing down inside it. Take the inner wheel-bearing seal and install it as you did the bearing races, tapping it into place and taking care not to cock it, but only get it flush with the inner surface of the hub. Don’t pound it in any farther than that. The BMW 2002 had the rubber grease seal shown, but the Lotus had an old-school felt seal where the felt was on the outside, greased, and meant to be in light contact with the base of the spindle. Care needed to be taken to test-fit the hub assembly to be certain the clearance of the felt seal was adequate.
When installing the bearings, order is important. You must drop the inner bearing in first, then install the bearing seal to trap it in place, then slide the entire hub assembly onto the spindle, then slide the outer bearing into place, and then trap it with the spacer and nut.
Take the new race and place it in the hub. Square it up, then gently tap it in with a rubber hammer, or a hammer and wood block, or hammer and a hockey puck, then stop and look at it carefully to determine whether it’s going in cocked, which it almost always is. If it is badly cocked, it can gouge the mating surface, so you want to correct it as quickly as possible. Gently tap on the high side until it is going in level, then continue tapping until it’s flush with the top of the hub.


 8613869596835